Hi! Welcome to my blog. I am a major foodie, with a haphazard cooking philosophy, currently making that transition from cooking and baking for friends and family to 'wonder if I could make this my career'. Follow me for recipes, the outcomes of a few experiments, and general lovely foodiness. Opinions, reviews and recommendations are all my own.
Showing posts with label Calender Cakes. Show all posts

Friday, 28 June 2013

Mini Swedish Princesstarta

This cake has been on my 'to-bake' list ever since Lucy at Supergolden Bakes and I ogled some snaps of it over on Pinterest. I decided it was going to be my bake for the April meeting of the Chesterfield Clandestine Cake Club, as the theme was Happy Birthday Your Majesty, but alas I couldn't make the event. It was then going to be my bake for the June meeting, when the theme was Cakes from Around the World, but once again life (or more specifically work) got in the way. 


This month, the Tea Time Treats challenge is Layer Cakes, whilst the Calender Cakes challenge is Pump Up The Jam, and as both of these challenges end today, and I was damned if I was going to miss another opportunity to bake this amazing cake, I grabbed a mixing bowl as soon as I got in last night, and didn't stop whisking until these beautiful mini Swedish Princesstartas were sat on the table in front of me. Now all I have to do is write up the recipe before the end of today... Let's hope I don't get distracted! 


A Swedish Princesstarta is traditionally made of layers of sponge, jam, pastry cream, and domed whipped cream and covered with a pale green marzipan. I have combined my go-to recipes for each of the above components, but I did scale everything down here to make two smaller cakes, as with the fresh cream elements it won't keep as long as a normal cake. If you wanted to make this as a celebration cake (for which it would be perfect) just double up all the quantities and use an 8 inch cake pan for a stunning centrepiece. 

Ingredients (makes 2 small cakes)

For the Sponge
  • 60 grams salted butter
  • 60 grams golden caster sugar
  • 1 egg
  • 60 grams self-raising flour
  • 1 tablespoon milk
For the Pastry Cream
  • 1 egg yolk
  • 25 grams vanilla sugar (or caster sugar and vanilla extract)
  • 2 teaspoons cornflour
  • 110 grams full fat milk
To Assemble
  • 2 tablespoons Strawberry Jam (I used Mackay's Strawberry Preserve)
  • 4-5 fresh strawberries
  • 300ml double cream, whipped
  • 300 grams marzipan
  • green and pink gel food colours
Method

First, make the sponge cake. Pre-heat the oven to 160 degrees, and line two 5'' cake tins. Cream together the butter and sugar until light and fluffy. Add the egg and beat well. Sift in the flour, and gently fold into the mixture until combined, then add the milk, and fold again to loosen the mixture. Divide the mixture between the two prepared tins, and bake for 15-20 minutes or until the sponge is firm to touch. Remove from the oven, and place on a cooling rack.

Whilst the cake is baking, make the pastry cream. Place the egg yolk, sugar and cornflour in a bowl, and whisk until smooth and silky. Heat the milk in a saucepan until just warm. Remove from the heat, and add to the egg mixture slowly, whisking continuously. Once all the milk has been added, return to the saucepan, and heat over a low heat, continuing to whisk the mixture until it thickens to a custard. Remove from the heat, transfer to a bowl, and set aside to cool to room temperature, then place in the fridge to cool completely. Stir occasionally to prevent a skin from forming. 

Once the cake and the pastry cream are completely cool, you can assemble the Princesstarta as follows;

Take a serrated knife, and slice each cake horizontally to create two layers. 

Spread a tablespoonful of strawberry jam on each of bottom layers.

Add a layer of chopped fresh strawberries.


Divide the pastry cream between the two cakes.


Place on the top layer of the sponge.


Use a pallet knife to use a little of the whipped cream to seal in the edges of the filling, then heap the rest on top of the two cakes.


Take the marzipan, and reserve a little (about 20g) to make the traditional rose decoration. Colour the remainder with the green food colouring. Divide the green marzipan into two equal portions, roll each out to around 5mm thick, and use to cover the Princesstarta, smoothing the tops to shape the cream underneath to a dome shape.


Trim the edges to remove an excess marzipan, and tuck the cut edges under the cake for a neat finish. 


Decorate with a pink marzipan rose (tutorial to follow) and a dusting of icing sugar. 


Store in the fridge, serve chilled, and consume within two days.


I am linking this recipe up with Tea Time Treats, hosted by Karen from Lavender and Lovage and Kate from What Kate Baked as the theme is Layer Cakes, of which this little beauty has plenty!!


I am also linking with Calender Cakes, hosted by Rachel of Dolly Bakes and Laura of Laura Loves Cakes, where the theme this month is Pump Up The Jam. 


Sunday, 10 March 2013

Hot Cross Buns

For the last three years now I have been perfecting Hot Cross Buns for Easter. It has taken me that long to get the recipe, ingredients, and technique right, and I have experienced a huge amount of disappointment, tears, and muscle burn from the constant kneading but I stand before you now, slightly dishevelled and covered in flour, with I believe the best recipe, and a few hints and tips that I hope will make your Hot Cross Bun journey a little less bumpy. And, I can promise, once you have tasted home-made, you will never buy shop-bought again... (apologies to Jonathan Warburton for the decline in sales next year...)

Hot Cross Buns
Having said all this, I have made a couple of substitutions today when making these up for this post, simply because of necessity. Normally I make these with orange zest, and a mixture of cranberries and sultanas, today, because of what I had in the house, they are made with lemon zest (as we had some leftovers from Gary making Lemon Chicken earlier in the week) and a mixture of sultanas and mixed peel, as that was what was in the cupboard. I guess really you can use whatever dried fruit you fancy, however I strongly recommend adding the cranberries if you get the chance. My sultanas were a little on the dry side, so I pepped them up before I started baking by soaking them in cold tea, and then draining them on a sheet of kitchen towel. 

Now, I do not profess to be an expert in anything bread related, in fact I am eagerly awaiting Paul Hollywood's new series (starting 18th March BBC2) to try once and for all to master the craft, however, my Grandpa was born and bread (sorry, bad pun) a baker, and I have picked up all my hints and tips from him along the way, and they have never failed to make baking easier for me...

Ingredients

  • 1 and a half teaspoons fast action yeast
  • 625 grams strong white bread flour
  • 1 teaspoon salt
  • 2 teaspoons mixed spice
  • 45 grams unsalted butter
  • 85 grams caster sugar
  • the zest of one orange (or lemon!)
  • 1 egg
  • 275 ml tepid milk
  • 125 grams dried fruit (recommend sultanas and cranberries, however use any dried fruit to suit tastes)
  • 2 tablespoons plain flour
  • vegetable oil
  • 1 tablespoon orange blossom honey (you could use any honey or golden syrup)

Method

1. Tip: Get a head start on the yeast. Put one and a half teaspoons of dried fast action yeast into a small dish, and add a teaspoon of warm water, and a teaspoon of the milk. Mix well to form a paste and set aside. This allows the yeast to start to ferment straight away, before you add it to the dough. 


2. Sift the flour into a large mixing bowl, and add the salt and mixed spice. Mix well. 


3. Chop the butter into small cubes, and add to the flour. Using you fingers, rub the butter into the flour to create a fine breadcrumb like texture. 


4. Add the orange zest (or lemon), the caster sugar, and the yeast. Try to add the yeast on top of the sugar. Mix them all well through the mixture. 


5. Make a well in the centre of the flour. Beat the egg lightly, and add to the well. Start mixing into the flour, and gradually add the tepid milk (I tend to blast my milk in the microwave for 5-10 seconds to bring it up to temperature). 


6. Mix the liquids into the flour mixture until a dough starts to form. At this point, it's time to get your hands dirty. Put down the wooden spoon, and bring the dough together with your hands, working in any dry bits of flour mixture that might be left. 


7. Empty the dough out of the bowl, and onto a lightly oiled work-surface. Most recipes dictate a floured work surface, however using oil instead prevents getting additional unnecessary flour worked into the dough, and yet still prevents the dough sticking to the surface. You only need the smallest amount of oil though. 


8. As you start to knead the dough, work in the mixed fruit a handful at a time. 


9. Knead the dough well. This will take around 15 minutes to achieve the required texture. I tend to knead in a V shape, alternating hands, and pushing the dough out with the palm of my hand, and then pulling it back in to the centre. You need (knead - oh gosh another bread pun) to find a method and a rhythm that suits you, as it does take time. I have tried to master Paul Hollywood's method of kneading, but it just doesn't work for me like the V pattern. 


10. The dough is ready when it takes on an elastic-y texture, is shiny, and when you pinch it it springs back to it's original shape. Tip: You can never over-knead bread - but you can under-knead. Make sure that your dough meets these three tests. If it doesn't, keep kneading until it does. (There is a point about 10 minutes in when you think it will never happen, but keep going, it all comes together quite quickly in the end). 


 11. Take a large, clean bowl, and oil it with a little vegetable oil. Place the ball of dough in the bowl, and then cover with clingfilm, also oiled on the underside. The oil prevents the dough from sticking to the clingfilm, and collapsing when it is removed. 


12. Put the bowl is a warm place for the dough to prove. If you are lucky, you may have an aga to place your bowl on. If you are luckier still you may have a super new oven with a proving drawer built in. I have neither of these things. I have tried little places all over the house for years to find the best places to prove my dough. Now I turn my oven on low, and put my dough in the (turned off) grill compartment above with the door open. Works a bloomin' treat I tell you! 


13. Leave the dough to prove for at least one hour, and until the dough has doubled in size. It should look a little like this... If the dough hasn't doubled, leave it to prove until it has, otherwise you will end up with hard, stodgy buns at the end. 


14. Tip the dough back out onto the work surface and knock it back. Start by pressing down on the dough with the back of your fists to press the air out, then re-knead the dough for 5 minutes as before. 


15. Shape the dough back into a ball, and place it back in the oiled bowl. Cover with the clingfilm again, and return to the 'warm place'. Leave to prove again for around 30 minutes, or until the dough has doubled in size again. 


16. Lightly oil two baking trays, and set to one side. Take the proven dough and turn it out onto the work surface. Take a knife, and cut the dough into 12 evenly sized pieces. Shape each piece into a ball, and place on the oiled tray, 6 pieces to each tray. Leave around 1 - 2 cm between each ball, they will grow a little more and join together. 


17. Loosely wrap each tray in greaseproof paper, then place in a plastic carrier bag and tie the bag tightly so no air can get to the dough. Return the trays to the warm place and leave again to rise for around 45 minutes. (There is a lot of waiting to prove in making Hot Cross Buns. Bear with them, they will be worth it I promise).


18. In a small pot, mix two tablespoons of flour with two tablespoons of water to make a smooth paste. The paste should be fluid, but thick enough to retain it's shape when piped. Transfer the paste to a piping bag. Turn your oven up to 200 degrees.


19. Take the trays out, and remove the bags and greaseproof paper. Using the flour paste, pipe crosses across each of the buns. 


20. Put the buns in the oven. Bake for around 10 minutes until they are a golden brown colour all over. They should make a dull hollow sound when tapped. 


21. Remove the Hot Cross Buns from the oven, and transfer from the tray to a cooling rack. Heat the honey immediately (a couple of seconds in the microwave will make it runny enough) and brush over the still hot buns with a pastry brush. Leave the buns to cool completely. 


And there you have it - 12 gorgeous, sticky, sweet and fruity Hot Cross Buns, to impress your nearest and dearest. Toast them, butter them, and sit down with a large mug of tea to bask in their glory. Just be warned, they will disappear so quickly that you will be back at Step 1 again before you know it! 

I am entering these Hot Cross Buns into this month's Calendar Cakes run by Rachel at Dolly Bakes, and Laura at Laura Loves Cakes - Laura is hosting this month, and you can find the full challenge here. The theme is Easter Extravaganza. 


Friday, 15 February 2013

Valentine's Day Black Forest Chocolate Cherry Cake

I am so excited to share this recipe and cake creation with you all, as I have had it mentally drawn up in the back of my mind for Valentine's Day for the last few weeks! It was actually baked for Valentine's Day, however I have had to wait until today to post it, as there is a hidden surprise inside and of course, it needed to be photographed! 

This is my Black Forest Chocolate Cherry Cake, with Cherry Brandy Ganache, Buttercream Roses and Dark Chocolate Hearts - an absolute feast for the eyes and the taste buds for Valentine's Day...

'Black Forest' Chocolate Cherry Cake ...
... and it hides it's own little secret - a bright pink Cherry heart!!

... with a hidden pink heart!
The flavours in this cake are inspired by the great classic Black Forest Gateaux, but with a few changes and twists in order to meet the design I had in mind. This cake is best made the day before needed as the ganache needs time to set before the remainder of the decorations are added. To recreate this gorgeous cake, you will need the following ingredients;

For the Pink Cherry Heart
  • 100g butter
  • 100g golden caster sugar
  • 2 free range eggs
  • 1 teaspoon either cherry brandy or cherry extract
  • 100g self raising flour
  • Pink or red food colouring (I used Sugarflair gel in Ruby)

For the Chocolate Sponge
  • 150g butter
  • 150g golden caster sugar
  • 3 free range eggs
  • 100g self raising flour
  • 20g good quality cocoa powder (I used Green & Blacks here)

For the Cherry Brandy Ganache
  • 200g good quality dark chocolate
  • 200g double cream
  • 1 teaspoon cherry brandy
For the Buttercream
  • 70g icing sugar
  • 50g butter, softened
To Decorate
  • Glacé cherries
  • 30g melted chocolate

Method

Start by making the pink cherry heart centre. Pre-heat the oven to 150 degrees. Line an 8 inch square cake tin with baking parchment leaving an overhang to make removing the sponge easier. In a large bowl, cream together the butter and sugar until light and fluffy. Lightly beat the eggs, and add to the mixture along with the cherry brandy. Beat together until combined. Sift in the self raising flour, and fold into the mixture. Finally add two to three drops of the food colouring, and mix well until you achieve a bright pink colour throughout the mixture.

Transfer the mixture to the lined tin, and take time to spread evenly into the corners of the tin. You want to avoid any uneven rise in the sponge. The mixture will spread thinly across the pan, we are aiming for a large flat surface of cake to cut shapes from. Place in the oven. The low temperature should allow the mixture to cook without colouring it too much on the crust. Bake for around 10 - 15 minutes until firm to touch, then remove from the oven. 


Whilst the sponge is still warm, use the baking parchment to lift it from the tin. Turn the sponge upside down on a chopping board, and peel away the baking parchment, revealing the soft underside of the cake. Use heart shaped cookie cutter to cut away 8 - 10 hearts from the sponge. Set aside on a cooling rack. (Make sure that the shape and size of the cookie cutter fits comfortably inside the loaf tin for the overall cake.)


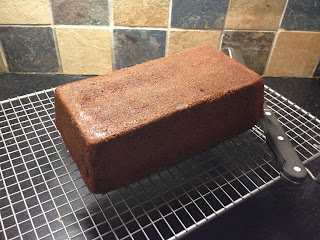
Next step is to make the chocolate outside of the cake. Line a loaf tine with baking parchment and grease well. Turn the oven temperature up to 180 degrees. Cream together the butter and sugar, then add in the beaten eggs. Sift in the flour and cocoa powder and combine well. 

Spoon a few spoonfuls of the mixture into the bottom of the lined loaf tin. Then take the pink hearts, and line then up upside down in the tin. Work from the middle outwards and gently press them together to prevent the chocolate mixture spreading between them when baking. 


Fill the tin with the remainder of the chocolate mixture, being careful not to knock the hearts out of position. Make sure that you cover the tops of the hearts completely. Flatten the mixture over the tin evenly, as the top of the tin will become the bottom of the cake when served. 


Bake in the oven for 25 minutes, or until a skewer inserted into the cake comes out clean. Remove the tin from the oven, and place on a cooking rack. 

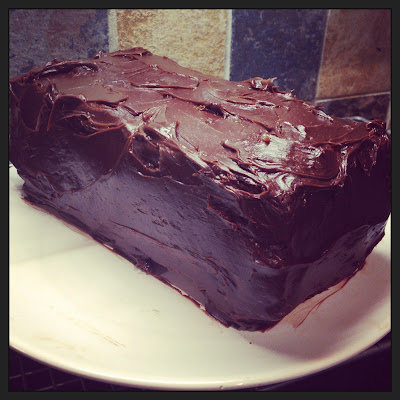
Meanwhile, make the chocolate ganache. Heat the double cream in a saucepan just until it starts to bubble. Turn down the heat, and add the chocolate pieces a little at a time, stirring throughout. The mixture should turn smooth and glossy. Add the cherry brandy and stir well. Set the mixture aside in a bowl until cool, and then place in the fridge to allow the mixture to firm up. It needs to be smooth enough to spread easily, but firm enough to hold shape and not run down the cake. 

Turn the cake out of the loaf tin, using the baking parchment to lift it out. Turn the cake upside down. You may need to use a knife to level off the top of the cake for it to sit flat, if so, be careful not to cut too deep as you don't want to cut any chunks out of the inner heart shape. 


Once the cake is cooled completely, and the ganache is the correct consistency, place the cake on a serving plate, and cover the cake completely with the ganache. Don't worry too much about getting a perfectly smooth finish, I deliberately wanted a more homely 'rough around the edges' look, just make sure that all of the surface of the cake is covered. Return the covered cake to the fridge to allow the ganache to set. 


Finally, it is time to decorate the cake. 

Start by melting the dark chocolate, either in the microwave carefully, or by tempering it over a bowl of hot water. Transfer it to a piping bag fitted with a number 2 nozzle. On a sheet of greaseproof paper draw a range of hearts to decorate the top of the cake. Again, I made these quite messy and rough. Set aside to cool and set. 


In a small bowl, mix together the ingredients to make the buttercream. Transfer the buttercream to a piping bag with a star nozzle fitted. Roughly pipe a row of roses along the top of the cake by placing the nozzle onto the cake and then spiraling outwards. Allow the roses to overlap each other. 


Finally, arrange the set chocolate hearts along the top of the cake, pressing them into the buttercream to stand upright. Alternate the hearts with glacé cherries. 


Now all that is left is to serve your cake, and enjoy the look of surprise on the face of your beloved when the inner pink heart is revealed! 


I am entering this cake into Calender Cakes, run by Laura at Laura Loves Cakes and Rachel at Dolly Bakes, where the theme is 'My Achey Cakey Heart', and Classic French hosted by Jen at Blue Kitchen Bakes, where the theme this month is Ganache.