Hi! Welcome to my blog. I am a major foodie, with a haphazard cooking philosophy, currently making that transition from cooking and baking for friends and family to 'wonder if I could make this my career'. Follow me for recipes, the outcomes of a few experiments, and general lovely foodiness. Opinions, reviews and recommendations are all my own.
Showing posts with label Great British Bake Off. Show all posts

Wednesday, 28 August 2013

Paul Hollywood's English Muffins - GBBO Technical Challenge Two

I was quite intrigued to see that this week's technical challenge on The Great British Bake Off was English Muffins. I've been making these myself for the last few months, and have found them pretty straight forward to make, so I was curious to see Paul's recipe and how it differed to the one I've become attached to. 

Muffins are made from an enriched dough, and the Paul Hollywood recipe uses butter and milk to do this, a variation from the natural yoghurt version I have been making. You can find Paul's recipe on the BBC Food website here

Paul Hollywood English Muffins - Butter and Milk Enriched Dough

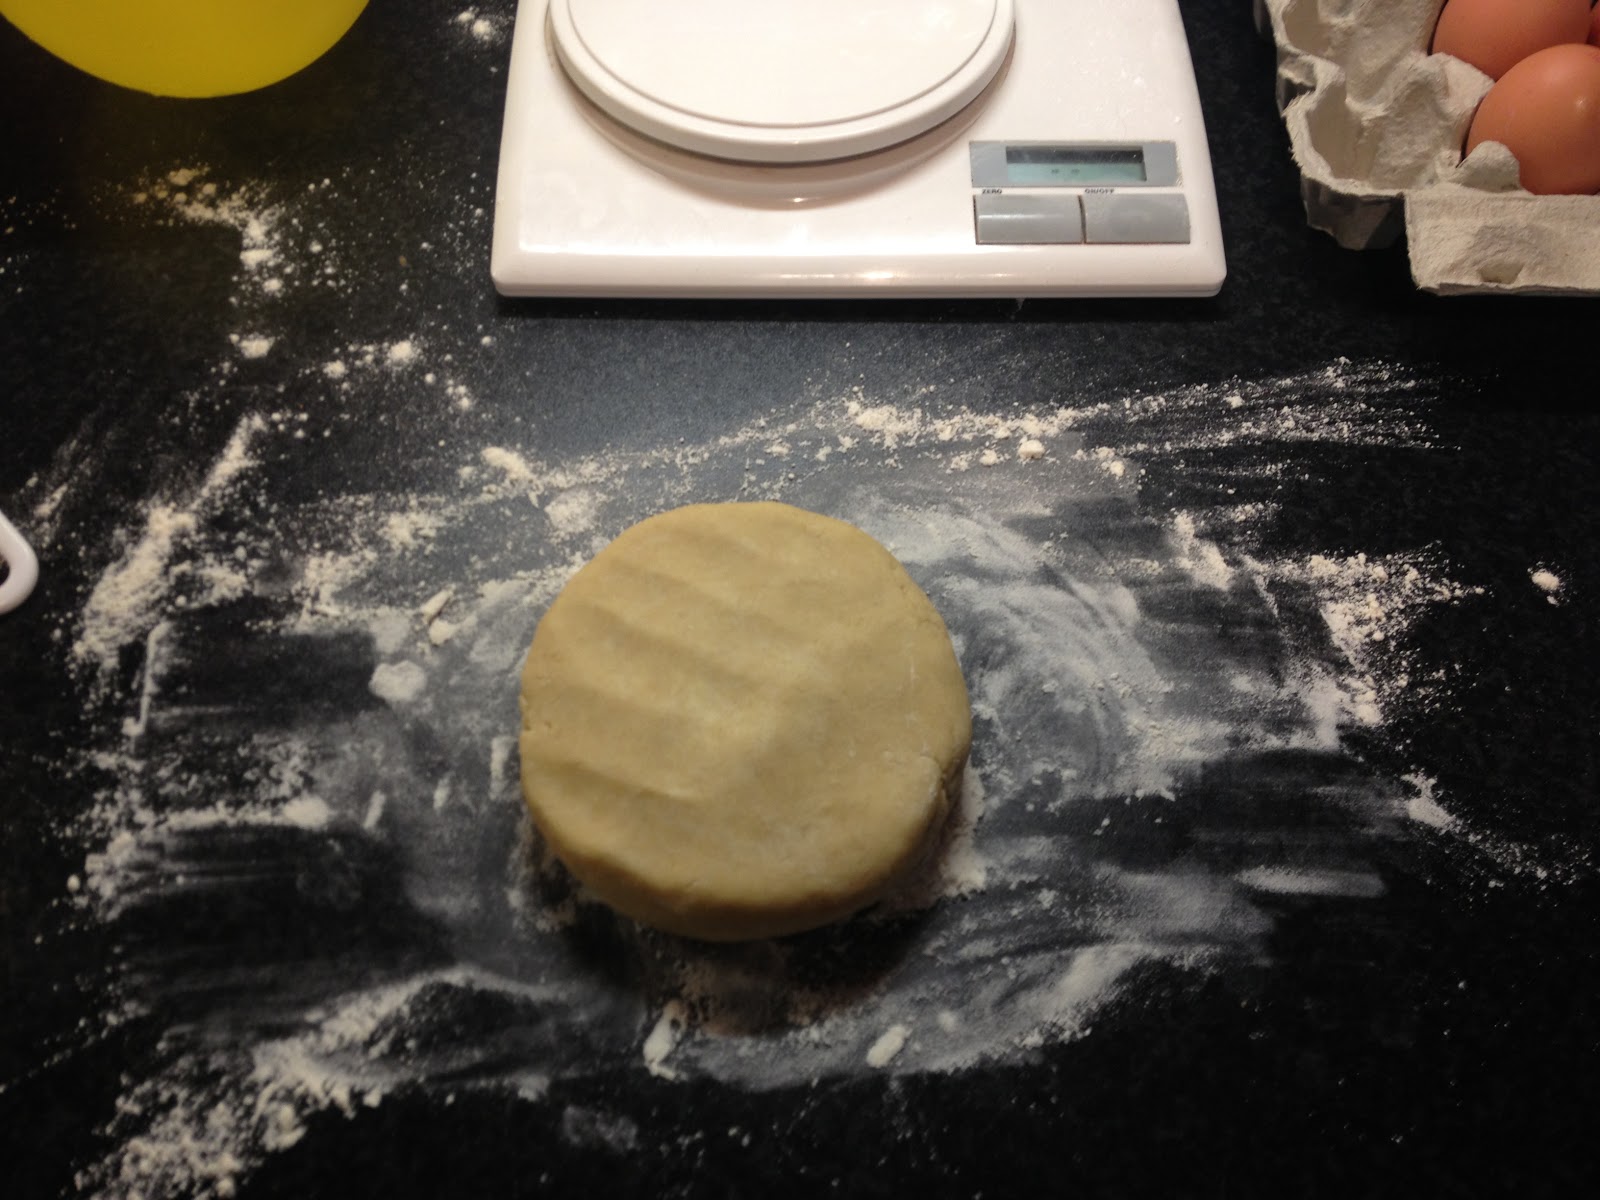
I found Paul's recipe easier in the execution, all the ingredients in one bowl and mix, then knead, however it makes for a very wet dough that is difficult to knead. In the end, I had to attack mine with dough hooks attached to my hand whisk. The dough proved well enough, but after cutting the circles out the muffins proved sideways rather than upwards, leaving some very large but slightly flat muffins.

Paul Hollywood English Muffin - Butter and Milk Enriched Dough

Overall both Gary and I agreed that we preferred the taste of the original recipe we were used to, although these were still of course much nicer than shop bought. I really think that the natural yoghurt gives an extra depth of flavour to the muffins, and that will always be my preferred recipe, though I may use Paul's as a back up if I don't have any yoghurt to hand.

English Muffins - Natural Yoghurt Enhanced Dough

I am re-posting my muffin recipe from a few months ago here, as it is my preferred way of making them.

Ingredients 

7 grams fast action yeast
125 ml tepid water
75 grams natural yoghurt
225 grams strong white bread flour
1/2 teaspoon salt
handful of semolina

Method
  • In a medium sized bowl, dissolve the yeast in about half of the water. Add the remaining water and the natural yoghurt, and mix well until smooth and combined. 
  • Sift the flour into a large mixing bowl, add the salt and quickly stir. 
  • Pour the liquid mixture into the flour, and mix together to make a dough.
  • Turn out onto a lightly floured surface, and knead well for 5 - 10 minutes until a smooth pliable dough is formed. Return the dough to the bowl, cover and leave to prove for 1 hour, or until doubled in size. 
  • Turn the dough back out on the surface, and knead quickly to knock back. Roll the dough out to about 2 cm thick, and cut out rounds about 3 inches wide. Knead the offcuts back together, re-roll and continue to cut out rounds until all the dough has been used. 
  • Place the rounds on a lightly floured baking tray, sprinkle the semolina over the tops, cover, and leave again to rise for about 40 minutes.
  • Heat a little oil in a large frying pan. Place the muffins in the pan, and cook for about 7 minutes on both sides. Keep the heat down low so as not to burn the outside of the muffins before the inside cooks. 
  • Set aside to cool. These muffins can be kept for a couple of days in an airtight container, just halve and toast and they are ready to eat. 

Sunday, 25 August 2013

Mary Berry's Angel Food Cake - GBBO Technical Challenge One

Forget the start of the new football season. Forget that The X Factor returns to screens next weekend. Forget the release date of that big summer blockbuster. Because, in our community, there is only one date that matters - the launch of this years series of The Great British Bake Off.

On Tuesday of this week the show kicked off in spectacular style, as we all expected it to. This year, I will be blogging my thoughts along with the show for By Book Or By Cook, the marketing department for Orion Books cookery department. You can read my review of the first episode here. Check back every week to for the latest episode review. 

Meanwhile over on this site, each week I will be tackling the technical challenge from the show. This is the section of the show where the contestants are given a bake that they haven't prepared for, with a half completed recipe to test their technical knowledge in piecing it together. 

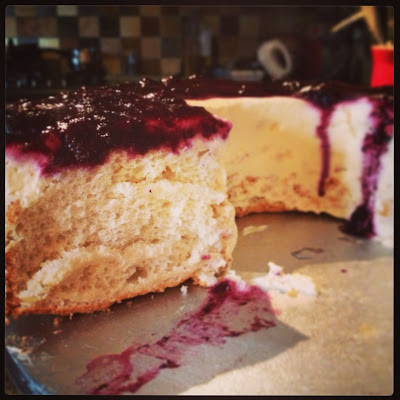
Vanilla and Blueberry Angel Food Cake

This week, the technical challenge is Angel Food Cake. This is a type of cake made from just egg whites, sugar and flour, to form a fat free, light, fluffy cake that almost melts in the mouth. The version that Mary Berry challenged the bakers with was flavoured with lemon zest, and drizzled in a lemon curd with passion-fruit seeds. I think the inspiration for the lemon curd topping comes from the fact that the cake recipe calls for 10 egg whites, that's a lot of egg, and a lot of leftover yolk. You can find Mary Berry's exact recipe from the show is here on the BBC Food website

I already had a couple of jars of lemon curd, and didn't really fancy making more, but I really didn't fancy wasting the 10 egg yolks. The solution that I found came in the shape of this amazing product - Two Chick Liquid Egg Whites. I found mine in the ready-rolled pastry section of my local supermarket, next to the butters, and it comes in a 500ml carton, which is the equivalent of 15 medium egg whites. Perfect!

Two Chicks Liquid Egg White

Thanks to the show, and the mishaps that befell some of the contestants, I had a good idea of the pitfalls in making this cake, and combined with the fact that I had Mary's full recipe to hand, I felt pretty confident. The only area for concern was that I don't own a specialist Angel Food Cake tin, with the little feet. The tin is really important for the cake, for two reasons. One, because the egg white is the only raising agent in the cake, the tin cannot be greased, and shouldn't be non-stick, to allow the cake to stick to the sides of the tin in order to rise. And secondly, the cake has to be cooled upside down in the tin, to prevent it sinking back into itself! The closest I had was this 12" springform tin, with a bundt style insert. It'd have to do!


As I decided against the lemon curd version of the recipe, I had a look at what was in the house, and settled on a punnet of blueberries that was in the freezer. So here is my Vanilla and Blueberry Angel Food Cake, adapted from Mary Berry's recipe from the Great British Bake Off. 

Vanilla and Blueberry Angel Food Cake

Ingredients

333 ml liquid egg white, or 10 medium egg whites
300 grams white caster sugar
125 grams plain flour
1/2 teaspoon salt
1 teaspoon cream of tartar
2 teaspoons vanilla extract

300 ml double cream
2 tbsp icing sugar

200 grams blueberries
1 tbsp vanilla sugar
1 tbsp water

Method

Pre-heat the oven to 180 degrees. Sift the plain flour into a mixing bowl, and add 200 grams of the caster sugar and set aside. Put the egg whites in a large mixing bowl, and whisk with a hand whisk for around 30 seconds, or until frothy...


Add the salt, cream of tartar and the vanilla extract, and whisk again to soft peaks. You can tell the whites are at soft peak when you remove the whisk, and the whites form a little peak that doesn't quite hold its shape...


Next, add the remaining 100 grams of caster sugar a spoonful at a time, and stir into the whites by hand. Once all of the sugar has been added in, use the whisk to whip the eggs up to a firm peak, but not stiff. The mixture will turn glossy...


Sprinkle around a third of the flour and sugar mix over the top of the whipped whites, and fold in gently, making sure not to knock any of the air out of the eggs. Add the remaining flour mix, and fold through again until combined...


Transfer the mixture to the tin. Gently shake the tin to make sure that the mixture is evenly distributed and there are no air pockets. Put the tin in the oven, and bake for around 40 minutes...


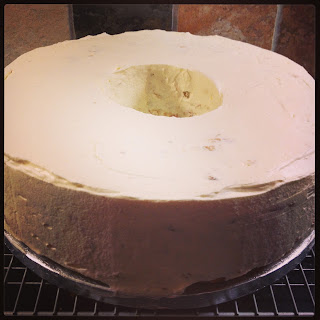
Check the cake after around 30 minutes, it is ready when a skewer inserted into the centre comes out clean. Once the cake is cooked, remove from the oven, and then it needs to be cooled upside down to prevent it from sinking. Although my tin wasn't the right Angel Food Cake tin, the insert that converts it to a bundt tin is taller on the inside than the edges of the cake, so when I turned it upside down, the cake was suspended above the cooling rack...

Angel Food Cake cooling suspended upside down

Whilst the cake is cooling, prepare the blueberry compote. Place the blueberries, vanilla sugar and water in a pan, and cook over a gentle heat until the blueberries have broken down, and the mixture coats the back of a spoon. Transfer to a dish and set aside to cool. 

Once the cake has cooled, slide a knife around the inner and outer edges to release the sides. Use a pallet knife to release the top of the cake from the base. This was the only problem I encountered with my tin, as the scalloped design was a little tricky to release without the tin being greased, therefore some of the top of the cake cake away, but not in any great catastrophe...


Whisk the double cream and icing sugar together until thickened to soft peaks, the coat the top and sides of the cake, smoothing over with a pallet knife...


Spoon the cooled blueberry compote over the top of the cake, and refrigerate until set...


This cake is so light and fluffy, Paul described it as tasting like marshmallow on Tuesday's show and he was absolutely right! I've never eaten an Angel Food Cake before, and this is like no cake I've ever tasted, but my goodness is it good! Because it's so light, you can have a good hearty slice and it doesn't sit heavy at all. The vanilla and blueberry combination is always good, and the tartness of the blueberry compote here is the perfect balance to the sweet cream and fluffy vanilla cake. I will definitely be experimenting with Angel Food Cake more in the future!


Monday, 25 March 2013

Classic White Bloomer, and 'Bread' Episode One

Last week I blogged a review of the new cookbook 'Bread' by Paul Hollywood. I tried to get across the fact that I have in the past had very much mixed results when bread-making, and was relying on Mr Hollywood to teach me his ways, and equip me with knowledge to make the perfect loaf every time. 

On Monday, the first episode of 'Bread' aired on BBC2, and if you haven't had the chance to watch it yet, let me tell you it doesn't disappoint! If you read my book review, I explained how I found the book a little daunting at first glance, but thoroughly wonderful when I actually sat down and read it properly. The TV series however, is totally accessible and absorbing from the first moment. Paul's easy manner when demonstrating his recipes is captivating and yet brilliantly down to earth, and his passion for a good bake radiates from the screen. We have seen glimpses of Paul's teaching style during the Great British Bake Off Master-classes, however 'Bread' is 30 minutes of uninterrupted Hollywood doing what he does best. 

Coming back to my mission however to learn to bake bread, as I had a busy work week coming up, I got a head start on myself, and actually made my first attempt at the Classic Bloomer on Sunday, when I knew I had time for the proving etc. I used the book and followed the instructions to the letter, and overall was very pleased with the results. After watching the episode on Monday evening, there are a few things I would do differently, it just goes to show that you can get so much from something in writing, but watching it happen really positively enforces the method. 

My first attempt at Paul Hollywood's Classic Bloomer

As I used the exact recipe, I am not going to lift it, but you can find it here on the BBC Food website. I will however share a few baker's notes from my experiences.

  • When adding the yeast and the salt, you have to make sure that the two do not touch each other directly until you start to mix. I use a set of digital scales, and weigh as I am adding to the mixture. For some reason, when I added my salt, the scales did not register any additional weight, and I had to second guess the quantity. My bloomer was a little too salty to taste, and I am unsure as to whether this is because of the quantity of salt in the recipe, or a fault in my measuring. Next time, I will measure the salt out separately and then add it. 
  • In the book, and on the show, Paul says that you do not need to prove bread in a warm place, any normal kitchen at room temperature will be fine. I tried this, and after around 90 minutes there was hardly any rise in my dough. Taking matters into my own hands I relocated my dough to my go-to 'warm place' and it flourished very nicely after that. 
  • After the knock back, you shape the dough, and then put it on a tray, cover it and place it in a bag to rise. When I made my bloomer on Sunday, I found that it rose beautifully, however the weight of the greaseproof paper and then the bag caused the dough to expand more sideways than upwards. I ended up with an albeit tasty, very wide and low loaf, that was a bit misshapen at one end. When Paul made the bloomer in Monday night's episode, he place two upturned mugs on either side of the loaf before covering with the greaseproof, so that it didn't touch the top of the loaf. Genius. 
And there you have it! I was really pleased with my bloomer, and I'm confident that the next time I make it (which will be soon) I will get it just right! Now I'm really looking forward to tonight's episode, which will be about various flatbreads... Yum!


Monday, 11 February 2013

Mary Berry's Lemon Meringue Pie : The Final Comic Relief Challenge

This post is the last in my four Great Comic Relief Bake Off challenges. So far I have posted Chocolate Eclairs, Bakewell Tart, and Custard Slices. The final challenge, from the final episode of the mini series is Mary Berry's Lemon Meringue Pie. For the reasons below, I have chosen to make these in miniature.

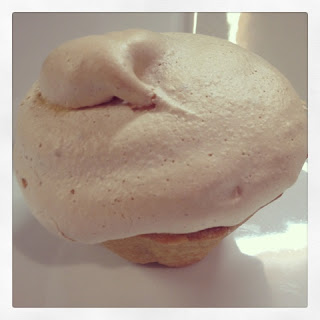
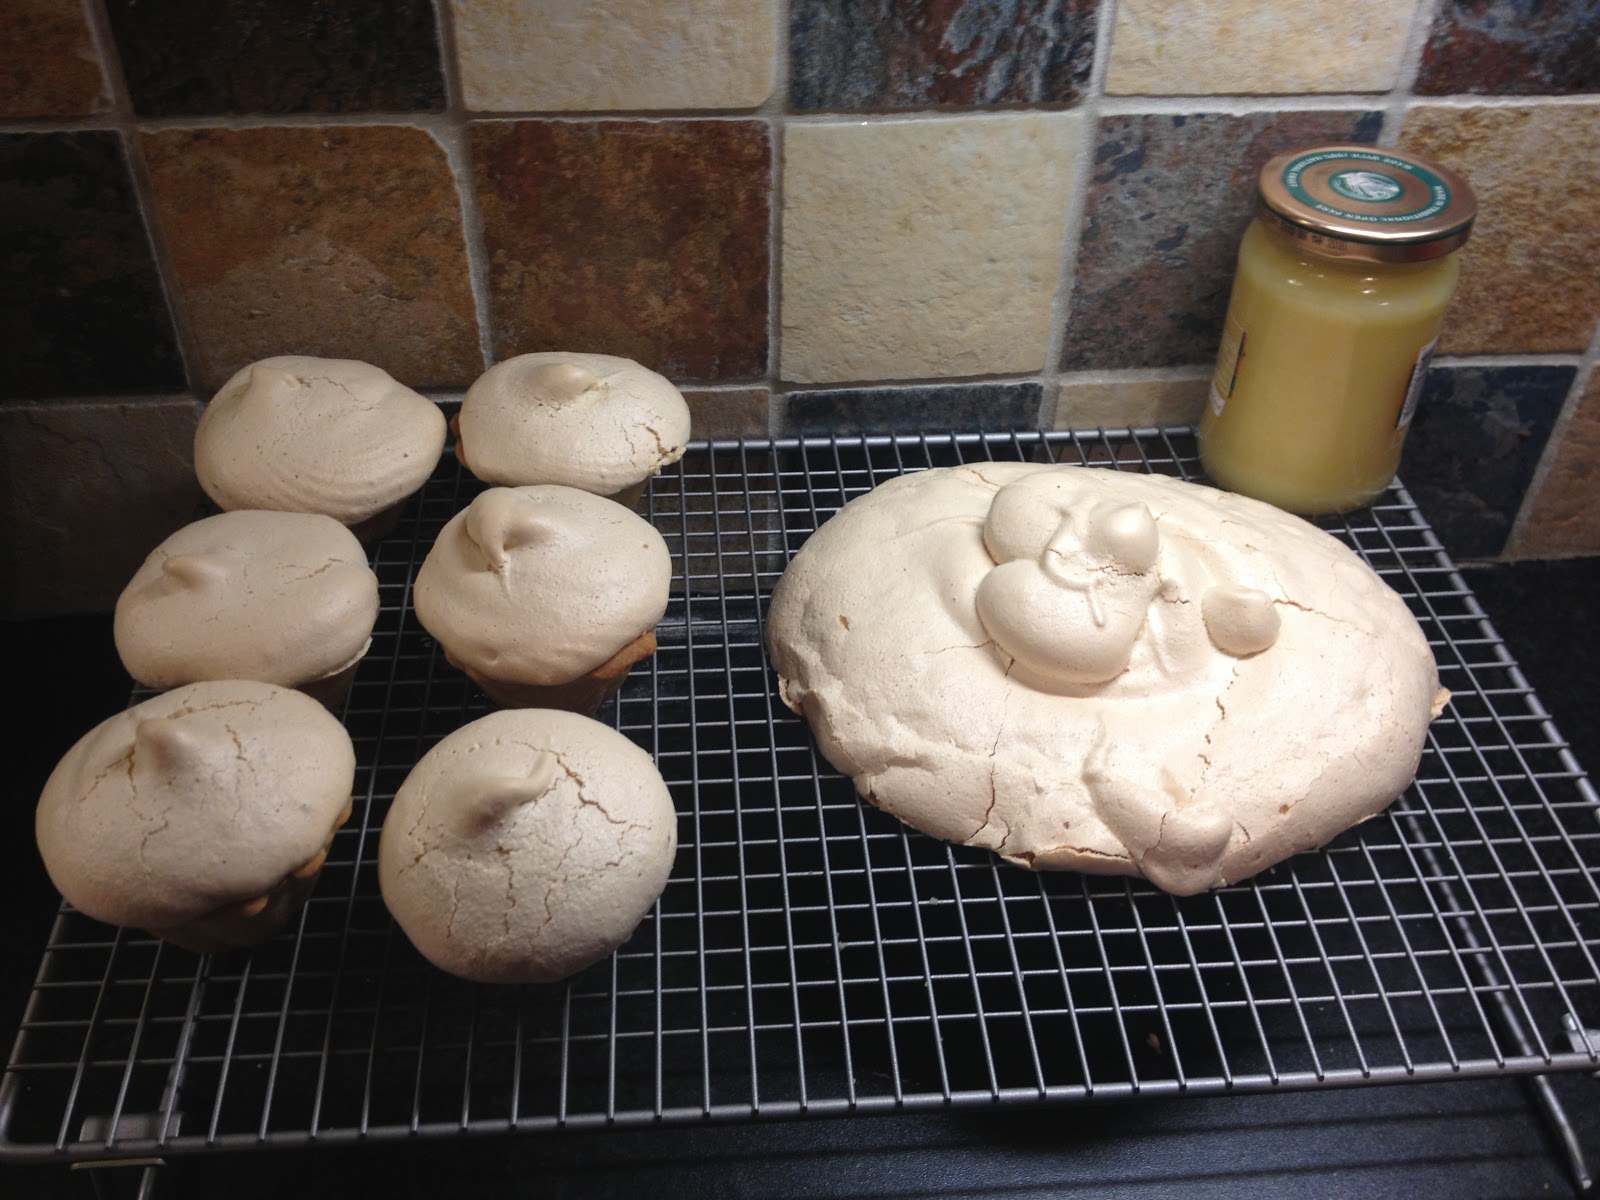
Individual Lemon Meringue Pies
The thought of Lemon Meringue Pie always brings a wry smile to my lips, as I remember a story my Mum has told often. When I was around three years old, my younger brother was Christened. My Mum laid on a feast for the friends and family that came, and the centrepiece was not one but three beautiful Lemon Meringue Pies. Imagine her disappointment when, after the Christening, she found three Lemon Tarts on the table, covered in tiny three-year-old fingerprints and some-what devoid of meringue! Needless to say I was a little ill that evening! 

It wasn't enough however to lose my appetite for this dessert, and I have been looking forward to attempting the Mary Berry recipe. Gary on the other hand openly voiced that he wasn't a fan of lemon desserts, so I decided to half the recipe, and make a few individual pies that I could ration out to myself and others, rather than a large pie that would be wasted. 


I used a silicone muffin mould, which made 6 individual pies, and halved all of the ingredients, however have posted the full recipe below. I did find however that even with half the quantities, I had enough lemon curd left over to fill a jam jar (not that I am complaining - that's breakfast sorted for the next week) and an excess of meringue mixture. I imagine that the full quantities makes for a very substantial sized pie.


As with the previous challenges, Mary's recipe is easy to follow, and surprisingly straight-forward. I found that the lemon curd filling comes together very quickly, and would recommend having all the ingredients weighed and to hand before starting so as to keep on top of the mixture as it thickens.

Our little Lemon Meringue pies were lovely, and I have to say Gary had just about finished his by the time I had paused to photograph mine for this post! He said it was the nicest he had eaten, and would definitely have another, which was the highest of praise from someone who doesn't normally like them.


This is the full recipe from the BBC Food website - I have tried to photograph the stages, however remember that the recipe is for one large pie dish, not the little muffin tin I used. I also missed a few photographs as didn't have enough hands at the crucial stages! 

For the pastry
 
For the lemon filling
  • 6 lemons, zest and juice
  • 65g/2¼oz cornflour
  • 250g/9oz caster sugar
  • 6 free-range egg yolks
 
For the meringue topping
  • 4 free-range egg whites
  • 225g/8oz caster sugar
  • 2 tsp cornflour

Preparation method

  • Pre-heat the oven to 180C/350F/Gas 4.
  • First make the pastry. Measure the flour and butter into a food processor and blend together until the mixture resembles fine breadcrumbs. Add the icing sugar, egg and one tablespoon of water and whizz again until combined to a ball.
  • Tip the pastry onto a work surface and roll out to a 3mm thickness. Use the rolling pin to lift the pastry up and transfer it to line a 23cm/9in loose-bottomed flan tin. Be careful not to stretch the pastry as you tuck it into the corners. Cover in cling film and place in the refrigerator to chill for 30 minutes.
  • Take the pastry-lined tin out of the fridge and trim the excess pastry. Press the top edge of the pastry so that it stands slightly higher than the top of the tin.
  • Line the pastry case with parchment and fill with baking beans. Bake for about 15 minutes then remove the beans and parchment and return to the oven for a further five minutes
  • Remove from the oven and reduce the temperature to 170C/340F/Gas 3½.
  • For the filling, mix the lemon zest and juice with the cornflour and stir to form a smooth paste. Measure 450ml/16fl oz of water into a pan and bring to the boil. Add the lemon cornflour mixture to the hot water and stir over the heat until the mixture has thickened, then remove from the heat.
  • In a bowl mix together the sugar and egg yolks and carefully whisk into the lemon mixture in the pan. Stir over a medium heat until thickened. Set aside for a few minutes and then pour into the baked pastry case.
  • For the meringue, whisk the egg whites in a free-standing mixer until soft peaks form when the whisk is removed. Add the caster sugar a little at a time, still whisking until the meringue is stiff and glossy. Add the cornflour and whisk again.
  • Spoon on top of the filled pastry case and spread the meringue to completely cover the lemon filling. Then create a swirl on the top of the meringue.
  • Bake in the oven for about 15 minutes until the filling is completely set and the meringue is lightly golden and crisp.
  • Serve warm or cold


Sunday, 3 February 2013

Mary Berry's Bakewell Tart - Great Comic Relief Bake Off Challenge No. 2

Earlier this week I blogged my intention to work through the technical challenges from the Great Comic Relief Bake Off, and shared the results of my first attempt at Chocolate Eclairs - post here

Today's challenge comes from Episode Two, and it is a great British classic - the Bakewell Tart. This challenge uses Mary Berry's recipe - found on the BBC Food website here. I'm not tackling these in the order of episodes particularly, in fact my only rule is to follow the recipe to the letter - a personal challenge for me as I have a natural urge to meddle with things! As we have spent the weekend visiting the in-laws, I decided to make a Bakewell Tart to take with us, as I apparently am unable to stop myself from arriving on people's doorsteps with hampers of baked goods, like some wannabe Bree van der Kamp (of Desperate Housewife fame), not that anyone has complained to date!


The Bakewell Tart was particularly important for me to get right, as I grew up twenty minutes down the road from Bakewell, and spent a huge portion of my childhood there playing in the park, feeding the ducks by the river, and sampling the local delicacy. I really felt I had to do this one justice for the 9 year old me.

I found this recipe really easy to follow, and everything came together really nicely. The only issue I encountered was that my flan dish is slightly larger than the 8 inches specified in the recipe, and because of that I had a little excess pastry case as the filling didn't come as far up the dish as it should have. But I'm being overly critical at that, the tart tasted delicious! I wouldn't change a thing about this recipe, and it's definitely going to become a firm favourite in our house!

---

THE RECIPE (taken from BBC Food)

For the shortcrust pastry
For the filling
For the icing

Preparation method

  1. To make the pastry, measure the flour into a bowl and rub in the butter with your fingertips until the mixture resembles fine breadcrumbs. Add the water, mixing to form a soft dough.

  2. Roll out the dough on a lightly floured work surface and use to line a 20cm/8in flan tin. Leave in the fridge to chill for 30 minutes.


  3. Preheat the oven to 200C/400F/Gas 6 (180C fan).

  4. Line the pastry case with foil and fill with baking beans. Bake blind for about 15 minutes, then remove the beans and foil and cook for a further five minutes to dry out the base.

  5. For the filing, spread the base of the flan generously with raspberry jam.


  6. Melt the butter in a pan, take off the heat and then stir in the sugar. Add ground almonds, egg and almond extract. Pour into the flan tin and sprinkle over the flaked almonds.


  7. Bake for about 35 minutes. If the almonds seem to be browning too quickly, cover the tart loosely with foil to prevent them burning.


  8. Meanwhile, sift the icing sugar into a bowl. Stir in cold water and transfer to a piping bag.

  9. Once you have removed the tart from the oven, pipe the icing over the top, giving an informal zig zag effect.


I am entering this bake into this month's Tea Time Treats, hosted by Lavender and Lovage and What Kate Baked, and run this month by Kate. The theme is 'Puddings' and I can't think of a better entry than this classic!


Thursday, 31 January 2013

Chocolate Eclairs : GBBO Technical Challenge

Last week after watching the Great Comic Relief Bake Off, I set myself the challenge of attempting the four technical challenges at home. My unwritten rule to myself was to use the recipe from the show (either Paul or Mary's) and follow it to the letter, rather than falling into my usual habit of substituting ingredients.
 
So... the four challenges are;
 
Episode One: Custard Slices - Paul Hollywood's Recipe
Episode Two: Bakewell Tart - Mary Berry's Recipe
Episode Three: Chocolate Éclairs - Paul Hollywood's Recipe
Episode Four: Lemon Meringue Pie - Mary Berry's Recipe

I'm not tackling these in order, but over the next few weeks I will test and publish each recipe and my comments.

Chocolate Eclairs

Chocolate Eclairs
So, this is the recipe that has the most riding on it, as they are Gary's absolute favourites. I have never made choux pastry before in my life, it has always appeared to be one of those witch-crafty type things that no normal person could ever achieve. After watching the celebrity bakers tackle it on GBBO however I was determined to give it a go.

As per my unwritten rule for this challenge, I used the recipe from the programme. I followed this one to the absolute letter, as I had a feeling if I deviated at all, something would go horribly wrong.

Making the actual pastry was surprisingly simple. Because I was a little afraid of this recipe, I weighed out all the ingredients beforehand, so that everything was ready to go, and I would definitely say this is the key to the pastry, as everything came together very fast. There are two points, firstly when you add the flour to the water and butter mix, and secondly when you combine the eggs with the dough, that it all looks like it's going wrong, and the mixture separates and goes lumpy, however power through, and it all comes back together perfectly just as the recipe states.

When cooking the choux pastry shells, again I followed the recipe method to the letter, even going so far as to set the stopwatch on my phone to time the intervals at each temperature. The next time I make them I am going to trust my instinct a little more, as if I am being over-critical the shells were about 1 minute over-cooked. When I cut the shells to make the slit for the cream to fill, a couple cracked as I eased them open. Filling with the cream was simple and straight-forward, however I would emit the vanilla extract from the recipe, as Gary and I both found the taste a little over-powering and unnecessary.

My only hiccough with the whole process was that I tried to short-cut on the chocolate and microwaved it to melt it down. I slightly burnt it at the edge, and the little crystallised bits of chocolate clogged up my piping nozzle making it really difficult to pipe evenly. Overall though, really pleased with my first attempt, and would definitely recommend this recipe to anyone wanting to give éclairs a go!
 
 
 The Recipe (from Paul Hollywood - BBC Food)
 
Ingredients
For the choux pastry
  • 65g/2½oz plain flour, sifted
  • pinch salt
  • 50g/2oz unsalted butter, diced, plus extra for greasing
  • 2 free-range eggs, beaten
For the filling
  • 200ml/7fl oz whipping cream
  • 5 tsp icing sugar, sifted
  • 1 tsp vanilla extract
For the icing
  • 100g/3½oz milk chocolate, chopped
Preparation method
 
  1. Preheat the oven to 200C/400F/Gas 6. Generously grease a baking tray with butter.
  2. Sift the flour onto a sheet of greaseproof paper.
  3. Put 120ml/4fl oz water into a medium-sized pan with the salt and butter and heat gently until the butter has completely melted – don’t let the water boil and begin to evaporate. Quickly bring the mixture to the boil and tip in all the flour in one go. Remove the pan from the heat and beat furiously with a wooden spoon – don’t worry, the mixture will look messy at first but will soon come together to make a smooth heavy dough.
  4. Put the pan back on a low heat and beat the dough for about a minute to slightly cook the dough – it should come away from the sides of the pan to make a smooth, glossy ball. Tip the dough into a large mixing bowl and leave to cool until tepid.
  5. Beat the eggs in a bowl until combined, then gradually beat them into the dough with an electric whisk or mixer, or a wooden spoon, beating well after each addition. (You may not need all the egg.) The dough should be very shiny and paste-like, and fall from a spoon when lightly shaken.
  6. Spoon the pastry into a piping bag fitted with a 1.25cm/½in plain nozzle and pipe 12 x 10cm/4in lengths onto the greased baking tray.
  7. Sprinkle the tray, not the pastry, with a few drops of water, and bake in the oven for 15 minutes. Then, without opening the door, reduce the oven temperature to 170C/325F/Gas 3 and bake for 10 minutes, or until golden-brown and crisp.
  8. Remove the tray from the oven and carefully make a small hole in the side of each éclair to allow steam to escape. Return to the oven and bake for a further five minutes, or until the pastry is completely crisp. Remove from the oven and transfer to a wire rack to cool.
  9. For the filling, whip the cream with the sugar and vanilla extract in a bowl until just stiff.
  10. Once the éclairs have cooled, cut down the length of one side of each éclair and pipe in the whipped cream.
  11. Melt the chocolate over a double boiler or a bowl suspended over a pan of simmering water (do not allow the bottom of the bowl to touch the water) and allow it to cool slightly. Dip the tops of the éclairs in the chocolate and let the chocolate set before serving.

Saturday, 26 January 2013

My Favourite Chocolate Cake Recipe


The last few days have been a bit of a whirl of baking ideas, tips and inspirations, and I suddenly have so much I want to share with you all, that I have actually started seven new blog posts, which I am going to have to ration out over the next few weeks! Not least of all has been the wonderful, albeit short lived return of the Great British Bake Off to our screens this week - my mission this weekend is to attempt at least two of the technical challenges from the week - standby for photos!
 
This week's run of GBBO has been every bit as entertaining, inspiring, and memorable as the three main series - my personal highlights have to be Warwick Davies goliath of a gateaux, Bob Mortimer's 'Baker St' cake, and Claudia Winkleman's... well just everything.
 
Let's not forget though that the run has all been about raising awareness and funds for Comic Relief - I for one will be buying an apron this weekend (and definitely will not be prancing around my kitchen pretending I have just been awarded Star Baker!) All the details are here - please take a moment to get involved.
 
Anyway - back to the main title of this post - I wanted to share my absolute go-to Chocolate Cake recipe - it's one I stumbled upon after years of experimenting and never being totally satisfied, and now I can safely say that this is THE ONE! I'm also going interject a few of my own baking essentials - this is by no way an endorsement or sponsored promotion - just my honest opinion on which products work best for me.
 
The Recipe
 
Ingredients (the following quantities make 12 cupcakes or one 8' cake layer - double the batter up to make a two tier cake, or a larger batch of cupcakes)
  •  50g dark muscovado sugar
  •  25g quality cocoa powder
  •  125 ml boiling water
  •  62g unsalted butter
  •  75g golden caster sugar
  •  112g plain flour
  •  1/4 tsp baking powder
  •  1/4 tsp bicarbonate of soda
  •  1 tsp vanilla extract
  •  1 large egg 
 
Step One: Weigh out the muscovado sugar and cocoa powder into a medium sized bowl. I always always always use Green and Black's cocoa powder. I find that the flavour is far superior to any other brand I have tried before, and it gives a really rich but not too sweet chocolate flavour to any bake. It is a little pricey, and this recipe calls for quite a high quantity - especially if you are doubling up the mixture for a tiered cake, but it really is worth it. Anyway, pour the boiling water over the sugar and cocoa powder, and whisk until fully combined. Set this bowl to one side.
 
 
Step Two: In a larger bowl, add the butter and golden caster sugar and cream together. Most cake recipes specify softened butter, which helps make the creaming process quicker and easier. I stumbled upon the Willow brand of butter when it was on offer once in my local supermarket, and it is wonderfully soft, even straight from the fridge. I have used this ever since, and it saves so much time - especially considering I never remember to take my butter out of the fridge in time and then have to mess with the microwave trying to soften it in 2 second bursts. I also only ever use golden caster sugar in my bakes, it's unrefined, and I really prefer the taste. 

 
Step Three: Add the vanilla extract and the egg to the creamed butter and sugar, and whisk well to combine. It is important here to use vanilla extract rather than essence, as the flavour is far better. You need to whisk the egg in well to combine to a smooth batter (above top right).
 
Step Four: Add the plain flour, baking powder and bicarb of soda, and mix well again. You will end up with quite a stiff mixture (above bottom right)
 
 
Step Five: Add the cocoa and water mixture from step one - use a spatula to get all the mixture out of the bowl, trust me you want every last drop! Mix well, until you achieve a smooth, glossy batter as above. The batter should be of an easy dropping consistency.
 
Step Six: Divide the mixture into cupcake cases or greased cake tins, and bake at 180 degrees until a skewer inserted into the cake comes out clean. For cupcakes this is about 15 - 20 minutes, and for a cake 30 - 35 mins.
 

And that's it - my favourite chocolate cake recipe in six easy steps! The cake is light in texture, firm in structure, and incredibly chocolaty without being too sweet, which means it can take a really sweet frosting without being too sickly. For the cupcakes in the picture I chose a Salted Caramel frosting. A dark chocolate ganache works just as well, and you can always add a dash of cherry brandy or orange liqueur for something a little more adult... Just perfect! I've also found that this cake keeps really well for up to a week.
 
Enjoy! V x

Monday, 26 November 2012

The Quest For The Perfect Christmas Cake

There are many things that I am trying to turn my hand to this year, with Christmas Cake being high up on the list for a number of reasons. Firstly, I am hoping that (if and) when The Pantry Door starts to officially trade, I will be able to sell them. Secondly, because this year, I am hoping that they will be a key feature in my Christmas hampers for friends and family. And thirdly, but no less important, because you have to have Christmas cake, and it's about high time I learned to make one!


Because Christmas is steeped in tradition and recipes passed down from generation to generation, I decided against Google as my source of inspiration this time, and tried a more traditional approach... I asked my Mum. My Mum is a great baker, her cakes are legendary. So much so in fact that I remember at school whenever I took a slice of my Mum's cake in my packed lunch I would auction it off to the highest bidder! (Always safe in the knowledge that I could spend my 20p on whatever I chose, and still have a slice of delicious cake when I got home...)

So I phoned my Mum, expecting, to be honest, for her to pop over for a cup of tea, and then, with exaggerated secrecy present me with a faded brown page, passed down from the ages, containing the ultimate Christmas cake recipe. In reality, she brought me a ready measured Christmas Cake Kit from Tesco. True, it was endorsed by Mary Berry, but that's not really the point.

However I set about the task in earnest, and unpacked the bag of ingredients and the recipe card. I actually have to credit the brilliant simplicity of these kits. All the dry ingredients are measured, bagged and labelled in the kit, and all you need to add are butter, eggs, and citrus peel. The sheet gives you step by step instructions on making the cake mix, and the recipe and quantities are all written down so you can actually keep it for another year.

The Mary Berry endorsed Tesco Kit recipe is as follows;

210g dark brown sugar
210g butter
4 large eggs
1 orange
1 lemon
40g chopped almonds
10g black treacle
210g plain flour
3g mixed spice
833g soaked fruit mix (currants, raisins, sultanas, cherries, apricots, mixed peel and brandy)
10g apricot jam
200g marzipan
250g icing sugar

The method is surprisingly simple. Pre-heat the over to 140 degrees. Grease an 8 inch tin, and line the base and sides with baking parchment. Make a lid for the cake from parchment as well, and cut a small hole in the centre to let any steam from the cake escape during cooking.

Line Tins with Greaseproof Paper or Baking Parchment
Beat the butter and sugar together in a large bowl until creamy. Add the eggs, almonds, treacle, and the zest of the orange and lemon, and mix well.  Sift in the flour and mixed spice, and fold into the mixture. Add the soaked fruit, and combine well until evenly distributed through the mix.

Christmas Cake Mixture

Place the mixture in the prepared tins
The instructions said to bake for four and a half hours, but to do the skewer test after three and a half. I actually used a series of small cake tins to make my cakes, as I have plans to decorate them individually as gifts, so I checked my bakes after an hour, and they were pretty much done. I gave them an extra 20 minutes, and then put on a cooling rack. 


Tradition dictates now, that the cakes are wrapped in greaseproof paper and tin foil, and are fed with more brandy every couple of weeks until they are decorated for Christmas. I have made two batches, and the first are now coated in marzipan waiting for the final touches with the icing. I cannot wait to see my designs come to life!

All in all, I have to say that the Christmas Cake Kit was not such a bad idea, and actually I picked up another couple at the supermarket last week for £5 each, which, lets be honest, you would never manage to buy the individual ingredients for, and actually, you are still doing all of the cooking so it isn't really cheating... is it? I suppose, as always, the proof will be in the eating - I'll let you all know how it goes on Christmas Day!

V x