 |
| Lavender and White Chocolate Macarons |
Ever since seeing them at the Cake and Bake Show in Manchester earlier in April, I have been keep to test Sainsbury's new range of infused sugars. Sainsbury's have really got on board with the ongoing baking trend that is running through the country, and have updated, revamped and expanded their home baking ranges for Spring with some fantastic new products, the focal point for me being these Taste the Difference Lavender, Vanilla and Cinnamon infused sugars. You can read more about their full range revamp here.
The infused sugars are pots of granulated white sugar, which actually have their flavour elements embedded in the sugar, so the vanilla sugar contains vanilla pods, and the lavender sugar is flecked with lavender flowers. I really like this touch, it would have been easy I am sure to have created an essence or flavouring, but the presence of the ingredients is really great, especially in the lavender sugar, as the flecks of flowers will be present throughout whatever you bake. If I had one niggle, I would have preferred to see Sainsbury's use a caster sugar, as it would have been better for us bakers, however it is only a little niggle!


I decided to try the lavender sugar first, and as I am hosting this month's Classic French challenge, I thought it would be an ideal flavour to incorporate into the theme of macarons, as the delicate flavour and dainty patisserie treats should go hand in hand. I took my basic macaron recipe, and replaced the normal caster sugar with the lavender sugar. Simple! Despite only having two tablespoons in the recipe, the lavender taste really comes through strong, and although not overpowering, you certainly wouldn't need any more. If you are using the lavender sugar in another recipe, you would only need to substitute a few tablespoons of normal sugar with this to get the flavour through really well, and with 250g in a pot, it will last quite a long time making it a reasonably priced investment to add the wow factor to your bakes. I can't wait to get creative with the Vanilla and Cinnamon versions!
Anyway, onto my macarons. I use quite a simple recipe, which I have found works well for me every time. The quantities are quite big, and make around 24 full macarons (48 halves) or 40 mini macarons (80 halves), you could happily halve it if you can find a way to split the eggs, or use a ready made egg white liquid such as Two Chicks.


I decided to try the lavender sugar first, and as I am hosting this month's Classic French challenge, I thought it would be an ideal flavour to incorporate into the theme of macarons, as the delicate flavour and dainty patisserie treats should go hand in hand. I took my basic macaron recipe, and replaced the normal caster sugar with the lavender sugar. Simple! Despite only having two tablespoons in the recipe, the lavender taste really comes through strong, and although not overpowering, you certainly wouldn't need any more. If you are using the lavender sugar in another recipe, you would only need to substitute a few tablespoons of normal sugar with this to get the flavour through really well, and with 250g in a pot, it will last quite a long time making it a reasonably priced investment to add the wow factor to your bakes. I can't wait to get creative with the Vanilla and Cinnamon versions!
Anyway, onto my macarons. I use quite a simple recipe, which I have found works well for me every time. The quantities are quite big, and make around 24 full macarons (48 halves) or 40 mini macarons (80 halves), you could happily halve it if you can find a way to split the eggs, or use a ready made egg white liquid such as Two Chicks.
Ingredients
- 125g ground almonds
- 200g icing sugar
- 3
free-range egg whites
- 2 tbsp Taste the Difference Lavender Infused Sugar
- ½ tsp cream of tartar
- violet food colouring gel
For the white chocolate
filling
- 200g white chocolate
- 160ml double cream
- 40g unsalted butter
Method
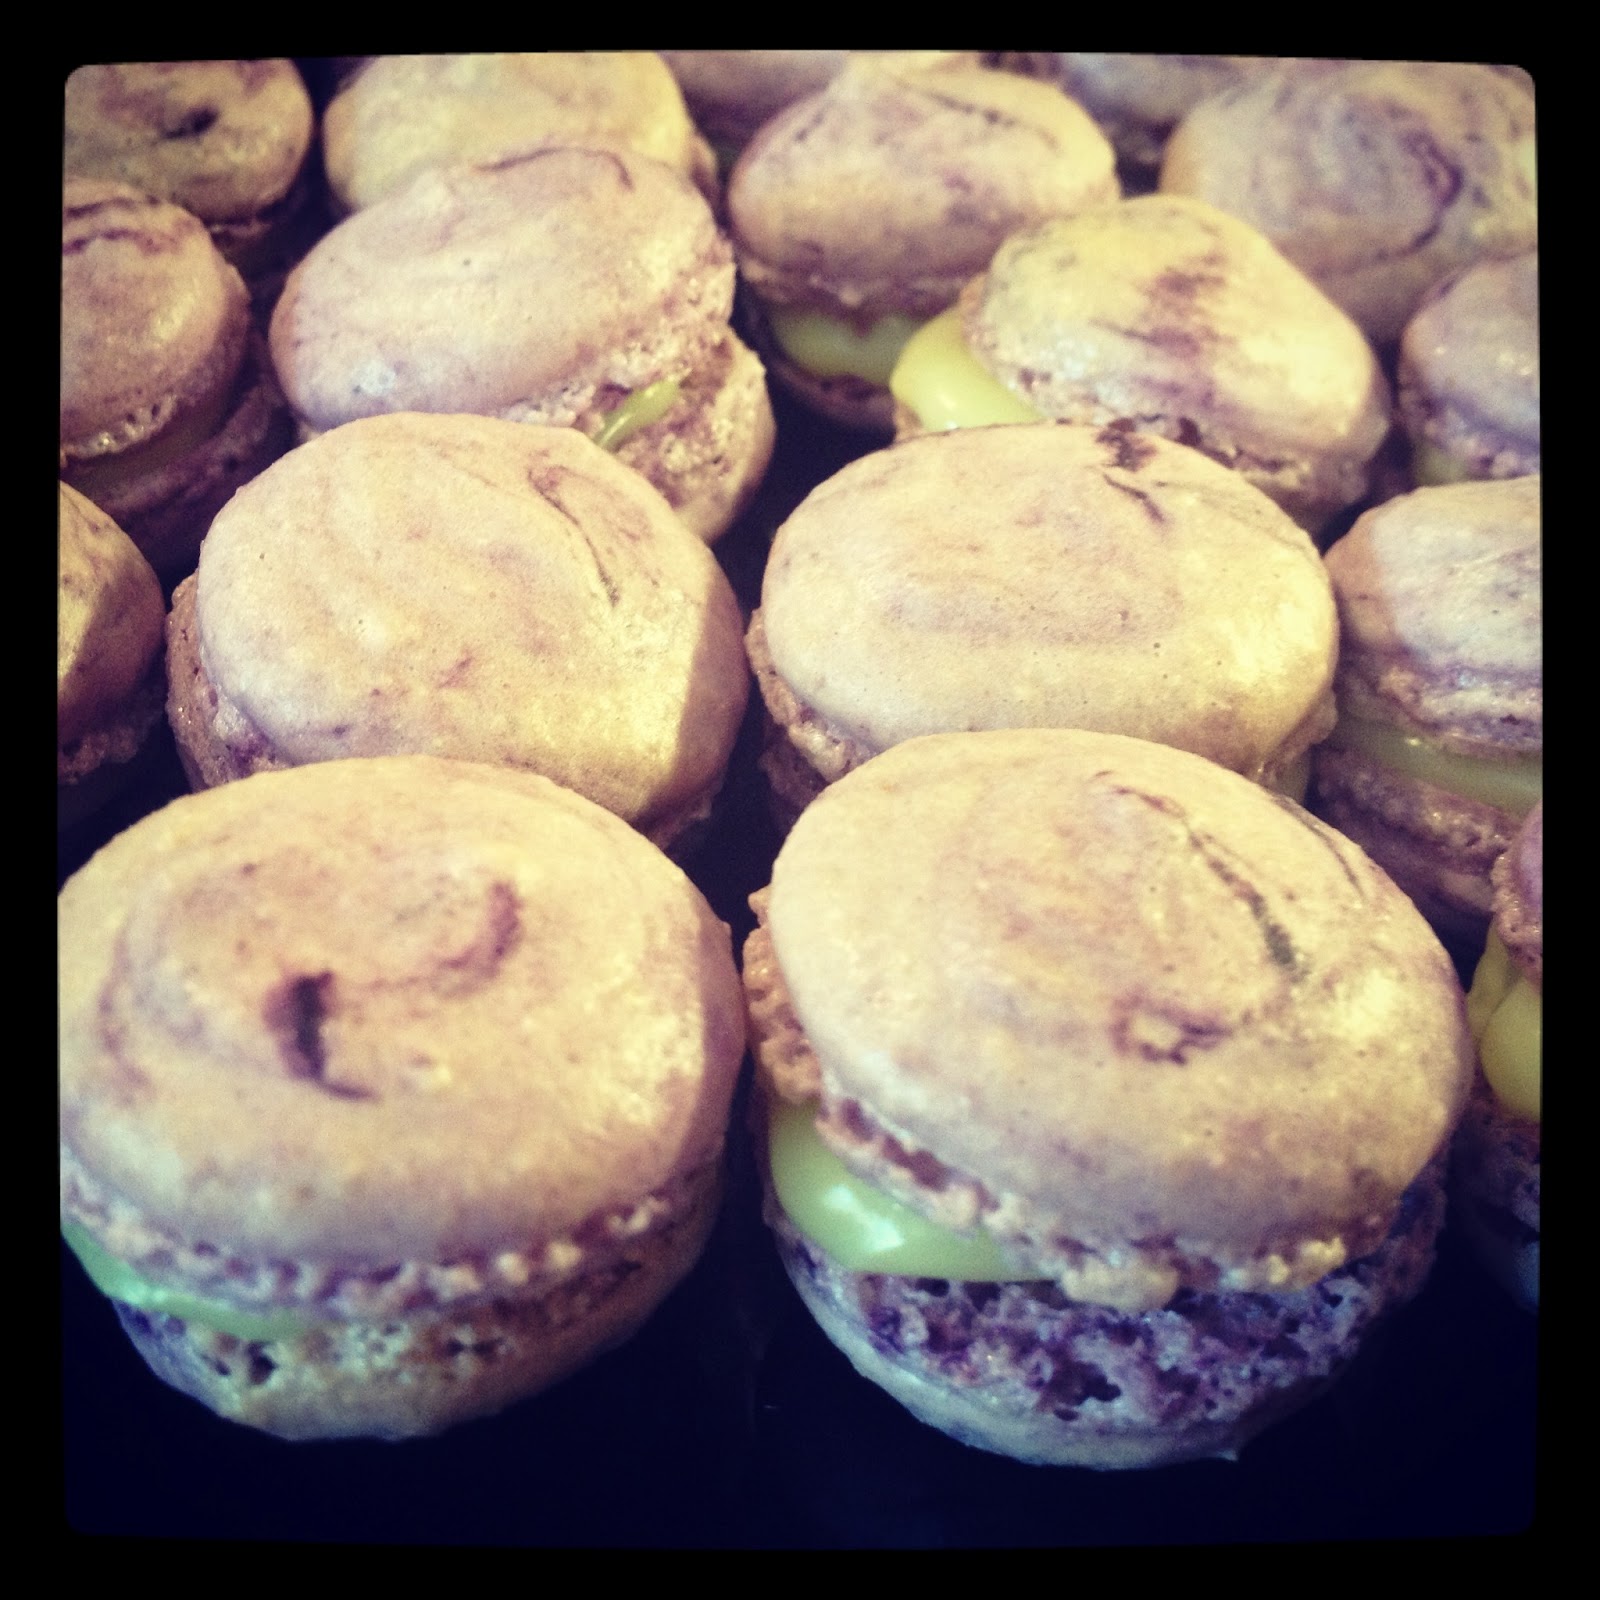
- Blend the ground almonds and icing sugar together in a food processor until well combined. Set aside. This is to make sure that the mixture is as smooth as possible. I actually don't have a food processor, so I don't do this step, it doesn't make any difference to the flavour, you will just notice from my pictures that my macarons have a little bit of a bumpy finish...
- In a large mixing bowl, slowly whisk the egg whites in a large bowl at a low speed until stiff peaks form when the whisk is removed. This will take about 5 minutes on the slowest setting, just keep going gently until you get there. Whisk in the cream of tartar and lavender sugar until the mixture is smooth and glossy, increasing the speed of the whisk as the mixture stiffens. I just scoped two teaspoons of the lavender sugar in, taking some of the lavender flowers at the same time, as I wanted them to be scattered through my finished macarons.
- Add the food colouring and the ground almonds and icing sugar, and stir through gently until the mixture resembles shaving foam, do not mix too much, as you will lose some of the structure. I added quite a bit of the violet food colouring, but didn't worry too much about getting it spread evenly through the mixture as I wanted a more marbled affect on my finished macarons.
- Spoon the macaroon mixture into a piping bag, and snip off the end. Pipe onto a baking tray lined with greaseproof paper, making sure to pipe even sized circles, and leave at least an inch between each macaron as they will spread. I cheat a little here, as I use a double sided macaron mat I bought from Baked by Me, it's brilliant, and has both normal and mini sized ridges on, which means that you can pipe more macarons on a sheet without fear of the spread...

- Once you have piped out all of the macarons, drop the tray a couple of times to flatten them out, and then set aside for around 60 minutes before baking. This is to allow the surface of the macaron to set its hard shell, they will be ready to bake when you can touch the surface of the shell and it is no longer sticky.

- Whilst the shells are setting, make the white chocolate ganache. Melt the butter and cream together in a saucepan, and bring to a low boil. Once little bubbles are starting to appear, turn the heat down as low as it will go, and add the white chocolate a couple of pieces at a time, stirring constantly, until the chocolate has all been melted into the mixture.
- Transfer the chocolate ganache into a bowl, and set aside to cool. I try and stir mine every 5 minutes or so, to prevent a skin forming, and once it is cool, place the bowl in the fridge to let it solidify enough to be piped easily without it running out the sides.
- Pre-heat the oven to 160 degrees.
- Bake the macaron shells for 10-15 minutes, until cooked. The top of the shell will rise up, and little 'feet' will appear at the base of the macaron. If you take them out of the oven too soon, they will split when you try and take them off the baking sheet, however if you bake too long, you won't keep the chewy middle of the macaron. After 10 minutes, test one shell to see if it lifts off the sheet easily or not, and keep checking until they are ready.

- Remove the shells from the oven, and transfer them carefully from the baking sheet to a cooling rack.
- Leave to cool for 5-10 minutes, then turn over half of the shells.
- Pipe the ganache onto the upturned half of the shells, then sandwich one empty shell onto one with ganache. Press them genlty together, so that the ganache pushes out to the edges.

- Refrigerate for 30 minutes to allow the ganache to set, and then tuck in!

I made some mini and some full sized of these macarons, and in this instance, the mini ones are perfect for the flavour combination. The lavender taste comes through strong, and therefore the sweet white chocolate ganache balances the floral tones perfectly, and as both flavours are quite pronounced, the mini macaron is the perfect mouthful.
These are my entry into this month's Classic French challenge, you can see the full challenge and add your macarons to the linky here.

These are my entry into this month's Classic French challenge, you can see the full challenge and add your macarons to the linky here.