Hi! Welcome to my blog. I am a major foodie, with a haphazard cooking philosophy, currently making that transition from cooking and baking for friends and family to 'wonder if I could make this my career'. Follow me for recipes, the outcomes of a few experiments, and general lovely foodiness. Opinions, reviews and recommendations are all my own.
Showing posts with label Paul Hollywood. Show all posts

Wednesday, 28 August 2013

Paul Hollywood's English Muffins - GBBO Technical Challenge Two

I was quite intrigued to see that this week's technical challenge on The Great British Bake Off was English Muffins. I've been making these myself for the last few months, and have found them pretty straight forward to make, so I was curious to see Paul's recipe and how it differed to the one I've become attached to. 

Muffins are made from an enriched dough, and the Paul Hollywood recipe uses butter and milk to do this, a variation from the natural yoghurt version I have been making. You can find Paul's recipe on the BBC Food website here

Paul Hollywood English Muffins - Butter and Milk Enriched Dough

I found Paul's recipe easier in the execution, all the ingredients in one bowl and mix, then knead, however it makes for a very wet dough that is difficult to knead. In the end, I had to attack mine with dough hooks attached to my hand whisk. The dough proved well enough, but after cutting the circles out the muffins proved sideways rather than upwards, leaving some very large but slightly flat muffins.

Paul Hollywood English Muffin - Butter and Milk Enriched Dough

Overall both Gary and I agreed that we preferred the taste of the original recipe we were used to, although these were still of course much nicer than shop bought. I really think that the natural yoghurt gives an extra depth of flavour to the muffins, and that will always be my preferred recipe, though I may use Paul's as a back up if I don't have any yoghurt to hand.

English Muffins - Natural Yoghurt Enhanced Dough

I am re-posting my muffin recipe from a few months ago here, as it is my preferred way of making them.

Ingredients 

7 grams fast action yeast
125 ml tepid water
75 grams natural yoghurt
225 grams strong white bread flour
1/2 teaspoon salt
handful of semolina

Method
  • In a medium sized bowl, dissolve the yeast in about half of the water. Add the remaining water and the natural yoghurt, and mix well until smooth and combined. 
  • Sift the flour into a large mixing bowl, add the salt and quickly stir. 
  • Pour the liquid mixture into the flour, and mix together to make a dough.
  • Turn out onto a lightly floured surface, and knead well for 5 - 10 minutes until a smooth pliable dough is formed. Return the dough to the bowl, cover and leave to prove for 1 hour, or until doubled in size. 
  • Turn the dough back out on the surface, and knead quickly to knock back. Roll the dough out to about 2 cm thick, and cut out rounds about 3 inches wide. Knead the offcuts back together, re-roll and continue to cut out rounds until all the dough has been used. 
  • Place the rounds on a lightly floured baking tray, sprinkle the semolina over the tops, cover, and leave again to rise for about 40 minutes.
  • Heat a little oil in a large frying pan. Place the muffins in the pan, and cook for about 7 minutes on both sides. Keep the heat down low so as not to burn the outside of the muffins before the inside cooks. 
  • Set aside to cool. These muffins can be kept for a couple of days in an airtight container, just halve and toast and they are ready to eat. 

Friday, 24 May 2013

Brioche and The Final Episode of Paul Hollywood's Bread

I've been procrastinating about writing this post for the last few weeks, and it's about time I just sat down and did it. Maybe I've been suffering a little from blogger's block, or maybe as is oft my way, I have that much on my to-do list that I've just been faffing about and not doing any of it. A little bit I think it's because this will be my last post in the series that I have been writing about and following Paul Hollywood's 'Bread' and a little part of me is kind of sad that it's all done and dusted. 

Clockwise from Top Left: Classic White Bloomer, Flour Wraps, Homemade Pizza, and a White Loaf

That being said, I am so pleased that I set myself this challenge, and that I stuck it out to the end. When I started out, I had made a few attempts at baking a white loaf before, with varying degrees of success, had just about mastered Hot Cross Buns, and that was the extent of my bread-making ability. Now, I can readily make a fresh loaf, wraps, naan breads, pizza dough, soda bread, sourdough and brioche to name but a few. I have an active jar of sourdough starter in my fridge, and have used it every Sunday for the last three weeks to make a number of different loaves. Once a week, I make fresh pizza dough when I get home from work, instead of going to the take-away. And I have even been brave enough to start experimenting with recipes and creating my own, my Sourdough Cheese Pinwheel Loaf went down with Gary so well that I have had to make it again - definite win! 

Clockwise from Top Left: Naan Breads, Soda Bread, Cheese Filled Rolls and Pitta  Breads

Clockwise from Top Left: English Muffins, Sourdough Loaf, Sourdough Starter, Sourdough Cheese Pinwheels

The final episode of 'Bread' was based on enriched doughs, these are breads that have the addition of eggs or butter in the dough, and create a rich and decadent taste and texture. After watching the episode, there was only one loaf that I wanted to try, the Savoury Brioche Couronne, stuffed with parma ham, mozzarella and twisted into a crown shape, it sounded right up my street. 

I used Paul's recipe, which can be found here on the BBC website the only change I made was I halved the ingredients as it looked to make a very large loaf. I was right to do so, as even the halved quantities made a loaf big enough to feed Gary and I for several days. The recipe worked without a hitch, I don't have food processor yet, so I used a hand whisk with dough hook attachments, and it worked just as well. 

The enriched brioche dough

Rolled and filled with Parma ham and Mozzarella

Twisted into the classic Couronne shape

Baked and Golden : Savoury Brioche Couronne
This whole project has been so rewarding, I have learnt so much about the different doughs and methods for producing different styles of bread, and I am so pleased that bread-making is now a staple part of food preparation and meal times in our house. The Paul Hollywood book is great for beginners like me, because of its pictorial instructions, and equally so for the more seasoned baker, as there are a real breadth of recipes and meal ideas to challenge any ability. I think that the addition of the TV series has really made this process come to life for me, and I definitely learnt additional hints and tips from the show that aren't covered in the book. I really hope that the BBC commission a follow up series to this, but regardless I know that my bread adventure has really only just begun, and I now have the confidence to go out there and keep trying new bakes. Thank you Paul! 

Friday, 10 May 2013

Simple Sourdough Loaf, and Episode Four of Bread

My sourdough journey has been somewhat bumpy, to say the least, and it has kind of derailed my mission to follow and bake from each episode of Paul Hollywood's TV series 'Bread' as the two weeks it took me to cultivate my sourdough starter meant that the series had ended before I got chance to turn the oven on...

That being said, I think it is fair to say that if Paul's mission was as he said to get the British baking bread, he has certainly succeeded with me - if I put half the amount of effort that I have taken in researching, practising, debating and fine-tuning my sourdough into my day-to-day life, I'd be some sort of multi-millionaire genius by now! 


I've documented the trials and tribulations I experienced actually cultivating my sourdough starter (Gizmo II) here, and am pleased to report that he is now healthy and residing on the bottom shelf of the fridge so that he only has to be fed once a week. When it came to making my sourdough loaf, I used Paul's recipe, which you can find on the BBC website here, and made just a few changes;

Gizmo II and my already well worn copy of 'Bread'
  • I used half the amount stated of strong white flour, and made up the rest with rye flour, as I wanted the rye flavour
  • As I don't have a banneton or proving basket, I liberally floured a mixing bowl, and used that to get my shape
Sourdough proving in a mixing bowl for shape
  • I used a mix of strong flour and semolina to dust the baking sheet and the top of the loaf to prevent it from spreading outwards when baking. 
Dusted with flour and semolina and ready to bake

I was really pleased with the texture and taste of my sourdough, I'd never actually tasted one before, so didn't know what to expect, but it reminded me a little of the real ales that my Dad used to drink, quite a hoppy smell and taste. I can tell you that it was absolutely divine, both on it's own, and topped with scrambled eggs and grilled tomatoes for breakfast! Mmm... 

My finished sourdough loaf, fresh from the oven

Friday, 3 May 2013

The Diary of a Sourdough Starter

What with work commitments, and a general fear of the whole sourdough process, I have been putting this one off for a while, however, I committed myself to learning all I could from Paul Hollywood's 'Bread' series, and as there is a whole chapter of the book, and a whole episode of the series dedicated to Sourdough, I could avoid it no longer. I have to hold my hands up at the start and say not only have I never made sourdough, I've never tasted it, so I'm not sure yet what I have been missing all this time. I guess I am about to find out! 

As making sourdough is a lengthy process, rather than lots of short disjointed posts, or one that hops and skips over the process, I decided to keep a short diary here day by day, to show you how my starter gets made and grows up to become a real loaf. And if you follow me on twitter, you will know that this has been one heck of a journey! I can promise you that this is a story of hard work, heartache, and some successes and failures... Enjoy! 

The Diary of a Sourdough Starter

Day 1
Day 1: The starter has been made, the first step is very easy, chop grapes, and mix into strong flour and tepid water to form a loose dough. My starter has been split into two as I didn't have a jar big enough to fit it all in with room to grow. I'm already feeling a little attached to it, and looking forward to seeing it grow over the next few days! Maybe this is my way of getting broody??

Day 2: I've named my starter Gizmo... After reading up on the best ways to cultivate a sourdough starter, the basic rules of looking after a Mogwai seem to apply - keep away from direct sunlight, never get it wet, and don't feed it after midnight. OK, so, I don't think anything will go really wrong if I feed it after 12 o'clock, but I figure if I do find myself feeding my sourdough starter in the middle of the night I might have to seriously re-consider my life choices... Anyway, Gizmo has yet to start growing, but he is a little darker in colour, and I can see condensation forming inside the tub, so something is definitely starting to happen.

Day 3
Day 3: We have growth! Gizmo has almost doubled in size, and there are definite bubbles inside the mixture. Paul's instructions say to leave the starter for three days before feeding it, and as I made it the morning of Day 1, I feel I need to wait a little longer before discarding half and feeding it for the first time. I might just re-watch the episode later this afternoon though to check I am on the right path, as the instructions in the book are not quite as detailed as I remember the programme being.

Day 4: Yesterday evening I checked Gizmo whilst I was in the kitchen, and noticed that after the growth during the previous day, the starter was starting to fall back in the jar. I decided that it had had a good two and a half days, and that it would be a good time to feed it for the first time. I opened both jars, and transferred the mixture all back into one bowl, gave it a quick stir, and then discarded half as per the instructions. I then fed the remainder with an equal quantity of fresh flour and water, and returned it this time back into one tub. Today I am concerned that I might have killed Gizmo... There are a few bubbles, but there has been no growth, and a separate layer of liquid has formed on the top of the starter? I don't think this is right. I'm going out later, and I think if there is still no change when I get home tonight, I might try and feed him again to see if I can resuscitate the growth, if not, I may be introducing you to Gizmo II tomorrow...

Day 5
Day 5: Ok, sad news, Gizmo didn't make it through the night. Well, that's maybe a little dramatic, the starter was still there this morning, but since being re-fed last night it has failed to grow at all. Not only that, but the smell emanating from the tub had gone from sour to just plain rancid. I decided to dispose of the whole attempt, and start again. I purchased a large Kilner jar from the supermarket this morning, and I have decided to use apple rather than grapes for my second attempt. After reading up, the liquid that was forming on the surface was a sign of the starter being over-active. I am hoping that the larger jar, which means I don't need to separate the initial starter, and the fact that it is more airtight than the tupperware I was using will be the key to success here. So without further ado, here is Gizmo II...

Gizmo II

Day 6: We're back to the beginning of the process, Gizmo II is happy in his new jar, no growth yet, but I'm not expecting any until the end of day two really. There are a few little bubbles, and all is well with the world.

Day 7
Day 7: We are starting to see some growth again, larger bubbles are forming, and the starter is beginning to creep up the side of the jar. Gizmo II hasn't really changed in colour much, compared to Gizmo I who went quite a lot darker. I think that this is a good sign that Gizmo II isn't being as over-active this time around. I reckon it'll be ready to be fed later tonight before bedtime, and I'm hoping that I can start to then make my first loaf by Monday...

Day 8: Disaster, Gizmo II has split as well! I can't for the life of me figure out what I'm doing wrong, but it must be me as it's happened to both attempts. This one doesn't smell anywhere near as funky as the first however, so I'm going to stick with it, feed it, and hope it starts to move again.

Day 9: Had a little moan about sourdough starters on Twitter, and received an absolute barrage of replies. There are some amazing people out there, and they gave me some fabulous advice. Big shout out in particular to Joanna at Zeb Bakes who asked me a ton of questions, worked out what I was doing wrong, and emailed me the most amazing tips and advice. Here are a few bullet points of things I have learned today, I hope that they maybe will help someone else one day too...

  • by creating a sourdough starter, we are aiming to create an environment for both yeast and lactobacilli to grow, which are the little bacterias that will eventually bring us bread. 
  • there is an additional bacteria that grows in the early days, which emits a large amount of gases that usually causes big bubbles and a lot of growth. The lactic acid that then forms in the lactobacilli however will then kill this off. After that, we are relying on the yeast to have formed and take the growth from there. 
  • using rye flour is a much better option for the starter than white flour, as the yeasts exist on the outside of the grain.
  • when you 'feed' the starter with flour and water, you are literally feeding it. The yeast and lactobacilli 'eat' sugars from the fresh flour. As they do so, they also reproduce and so run out of food quicker. They produce gas and acid, and a pure form of alcohol, which is in the colourless watery layer when your starter splits. Basically, the split happens when it runs out of food. 
  • to avoid this, the starter should be fed at least every day, and in some cases up to every 4 hours. The warmer the temperature, the more active the yeasts are, and therefore the more often it will need to be fed. 

    Here lies my problem, my kitchen is warm, and the Hollywood method only states to feed the starter every 2-3 days. Basically, I have been starving the Gizmos of food! I've been told to discard all by 30g, re-feed it a couple of times a day, and it should come back to life...

Day 10
Day 10: Yesterday evening I discarded most of Gizmo II, keeping back just 50g, and fed him 100g of rye flour (Gary went to the supermarket especially for me) and 125ml water. I put clingfilm over his jar rather than the sealed lid, so that a little of the gases could escape, and I put him to bed. Late tonight I noticed that there was finally some proper growth happening... fingers crossed!

Day 11: Success!!! I've been feeding Gizmo II twice a day, and finally I have a starter that seems to be behaving itself. The bubbles are smaller and more even, the starter has doubled in size, and responds well to being fed. And it doesn't smell bad at all, just yeasty, like it's supposed to. Tomorrow, I'm going to make my first ever sourdough loaf, and I couldn't be more relieved that this part of the process is finally over!!!

Day 11

To summarise, the next time I make a sourdough starter, I will be doing the following;

  • Use 150g organic rye flour and 175ml warm water (no fruit)
  • Feed the starter daily, or twice a day if the weather is warmer
  • Discard all but 50g of the starter each time it is fed, and feed with 100g rye flour and 125ml warm water
  • If not using regularly, keep in the fridge and feed weekly. Return to room temperature however before using in a loaf. 
I hope that this blog post has entertained you, and more importantly, I hope that by reading about my trials and traumas I can help you avoid them yourself! Come back soon to find out how the loaf comes out... 

V x

Wednesday, 17 April 2013

Soda Bread, Welsh Rarebit and Episode Five of 'Bread'

For the last five weeks, I have dedicated most of my baking time to mastering the right techniques for baking bread, as it was a skill I felt I was lacking. My mission coincided with the start of Paul Hollywood's new TV series 'Bread', and each week I have reviewed the episode, and attempted to bake at least one of the loaves featured, with varying results! I am skipping an episode in my write ups here, as episode four covered sourdoughs, and work commitments have prevented me from starting to grow my starter culture, however rest assured when I get back from Belgium this weekend this will be the second thing to do on my list (after giving Gary a big hug of course!).

So, brushing past sourdoughs for now, episode five of the show was dedicated to soda breads, known by bakers it seems as 'the easiest of the breads'. The main thing to know about soda breads is that they vary from most other forms of bread due to the fact that they don't contain any yeast, the raising agent instead being bicarbonate of soda - hence the name. The magic occurs within soda bread due to the combination of lactic acid, found in buttermilk, and the soda reacting to form carbon dioxide, which in turn creates the bubbles that texture the loaf. This chemical reaction is instantaneous, which negates the need to knead and prove the dough as with yeast-based breads, therefore soda bread is a great option for when time is short. 

Soda Bread
Soda Bread

As with previous episodes, I have used Paul Hollywood's recipe, however this week for a couple of reasons I have had to make a few substitutions. Mostly this was down to not being able to purchase the correct ingredients in my local supermarket, and as I fear this may be a common problem depending on where you live and/or shop, I am going to share my amended version of the recipe, to show you how substitutions can be made. If you want Paul's original recipe you can find it here

The two main changes I made here were substitutions for not being able to find either plain wholemeal flour, or buttermilk in the supermarket. To compensate for the plain wholemeal, I used a self raising wholemeal flour, and halved the amount of bicarb of soda, as the SR flour already contains a rising agent. To compensate for not having buttermilk, I mixed normal milk with sour cream and a little lemon juice, which together creates the same properties as buttermilk. Here's my version of the soda bread recipe;

Ingredients

250 grams plain flour
250 grams wholemeal self raising flour
1 teaspoon salt
1/2 teaspoon bicarbonate of soda
150 ml sour cream
270 ml semi-skimmed milk
1 teaspoon lemon juice

Method

Pre-heat the oven to 200 degrees, and line a baking tray with greaseproof paper. In a large mixing bowl, sift both the flours together, add the salt and the bicarb of soda, and combine. In a jug, mix together the milk, sour cream and lemon juice together and set aside for a few minutes. Then, gradually add the fluids to the flour mix, stirring with a wooden spoon, to form a dough. Tip the dough out onto a floured surface, and bring the dough together into a ball without kneading it as this will prevent the bicarb from doing it's thing. 

Shape the dough into a ball, and then pat it down to form a flat-ish round. Transfer onto the lined baking tray, and using a sharp knife cut into four sections. Leave the four sections in one full round, as they will join together as the loaf bakes. 


Bake in the oven for 30 minutes, until golden in colour, and hollow sounding when tapped on the base. I checked my loaf a little too early here, and one of my sections broke off as I moved it, as the dough was still sticky in the centre. Once the loaf is cooked, remove from the oven and transfer to a cooling rack to cool. 


Taking inspiration from Monday's episode of 'Bread' I decided to turn my first ever loaf of soda bread into a Welsh Rarebit for our lunch. I started again with Paul's recipe as a base, but made a few adjustments based on ingredients and our own tastes. Paul's recipe is here, or mine is below... (pick mine!) 

Welsh Rarebit
Ingredients

120 ml semi-skimmed milk
1 tablespoon plain flour
200 grams grated mature cheddar
1 teaspoon mustard powder
1 teaspoon worcestershire sauce
90 grams bread crumb (roughly two slices)
1 egg yolk

Method

Heat the milk in a saucepan until it starts to boil. Add the flour and whisk well, making sure there are no lumps of flour in the mixture. Continue to whisk over the heat until the mixture starts to thicken a little. Add the grated cheese, and again whisk in, until the cheese has melted and forms a sauce. Add the mustard powder and the worcestershire sauce, and stir well. Add the breadcrumbs, and mix in thoroughly, the mixture will start to thicken to a paste, and will ball up in the pan. Transfer the mixture to a bowl, and set aside.

Cut slices from the soda bread loaf, and place under a grill to toast one side. Whilst the bread is toasting, take the cheese mixture, add the egg yolk and beat together.

Remove the bread from under the grill, turn each slice over, and spread the cheese mixture thickly over each piece. Return to the grill, and cook for 4-5 minutes until the mixture is bubbling and starting to colour. Remove, and serve hot. 


I am entering this post into this week's Made with Love Monday feature hosted over at Made w/ Luv by Javelin Warrior, as the whole meal was made totally from scratch, including the bread. 

Wednesday, 3 April 2013

Chocolate, Orange and Almond Biscotti and Episode Three Of 'Bread'

It's becoming something of a mini-tradition (ok, so it's happened exactly three times so far) for me to sit and watch the latest episode of Bread, notebook in hand, gazing in awe as Mr Hollywood finds yet more ways to turn flour, yeast, salt and water into all manner of different shapes, colours and textures, whilst Gary taps away at the computer on the other side of the room, trying to humour me. At the end of each episode, I turn to him, and ask his opinion on which of the breads shown in the episode I should attempt to make next, and we have one of those great conversations where I think out loud, and he mumbles agreement with whatever I am saying, and then I happily toddle off to find the bread flour.

I knew that this week was going to be different however as soon as the camera panned over a shot of Paul dunking crisp biscotti into his Chocolate Mocha dipping sauce, and the typing from the corner of the room stopped... "I want those please" was pretty much all I heard for the next 10 minutes.

So this week I made the Chocolate, Orange and Almond variation of biscotti from Paul's book (complete of course with the accompanying dipping sauce!) The full recipe can be found here along with two other variations, Pistachio and Cranberry, and Hazelnut and Date. 

Chocolate, Orange and Almond Biscotti
I found this recipe easy to follow, everything came together as described, but it does involve getting your hands dirty to bring the biscotti dough together at the beginning. My only issue really is that I didn't get a strong chocolate taste from my biscotti, and they are no way near as dark and rich in colour as Paul's. I can only think that maybe my chocolate wasn't as high in quality, as I used exactly the right quantity from the recipe? The orange flavours came through really well however, and the almonds added a great texture. 

All in all though, I would thoroughly recommend this recipe, it's quick in terms of bringing the dough together, and the longer bake times are more forgiving than a normal biscuit, where an extra 30 seconds can be all it takes to take a bake over the cliff. Plus, they look really impressive when you serve them to guests with their cup of tea! 


In terms of my 'bread-ucation' project, I did feel like I cheated a little bit this week, as although Paul says that the biscotti are made from a bread dough, I still feel like they don't really count. To counter this, I did make some Naan breads to accompany a homemade curry tonight, using a recipe for Curried Naan breads from 'Bread' although I omitted the sultanas and mango. They turned out really well!

Curried Naan Breads
I've also tried my hand at a white bread loaf, and some homemade pizza this week, and have been really pleased with the results... I think I might finally be getting somewhere!

Sausage, Mushroom and Pepper Pizza
Traditional White Bread Loaf


Friday, 29 March 2013

Flour Tortilla Wraps and Episode Two of 'Bread'

I'm going to start this post light of heart, as I am really enjoying my bread-making journey, and can feel my confidence growing more and more with every successful bake. So much so in fact, that I even went 'off-piste' from my self set syllabus this weekend and made pizza dough from scratch. I was particularly looking forward to this week's episode of 'Bread' featuring Paul Hollywood, as the theme was 'flat-breads', something that we consume a lot of in our house, but it had never occurred to me that they could be made at home... yes, I am a little slow on the uptake sometimes!

Paul took us around the world in this episode, giving us Cyprian Pitta breads, a Middle-Eastern Maneesh bread, and Mexican Corn Tortillas. As with the first episode, he evolved each of these bakes into a full on meal, each one oozing spices and flavours enough to have you slathering at the TV screen. As with the first episode, Paul demonstrated his bakes with a simple manner and a fistful of passion, that makes the show both easy watching, and yet very informative. I am enjoying this side of the 'silver fox', I find him much more sincere when he is baking alone, than when he is bantering and jesting with Mary Berry, and for me, because I am trying to learn here, I'm finding it a lot more accessible.

Gary and I watched the episode together, and at the end I asked him which of the breads from this week I should attempt as the next stage in my 'bread-ucation' (oh yes, I'm trade-marking that phrase right now!). We agreed upon the Corn Tortillas, from Gary's point, because he wanted to eat the Tortilla Stack that Paul made with the finished product, from my point, because it looked like the easiest of the three bakes to try first!

Here is where I hit my first stumbling block. The recipe calls for Masa Harina, a Mexican maize flour. I had no real expectation that I would find this in my local supermarket, however Paul's notes in the book said that you can substitute this for wheat flour. Now I'm not an expert in anything bread-related, and I'm not ashamed to admit I searched the supermarket shelves for 'wheat flour', and when nothing had such a title written on it, I went home, dejected.

I re-consulted the book, and decided to make flour wraps instead, and convert the stack idea into more conventional Fajitas. I have since realised, through research, and having a slightly calmer frame of mind, that all flour is made of wheat - duh, and that I should have been able to use a white or wholemeal flour to make the Corn Tortilla recipe.


Never-the-less. I had pressed on with my wraps, and tried to rectify the mistakes that I had made previously with my Bloomer. I weighed out the salt, sugar, butter and yeast first, so as not to get an overly salted bread like before. I practised my more aggressive kneading techniques, and placed my dough in it's 'warm place' to prove.

When I went back to my dough an hour and a half later as instructed in the recipe, I was alarmed to see that it had barely moved. The recipe did say that it didn't need to rise very much, but not at all!?!? Despite my panic, I soldiered on, mostly because we had nothing else for tea, but also because I needed to see how things turned out. I divided my dough, and rolled out the first circle. I quite quickly got into a motion of placing one wrap in the pan, rolling out the next, flipping the first and so on. They take literally moments to brown, and then it's onto the next.


I served our wraps with some lightly spiced chicken, and a selection of salsa, sour cream, guacamole and cheese. OH MY GOODNESS! These wraps were incredible! Still warm, soft and floury, they had a taste like nothing I'd ever experienced in shop-bought vacuum-packed wraps. I am NEVER buying them ever again!


I'm not going to post the recipe, as it's from Paul's new book, however the link for the recipe from the episode for Corn Tortillas is here. Roll on next week, and the next stage in my 'Bread-ucation'!!!!

Monday, 25 March 2013

Classic White Bloomer, and 'Bread' Episode One

Last week I blogged a review of the new cookbook 'Bread' by Paul Hollywood. I tried to get across the fact that I have in the past had very much mixed results when bread-making, and was relying on Mr Hollywood to teach me his ways, and equip me with knowledge to make the perfect loaf every time. 

On Monday, the first episode of 'Bread' aired on BBC2, and if you haven't had the chance to watch it yet, let me tell you it doesn't disappoint! If you read my book review, I explained how I found the book a little daunting at first glance, but thoroughly wonderful when I actually sat down and read it properly. The TV series however, is totally accessible and absorbing from the first moment. Paul's easy manner when demonstrating his recipes is captivating and yet brilliantly down to earth, and his passion for a good bake radiates from the screen. We have seen glimpses of Paul's teaching style during the Great British Bake Off Master-classes, however 'Bread' is 30 minutes of uninterrupted Hollywood doing what he does best. 

Coming back to my mission however to learn to bake bread, as I had a busy work week coming up, I got a head start on myself, and actually made my first attempt at the Classic Bloomer on Sunday, when I knew I had time for the proving etc. I used the book and followed the instructions to the letter, and overall was very pleased with the results. After watching the episode on Monday evening, there are a few things I would do differently, it just goes to show that you can get so much from something in writing, but watching it happen really positively enforces the method. 

My first attempt at Paul Hollywood's Classic Bloomer

As I used the exact recipe, I am not going to lift it, but you can find it here on the BBC Food website. I will however share a few baker's notes from my experiences.

  • When adding the yeast and the salt, you have to make sure that the two do not touch each other directly until you start to mix. I use a set of digital scales, and weigh as I am adding to the mixture. For some reason, when I added my salt, the scales did not register any additional weight, and I had to second guess the quantity. My bloomer was a little too salty to taste, and I am unsure as to whether this is because of the quantity of salt in the recipe, or a fault in my measuring. Next time, I will measure the salt out separately and then add it. 
  • In the book, and on the show, Paul says that you do not need to prove bread in a warm place, any normal kitchen at room temperature will be fine. I tried this, and after around 90 minutes there was hardly any rise in my dough. Taking matters into my own hands I relocated my dough to my go-to 'warm place' and it flourished very nicely after that. 
  • After the knock back, you shape the dough, and then put it on a tray, cover it and place it in a bag to rise. When I made my bloomer on Sunday, I found that it rose beautifully, however the weight of the greaseproof paper and then the bag caused the dough to expand more sideways than upwards. I ended up with an albeit tasty, very wide and low loaf, that was a bit misshapen at one end. When Paul made the bloomer in Monday night's episode, he place two upturned mugs on either side of the loaf before covering with the greaseproof, so that it didn't touch the top of the loaf. Genius. 
And there you have it! I was really pleased with my bloomer, and I'm confident that the next time I make it (which will be soon) I will get it just right! Now I'm really looking forward to tonight's episode, which will be about various flatbreads... Yum!


Friday, 15 March 2013

Book Review: Paul Hollywood's 'Bread'


With every bakers' favourite 'silver fox' (sorry Schofe, but the title is definitely in contention) due back on our screens imminently, I, along with many others I suspect, am very much looking forward to a great BBC production, some fabulous recipes and great artistic shots of gorgeous loaves of bread... foodie heaven. Now I love a good food show as much as the next person, I ogle the baked treats on The Great British Bake Off, I watch Masterchef with a cocky 'I could do better than that' attitude when really I know I'd freeze in front of the camera worse than anyone, and my Saturday morning cleaning spree wouldn't be the same without James Martin navigating celebs and chefs across the TV screen in the background.

But my anticipation for Mr Hollywood's new series goes much deeper than the superficial love of a good TV show, because, despite many... and I mean many... attempts, I have yet to really master baking a loaf of bread. And it goes to show my faith in the man himself that when I first heard about the new show, and the cookbook that underpins it, my first reaction was 'finally! I'm going to learn how to bake bread!'


'Bread' by Paul Hollywood, is in all good bookshops already, and I have my copy here, ready and waiting for me to painstakingly follow episode by episode. My plan is to watch the show, pick up the tips, learn from the master so to speak, and then attempt to recreate the bakes each week, until I am much more confident in reaching for the strong white flour and yeast and creating good homemade breads.

The blurb on the back of the book gives a clear message about what can be found inside, in Paul's words: 'It's time to take bread off the side plate and put it back where it belongs: in the centre of the table." In short, the book contains a wide collection of bread recipes, from bloomers to sourdough, ciabatta to corn tortillas, flatbreads, brioche and fruit loaves. The twist is that with each bake, Paul has then suggested a full recipe that incorporates the bread. Irish soda bread therefore becomes Irish Rarebit, Malt Loaf is embedded in a Marmalade version of Bread and Butter pudding, and there are stews, curries, and salads galore.

At the first initial thumb-through of the book, I must admit to feeling a little over-whelmed. I couldn't see the bread for the Limoncello Trifle, and I wasn't sure whether I was going to get what I wanted out of this and learn the basics of making good bread. Because the recipes have been grouped together by type of bread, rather than the traditional starters, mains and desserts format that we are used to, the pages jump from pudding to salad to snack and back to pudding again, with pictures of loaves in-between.

I needn't (kneadn't!! Sorry..) have worried though. Sitting down with a mug of tea, and my concentrating face on, I read the book again, as intended from front to back. It truly is an incredible culinary feat. Paul begins by outlining his mission, and quickly moves on to a really good overview of the best equipment, ingredients and techniques to use. The descriptions are clear, and honest - "Bread doesn't need much kit".


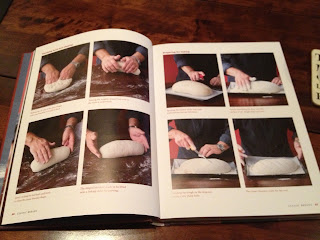
Then the real baking begins. We get eased in with a Classic White Bloomer, a few Rye Breads, and Maltloaf. Then, as the book progresses, we graduate from Classic Breads to Soda Breads, then Flatbreads, Continental bakes, and eventually to Enriched Breads, with Danish Pastry Dough and Brioche. The photography that supports each page is stunning, with great action shots of Paul spinning pizza dough alongside rustic style photos of each bake and dish. And what won me over completely are the step by step pictures that underpin the methods for making the bread doughs, so that a novice like me can refer back at each stage and check that the dough looks like it is supposed to do.


This isn't a normal cookbook, and if that's what you are looking for, then this might not be the book for you. There is the odd curry, a few puddings, and a sprinkling of breakfast recipes, and it isn't easy to pick up if you are looking for some last minute inspiration for dinner. What this book is however, is a baker's masterclass in bread-making, with a real clear cut mission to move us away from the classic white loaf, and back into traditional bread-making and thinking about pairing bread with great home cooking.


The more I have studied this book, the more pages I have folded, notes I have jotted, and recipes I have spotted that at first were lost in the masses only to be uncovered like little gems. To summarise, a little daunting at first glance, but actually a really good beginner to baker journey, this is definitely a cookbook to follow and learn from, rather than just thumb through for a random recipe. I await episode one of the show on Monday night with great anticipation, and look forward to sharing my attempts at bread with you all...


Disclaimer: The views and opinions in this post are my own, and are not part of any sponsored or paid for activity.

Friday, 8 February 2013

Custard Slices: GBBO Comic Relief Challenge Three

So far in my self-inflicted challenge to re-create the Technical Bakes from the Comic Relief GBBO episodes, I have attempted Chocolate Eclairs, and Bakewell Tart, with some reasonable successes. I'm not going to lie - I got a little bit cocky. So I decided that the third challenge to face would be the Custard Slices. For this, I am using Paul Hollywood's recipe from the BBC Food site.

I dutifully purchased the required ingredients, and tonight set about reading the recipe and preparing to conquer the Custard Slice. Then I realised two things. Firstly, I have never made rough puff pastry before in my life... and secondly, I have never made patisserie crème, nor have I ever successfully mastered custard from scratch. Needless to say, my confidence was immediately shot. 

None-the-less, I bravely opened the packet of flour, and started sifting. As with the previous challenges, I will copy the recipe and instructions below, with some photos of the process. These are my main notes from the recipe.


Making the rough puff pastry was surprisingly straight-forward, the instructions were clear - the key I figured out was to handle it as little as possible. I only used about two thirds of the water stated in the recipe until the pastry came together, so stopped adding it then. The rolling, folding and resting sequence is quite time consuming, in fact this recipe is one for a leisurely afternoon or evening bake, as there are lots of steps for mixing, cooling, assembling, and quite a few breaks in between. (It does give you plenty of time to clean up and wash up in between stages though).

I was quite pleased with my pastry, although both sheets did puff up more on one side than the other, and the bottom sheet flaked quite a bit when I transferred it to the tin. 

The patisserie crème was the bit that I was most daunted by, and I think I cooked it a touch too long as I had to work really hard to get it through the sieve at the end but other than that I managed to follow the recipe fairly uneventfully. 

I assembled the pastry and patisserie crème, and finally spread the icing over the top layer. As both my sheets of pastry were a bit bumpy, I turned the top sheet over so that the flat bottom side was facing upwards (I'm all for using illusion to hide mistakes!). I drew on the lines of melted chocolate, and pulled a cocktail stick through to create the 'feathered' effect, and voilà! By no means perfect, but I was happy with the first attempt, and most importantly they tasted great! Home-made is always better than shop-bought! 

---

The Recipe: taken from the BBC Food website


Ingredients

For the rough puff pastry
  • 225g/8oz plain flour, plus extra for dusting
  • ½ tsp salt
  • 200g/7oz butter, chilled and cut into 1cm/½in cubes
  • 140-160ml/5-5½fl oz water
For the crème pâtissière
For the icing

Preparation method

  1. In a large bowl mix the flour and salt together. Rub in a third of the butter until the mixture resembles fine breadcrumbs. Then roughly rub in the remaining butter, leaving large lumps.


  2. Add the water a little at a time until the pastry just binds together (you may not need all the water).


  3. Tip the pastry out onto a floured work surface. Roll into a narrow rectangle about 2.5cm/1in thick.


  4. With the pastry vertically in front of you fold the bottom third of the pastry up onto the middle third then the top third down onto the other thirds. This is called a turn.


  5. Wrap the pastry in cling film and place in the refrigerator to chill for 10 minutes


  6. Take out of fridge and with a rolling pin roll out again into a narrow rectangle and repeat the turn as before.


  7. Chill again and repeat the rolling and turning once more, so a total of three times. Wrap the pastry in cling film and return to the fridge to rest.
  8. While the pastry is resting, make the crème pâtissière. Pour the milk into a pan and add the split vanilla pod and its seeds. Bring the milk mixture to the boil, then remove from the heat.


  9. Whisk the sugar, egg yolks and cornflour together in a large bowl.


  10. Pour out a little of the hot milk onto the egg mixture, whisking continuously. Whisk in the rest of the hot milk until well-combined, then return to the pan.
  11. Cook the mixture over a gentle heat, stirring continuously, until the mixture becomes thick. It will just come to the boil.
  12. Remove from the heat and pass the mixture through a sieve into a clean bowl. Add the butter and stir until melted and thoroughly combined.


  13. Leave to cool, cover with clingfilm and then chill before using.
  14. Pre-heat the oven to 220C/425F/Gas 7. Line two baking trays with baking parchment.
  15. Divide the pastry into two equal pieces and roll out both pieces to 20cm/8in square and 5mm/¼in thick. Then place each pastry sheet onto the lined baking trays, and chill for 10-15 minutes.


  16. Bake the pastry sheets for 10-15 minutes or until golden-brown and crisp. Set aside to cool.


  17. While the pastry bakes, line a deep 23cm/9in square baking tray with foil with plenty of extra foil at the sides. The extra foil allows you to lift out the assembled slices.


  18. Place one pastry sheet in bottom of the lined baking tray. (Reserve the prettiest piece for the top.)


  19. Spread the crème pâtissière evenly onto the pastry in the baking tray before placing other piece of pastry, on top. Refrigerate while making the icing.


  20. For the icing, sift the icing sugar into a bowl. Stir in cold water until thoroughly combined and set aside.
  21. Transfer the melted chocolate into a piping bag fitted with a small plain nozzle, and set aside to firm up slightly.
  22. Take the custard slice from the fridge and spread the icing over the top layer of pastry.


  23. Using the piping bag, draw ten parallel lines along the top of the icing in one direction. Using a tooth pick, pull parallel lines about 2.5cm/1in across the melted chocolate and icing in alternating directions to create a feathered effect.


  24. Place the slice back into the fridge to set.
  25. Cut the finished vanilla slice into eight pieces.


  26. Using the foil carefully lift the portioned vanilla slices out of the tray and place onto a serving platter.