Hi! Welcome to my blog. I am a major foodie, with a haphazard cooking philosophy, currently making that transition from cooking and baking for friends and family to 'wonder if I could make this my career'. Follow me for recipes, the outcomes of a few experiments, and general lovely foodiness. Opinions, reviews and recommendations are all my own.
Showing posts with label Credit Crunch Munch. Show all posts

Sunday, 2 June 2013

Possibly the Best Broccoli Dish Ever...

Continuing my quest to find great tasting food that has high nutritional values, I decided to tackle a personal nemesis last night - broccoli. Whilst I don't dislike broccoli, it's hardly up there in my top ten ingredients either, and aside from smothering it in cheese sauce, I've never really found a way to cook it that makes it taste of ... well ... anything. 


That aside, as I have started my research into nutritious food types and broccoli sits firmly at the top of the list of so called superfoods, full of antioxidants, vitamin C, and dietary fibres. So when it came to fridge raiding to find an accompaniment for roast chicken and potatoes, the obvious choice was the large portion of broccoli in the veg compartment. I just couldn't face it steamed or boiled though, and through sheer desperation to inject some resemblance of flavour into its florets, I opened the laptop, and googled the cry for help "interesting things to do with broccoli"! 

What I discovered was the following recipe from US food author Ina Garten, aka the Barefoot Contessa. Several reviews and comments all appeared to be unanimous in hailing this recipe as the best broccoli dish ever, the version I came across was on the Food Network, I made a few tweaks due to the ingredients I had in the house, and it honestly lived up to the internet hype...

Parmesan Roasted Broccoli


Ingredients...

Approx 350 grams broccoli
2 teaspoons crushed garlic (or 2 cloves)
4 tablespoons olive oil
1 teaspoon dried basil
salt and pepper to taste

zest and a squeeze of juice from one small lemon
40 grams fresh parmesan, finely grated

To make...

  • Pre-heat the oven to around 180 degrees.
  • Cut the broccoli florets away from the main stem, and arrange flat on a baking tray. 
  • Mix together the garlic, olive oil, basil, salt and pepper in a small bowl, and then drizzle evenly over the broccoli florets.
  • Roast in the oven for around 20 minutes, turning over in the oil mixture halfway through.
  • The broccoli is ready when the edges start to colour brown and crisp up. 
  • Transfer the roasted broccoli to a large bowl, add the lemon zest and parmesan, squeeze over around a tablespoon of fresh lemon juice, and toss lightly to evenly coat all the florets. 
  • Serve and enjoy! 

I found that the garlic and lemon flavours in particular worked really well with the broccoli, but the revelation for me was the taste and texture of the broccoli having been roasted rather than steamed or boiled. It retained much more crunch and firmness, plus none of those precious nutrients can escape in the water - I will definitely be roasting broccoli from now onwards!

I am entering this recipe into a few challenges this month, as it was so delicious I wanted to share it with as many people as possible!

Firstly, Credit Crunch Munch, run by Fab Food 4 All and Fuss Free Flavours, and hosted this month by Anneli at Delicieux. I am entering this because the dish was quick and easy and used just store cupboard ingredients and broccoli that needed using up. 


I am also entering into Made with Love Mondays hosted by Mark at Javelin Warrior, as it is completely made from scratch, with fresh ingredients.


I'm also going to take a punt, and enter this into Random Recipes run by Dom over at Belleau Kitchen. In the random recipe challenge, Dom ask participants to gather all their recipe books together and select a recipe at random. I don't really have a many books at all, and those I do are either for bread or cake decorating, however I'm hoping that the random google search that led me to this recipe will count? Plus, I really think that this dish fits the Healthy and Happy theme to a T! 


Monday, 13 May 2013

Superfood Pancakes, and a Review of Clarks Maple Syrup

Scotch Pancakes, Blueberry Pancakes, Drop Scones
Superfood Pancakes

I was recently sent some samples of Maple Syrup and Honey from Clarks to try, and within the same week, in fact literally a few days later, there was an article published by the Daily Mail detailing how maple syrup had been elevated to the lofty status of 'superfood'. I was curious to explore the science behind the idea of 'superfoods' a little, as it is a term that is used seemingly quite feely, and I wasn't entirely sure of the substance behind it. As it turns out, there are two opposing camps out there on the subject of superfoods, on the one side those who believe that superfoods contain high levels of antioxidants and phytochemicals that have substantial health benefits, and the other side, those who believe the terms is one invented and exploited by marketing companies. (It is worth noting that there is no legal definition to the term 'superfood'.)

A selection of Maple Syrup and Honey from Clarks

If we choose to look on side of those that do believe in the power of superfoods, then in simple science superfoods are those that are especially high in key nutrients, such as Omega 3, antioxidants and potassium, which are considered to have affects such as reducing the risks of cancers and cardiovascular diseases, increasing your immune system, and reducing depression. 'Famous' superfoods include blueberries, broccoli, oily fish and green tea to name but a few, and now, maple syrup can be added to that list. 

Predominantly maple syrup contains phenol compounds that house enzymes that convert carbohydrates into sugars, and the recent studies suggest that this could be the basis of an anti-diabetic compound. In addition, maple syrup also contains a high density of antioxidants, which are key in slowing down the oxidization, or ageing of the bodies cells, something that is not found in other natural sweeteners, even including honey. You can find more information on the health benefits of maple syrup on the Clarks website here.

All this talk of superfoods got me thinking, and as someone who constantly strives and yet falls short of eating a healthy diet, I wanted to have a go at creating something with my maple syrup that would make the most of it's new 'superfood' status. I had a look at some of the other ingredients that are also considered superfoods, and came up with this recipe for 'Superfood Pancakes', which is loosely based on scotch pancakes, or drop scones as they are also known in some parts of the UK. Containing blueberries, oats, and wholemeal flour, there are four, yes four, superfoods in this recipe! Which makes them really very good for you in my book (if you overlook the milk, sugar and butter content). 

Superfood Pancakes


Ingredients

150 grams wholemeal self raising flour
50 grams rolled oats
100 grams golden caster sugar
200 ml semi-skimmed milk
1 large egg
150 grams frozen blueberries

a little butter to cook

maple syrup to serve

Method

These are the easiest breakfast/ brunch/ snack to make, just beat the batter together and cook it! The quantities given should make 12 - 15 pancakes.

Sift the flour into a large bowl, add the oats and golden caster sugar, and mix well...

Whisk together the milk and egg, make a well in the centre of the dry mix, add the liquids, and whisk together to form a batter...

Add the frozen blueberries and mix well into the batter...

Melt a little butter in a frying pan or on a griddle, and drop three dessert-spoonfuls of the batter into the pan. It will spread a little but not greatly...

When the pancakes start to have little bubbles in the surface, and are colouring around the edges, flip them over carefully to cook on the other side...

And then serve hot, with a good healthy drizzle of maple syrup!

Gary and I had three pancakes each, which we topped with each of the three maple syrups in order to 'judge' each one. The vanilla maple syrup was noticeably sweeter than the others, although honestly I didn't get much of a vanilla flavour coming through. The Grade 1 and Grade 2 syrups were great, the Grade 2 definitely being my favourite, with a real earthy flavour coming through which worked perfectly with the pancakes.

I'm entering this recipe into Credit Crunch Munch, run by Camilla and Helen, and hosted this month by Janice at Farmersgirl Kitchen, as it is made from store cupboard ingredients, and cheap to make.


I'm also entering into Made with Love Mondays run by Mark over at Javelin Warrior, as it was made totally from scratch, on a Monday, with a lot of love... simple! ;-)


Disclaimer: I was sent a selection of maple syrups and honey to try by Clarks, however all opinions expressed in the post are 100% honest and my own.

1st June 2013 - I am updating this post to be entered into the Feel Good Food challenge, hosted by myself, as the theme is blueberries, and these pancakes are super-nutritious!


Friday, 5 April 2013

Definitely NOT A Cornish Pasty

Disclaimer: This may look like a Cornish Pasty, it may even taste like a Cornish Pasty, but it is definitely NOT a Cornish Pasty... I think! I say this because, a) it's my own recipe, and I am not Cornish, b) it was made in my kitchen in Chesterfield, and therefore under the PGI (Protected Geographical Indication) status it cannot claim to be a Cornish Pasty, and most importantly c) my partner and in-laws are from Devon, and due to the Devon/Cornwall rivalry, I fear I would be disowned for making something 'Cornish'. I have even had to change the way I eat my scones... 

So this is my Northern, hybrid, slightly less than proper way of making a C*****h Pasty. From here on in we will refer to it simply as 'pasty'. 

Cornish Pasty, Pasty, Pasties,

Ingredients - makes 6 - 8 medium sized pasties. 

For the pastry
- 225 grams strong white flour
- 225 grams plain flour
- 1 teaspoon baking powder
- 1 teaspoon sea salt
- 125 grams butter
- 2 free range egg yolks
- 100 ml cold water
- 1 egg, beaten, to glaze the finished pasties

For the filling
- 300g rump steak
- 1 small onion
- 1 small swede
- 2 large potatoes

This is the 'totally-by-hand' method to make the pastry, although if you are blessed with a food processor you can use it to mix up the pastry also. Start by sifting the flours, salt and baking powder together, and mix well. Cube the butter, and rub into the flour to create a breadcrumb like texture. Add the eggs yolks, and mix through using a fork until well combined. Now, add a third of the water, and mix through using the fork, repeat with another third of the water. A dough should now be forming, slowly add a little more of the water until the dough comes together into one piece. Knead the dough briefly so that it holds together, then roll up into a ball, wrap in cling film and place in the fridge for an hour. 

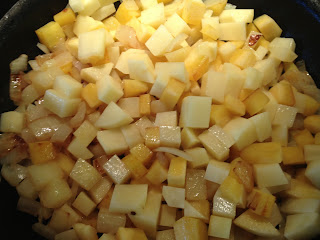
Meanwhile, chop the onions, potatoes, swede and beef. Ideally, all the ingredients should be in equal sized pieces. Put a little oil in a frying pan, and shallow fry the onions until soft. Add the swede and potato and flash fry for just a minute, and then take off the heat and set aside.

Potato, Swede and Onion Filling

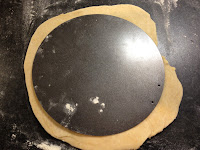
Pre-heat the oven to around 170 degrees Once the pastry has chilled, remove it from the cling film, and roll it out to about 3 - 5 mm thick. Using a dinner plate or similar, cut out circles from the pastry. I used the inside of an 8 inch tart tin, to make some smaller sized pasties, it depends how big you want them to be. Bring the offcuts back together and roll out again to cut out more circles. Try to avoid doing this too many times, as you don't want to overwork the pastry. 

Pastry Circles, Cornish Pasty, Cornish Pasties

Now, add the vegetables to the beef, season generously with salt and pepper, and mix well.

Beef, potato, swede and onion Cornish Pasty filling

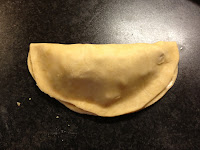
Now, to make the pasties, divide the filling evenly between the pastry circles. Take the beaten egg, and brush around the edge of half the circle. Fold the pastry in half, and press the edges together. 

Cornish PastyCornish Pasty

Starting from the left hand side, twist over a small amount of the pastry edge, pressing it back into itself. Holding the fold in place, move along the edge, and repeat the action, creating a crimped edge. Continue all the way around the pasty, when you get to the other end, tuck the final piece of pastry under itself to finish the edge. 

Cornish PastyCornish Pasty

Place the crimped pasties on a lightly greased baking tray, and brush all over with the remaining egg wash. Bake for approximately 30 - 40 minutes, depending on their size. When they are cooked, they should be a deep golden brown all over, and make a hollow sound when tapped.They should also be firm on the base. If needed, for the last 5 minutes of cooking, remove them from the baking tray, and place back onto the oven shelf to allow the heat to get directly to the base. We don't want any soggy bottoms!

Cornish Pasties

Once golden all over, remove from the oven, and place on a cooling rack. Serve hot or cold, for lunch, tea or dinner, or as a mid afternoon snack. Pasties will keep well for a couple of days in the fridge, and can be reheated. 


The classic Cornish pasty is made from potato, swede, beef and onion, however, as these are not Cornish, you could also use carrots, sweet potatoes, any ingredient really, and are a great way to use up leftovers. Which is of course, what the Cornish pasty was originally used for. As these are made from cheap and ready ingredients, I am entering them into this month's Credit Crunch Munch, run by Camilla at Fab Food 4 All, and Helen at Fuss Free Flavours


This month's Credit Crunch Munch is a blog hop... here are some of the other entries.


Monday, 4 March 2013

Hearty Beef Goulash

Goulash is a traditional Hungarian dish with hundreds of varieties and recipes. The name originates from the name of the cattle-herders in Hungary, and evolved to become the name of the meat dish that the cattle-herders made. Sometimes it is made as a soup, and sometimes more as a stew. This is my interpretation of the dish, made with store cupboard ingredients, and it makes an easy, economical and hearty dish. It can be served with potatoes or rice, and is ideal for making in a slow cooker during the day, or making at the weekend and freezing in batches to take to work for individual lunches. 

The dish is wide open to substitutions and additions to use up what you have, you may consider switching the cannellini beans for kidney beans, or adding new potatoes or carrots, feel free to have some fun with this one!

Ingredients

1 Onion
500 grams Casserole Steak, diced
1 teaspoon Paprika
400 ml Beef Stock
400 grams (1 tin) Chopped Tomatoes
1 Red Pepper
1 Green Pepper
400 grams (1 tin) Cannellini Beans
3 teaspoons Cornflour
Salt and Pepper to taste

Method

Take a large heavy bottomed saucepan, and heat a tablespoon of olive oil. Roughly chop the onion, and add to the pan. (You can test that the oil is hot enough by dropping a piece of the onion into the pan - if it sizzles on contact, it is ready to use) 

Once the onions have softened and turned clear, add the beef to the pan. Fry for 2 - 3 minutes until the meat browns, then add the paprika and stir until the meat is well coated. 

De-seed and chop the red and green peppers and add to the pan. Add the beef stock and the tomatoes, and stir well. Cover the pan with a lid, and leave to simmer for 1 - 1 1/2 hours. Alternatively at this point transfer the mixture to a slow cooker, and cook on the low setting for 8 hours.


When the meat has tenderised, drain the can of cannellini beans and add. Mix the cornflour with a few teaspoons of water to make a paste. Add the cornflour mixture to the pan, and stir thoroughly to thicken the goulash. Season to taste. Cook for a further 15 - 20 minutes to allow the cannellini beans to cook, then serve with potatoes or rice, or simply in a large bowl with hunks of crusty buttered bread.


I am entering this into Credit Crunch Munch run by Helen at Fuss Free Flavours and Camilla at Fab Food 4 All, as it is a brilliant dish for using up leftovers, making the most of cheaper cuts of beef, and great for freezing or portioning for lunches. Helen has asked for substitutions this month, and although there aren't any in my recipe, the dish itself is great for adapting and substituting depending on what is in the house.


Sunday, 3 March 2013

Plum and Almond Crumble

As much as I love experimenting with recipes and flavours from different cultures, sometimes the British Classics are just simply the best. Almost any fruit can be made into a crumble, which makes it a perfect dish as well for using up seasonal fruit. A crumble can be pepped up in any number of ways, through the addition of spices to the fruit, or nuts to the crumble mixture, a teaspoon of ginger in a rhubarb crumble totally transforms it trust me. 

Plum and Almond Crumble
Today, I had a punnet of plums that I had forgotten I bought, and they needed to be used up. I had also discovered when tidying my store cupboards that I had eight, yes eight, packs of ground almonds hanging around (for some reason, almonds and lasagne sheets I seem to always forget I have and buy them again and again unnecessarily). 


Ingredients

For the stewed plums;

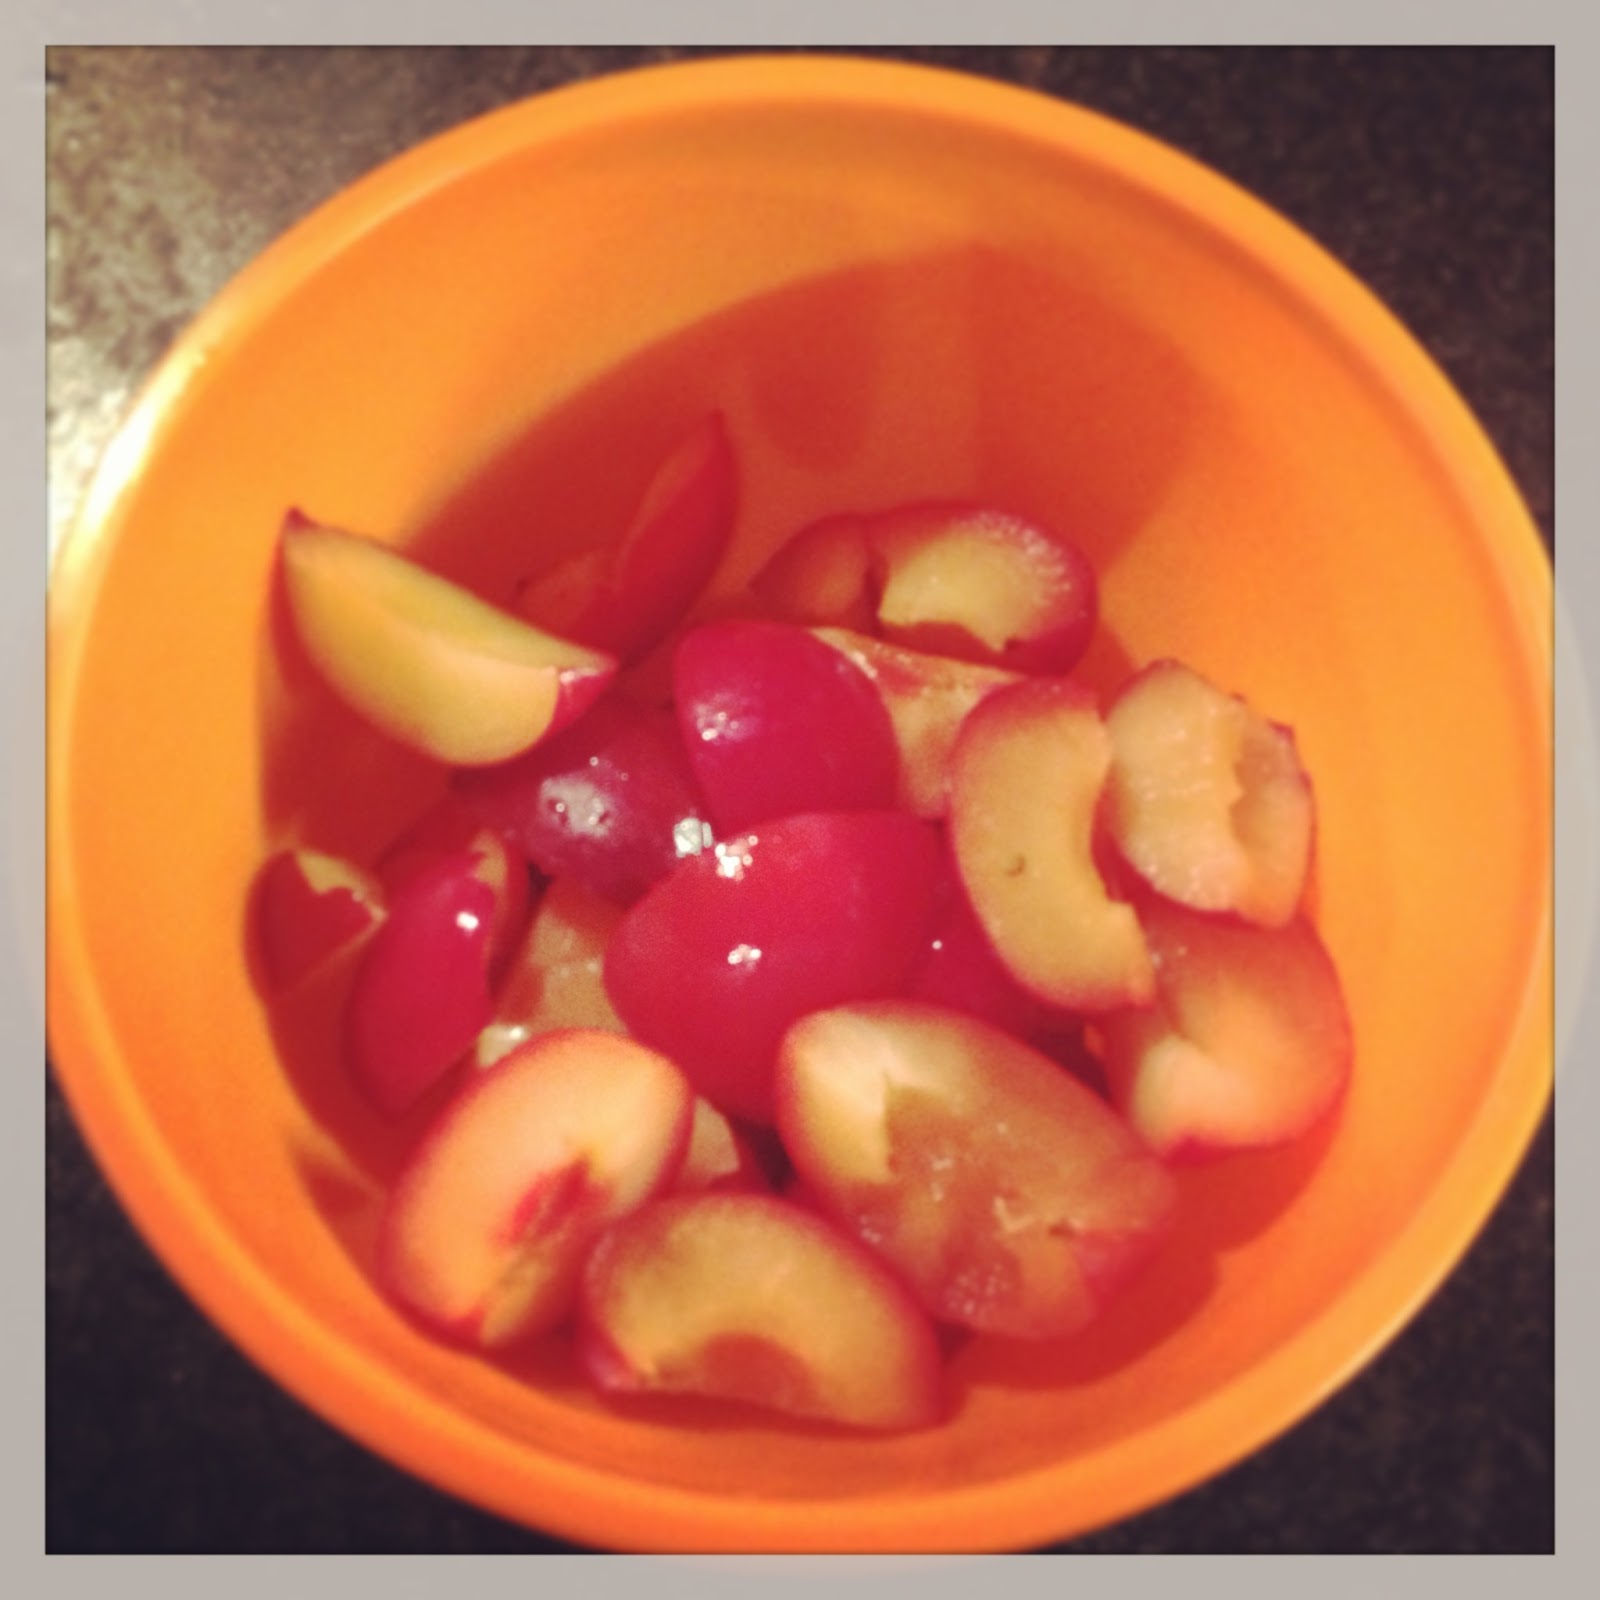
350 grams plums, stones removed and quartered
2 tablespoons water
2 tablespoons sugar
1/2 teaspoon mixed spice

For the almond crumble;

125 grams plain flour
75 grams butter
80 grams sugar
30 grams ground almonds

For the topping;

Flaked almonds
1 tablespoon sugar

Method

Put the plums, sugar, water and mixed spice in a saucepan, and place over a low heat. Cook for 10 - 15 minutes, stirring occasionally, until the sugar has dissolved, and the plums are starting to stew, but are still holding some of their shape.


Remove from the heat, and divide into four ramekins.


In a large mixing bowl, add the flour and butter, and rub together to form a fine breadcrumb like texture. Add the sugar and ground almonds, and mix well.

Spoon the crumble mixture over the plums, and press down with the back of a spoon.


Sprinkle the flaked almonds and sugar over the top.


Bake for 20 minutes, and then serve with double cream, ice cream or custard. 

I am entering this post into this month's Credit Crunch Munch, hosted by Helen at Fuss Free Flavours, and Camilla at Fab Food 4 All, as it a great recipe for using up fruit, and is made from simple store cupboard ingredients. Helen has made a special request this month for substitutions, and this recipe is wide open for them, you can substitute the fruit, the spices, and the almonds for any combination that takes your fancy! I'd love to hear any ideas below that you might have...


Saturday, 16 February 2013

Minced Beef Pie: A Real Kick at the Pantry Door!

Looking out of the window today, it's hard to believe that only 48 hours ago, there was snow on the ground. The weather the last few weeks has been somewhat unpredictable, from snow to rain to clear skies and back again - I don't think I remember a time when snowstorm follows snowstorm in the way it has this year. Anyway, on one such evening last week, when the snow was coming down, and Gary and I were trying to come to some compromise over who would brave the weather to get to the supermarket, desperation to keep warm led me to the freezer to see whether there was anything that could be salvaged to form a meal. 

I came up with this Minced Beef and Vegetable Pie, which we had with some leftover oven chips and onion rings. I was very pleasantly surprised by the taste and how well the whole pie held together, so thought I would share it with you all!

Minced Beef Pie

These are the ingredients I used, this made one large pie, plus two smaller pies which Gary had for lunch over the following days. It is really a case of using up what is available, so feel free to add or omit ingredients from the beef mixture as necessary...

For the shortcrust pastry
  • 250g plain flour
  • 125g butter
  • pinch of salt
  • 100ml ice cold water
  • 1 egg, beaten 
For the Minced Beef filling
  • 1 tsp sunflower oil
  • 500g lean minced beef
  • 1 tsp thyme
  • 1 tsp rosemary
  • 1 Knorr Beef stock cube
  • 2 serving packets Bird's Eye frozen mixed vegetables (mixed peas, carrots and brocolli) 
  • 1 tin Broad Beans, drained
  • 100ml beef gravy made from instant gravy mix
Pre-heat the oven to 180 degrees and lightly grease a pie dish.

To make the pastry, sift the flour into a large bowl, and mix in the salt. Cube the butter and rub into the flour to produce a fine crumb like texture. Add the water a tbsp at a time. I have quite warm hands, so use a fork for this stage to stir the water through the mixture, and add a small amount at a time until the pastry starts to ball up. I usually do not have to use the full amount of the water. Once the pastry starts to ball, use your hands to gather the mixture together and shape the dough into a ball. Wrap the dough in clingfilm and refridgerate for 30 minutes. 

Meanwhile, in a large saucepan, heat the oil, and then add the minced beef to brown the meat. Add the herbs and stock cube and stir well. Once the meat is fully cooked, reduce the heat, and add the vegetables straight from the freezer, and the broad beans. Stir well. Finally, once the vegetables have warmed through, make up the instant gravy, and add to the pan. Place a lid over the pan and simmer on a low heat whilst you blind bake the pastry.

Split the dough into two halves, wrap one half in clingfilm and place back in the fridge. Roll out the pastry to around 5mm thick, and transfer to the pie dish. Press the pastry into the corners and ridges of the dish, and then trim off any excess. Cover the pastry with a sheet of foil, and place in the oven for 15 minutes to blind bake - so we can avoid any soggy bottoms! After 15 minutes, remove the foil, and return to the oven for a further 5 minutes to crisp up.

Remove the pastry from the oven, and spoon in the minced beef mixture. Roll out the remaining pastry to make the lid. Using a pastry brush, brush some of the beaten egg around the edges of the pie bottom. Transfer the pastry for the lid over the top of the dish, and press the edges onto the edges brushed with egg to make a join. Trim of any excess, and make a small slit in the centre to allow any steam to escape. 

Brush the top of the pastry with the beaten egg, and place in the oven for a further 15 - 20 minutes until golden brown. 

Serve, and enjoy! 
Minced Beef Pie and Chips
I am entering this recipe into Credit Crunch Munch hosted by Camilla at Fab Food 4 All, and Helen at No Fuss Flavours, as it was made entirely from leftover ingredients found in my cupboard and freezer, and can be adapted to suit anything that needs using up.