Hi! Welcome to my blog. I am a major foodie, with a haphazard cooking philosophy, currently making that transition from cooking and baking for friends and family to 'wonder if I could make this my career'. Follow me for recipes, the outcomes of a few experiments, and general lovely foodiness. Opinions, reviews and recommendations are all my own.
Showing posts with label Cupcakes. Show all posts

Sunday, 11 May 2014

The Pantry Door Sunday Update - 11th May

Well! That was a busy two weeks! Cakes, weddings, visitors, bank holidays, and a whole lot of day job too! The biggest news this weekend however is this - on Friday, the local council came out to assess my home kitchen for running the business, and I am pleased to say not only did we pass the inspection, but were awarded the full 5 stars! Phew, that's another hurdle overcome!

I must say, this is one of the reasons that I put off setting up for so long - having been told by so many people I can't do this or I can't have that - there were so many reasons given to me as why my beautiful kitchen would not be suitable. And they were all wrong. In truth, the local environmental health team are more concerned with your procedures for managing hygiene, and CBC have been great from my first enquiry, offering both advice and reassurance throughout. If anyone else is in a similar position and not sure about taking the next step, my advice is pick up the phone, and talk to the experts - you'll be surprised how supportive they can be. 

So now everything is 100% in place, the council, the tax man, and the customers! Here's the fun bit, this is what we have been making in the kitchen these past two weeks... 

iPhone Cake - complete with apps and the birthday girl taking a 'selfie'

Damask Print 50th Birthday Cupcakes

Metallic Gold and Ivory Wedding Cake with Gold Edged Sugar Roses

Mixed Cupcakes for a Mechanic

Dirty Dancing Movie Reel Cake - with Edible Pictures

Dairy Free 'In The Night Garden' Cake

Star Trek 'Enterprise in the Galaxy' Cake

Subaru Cake

Saturday, 22 June 2013

The Tale of a Wannabe Wedding Cake Decorator

I have made no secret of the fact that I harbour a dream to quit the medical sales rat race one day and make a living from baking and cake decorating. I do in fact have something of a game plan for this, but have a little superstition (founded from blowing out the birthday cake candles I fear) that if I speak my goals out loud they will fail to come true. Maybe one day I shall surprise you all with the big reveal when it happens, and be all nonchalant .."oh yes, I planned this all along"... 

Anyway, I digress. When I first started this whole cake decorating/ recipe developing/ blogging malarkey back in September, a very dear friend of mine approached me and asked me to make her wedding cake, for the big day in June 2013. At that time, my cake decorating skills had pretty much started and ended with this...


... pretty huh! None-the-less, I have a terrible character flaw in never saying 'No' to anyone, and more importantly, my gorgeous friend had a seemingly bottomless supply of faith and belief in me, something which I will never forget, and will cherish for the rest of my life.

The wedding was last weekend, and after months of planning, taste testing, sharing photos and ideas, and colour matching buttercream, not to mention a 16 hour mammoth baking session, the finished cake took its place amongst the stunning vintage-style floral displays and table decorations. 

The brief was this: A selection of vintage style cupcakes, displayed in a tower, with a small one tier cake on top for the cutting the cake ceremony. The wedding colours were a selection of pastel lilacs, pinks and ivory, and the wedding flowers included memory lane roses, sweet avalanche roses, and frilly lisianthus. 

Colour-matching buttercream using paint colour charts!

Memory Lane Rose Image
Sweet Avalanche Rose Image


 The Creative Process...

Sugarcraft Flowers in Production
And here are a selection of photos of the finished display...

The finished display installed at the venue

The display had 6 different cupcake designs, with each design in 3 colours

Edible pearls added to the 'Vintage' theme

Additional sugarcraft flowers and leaves were added to the stand as decorations

We used these adorable shimmery lace cupcake wrappers for a more elegant feel

How cute are the personalised Lego Bride and Groom!?

The cake was 8 inches, with a mini 3 inch cake for the Bride and Groom to stand proud

Handmade sugar eucalyptus springs added some greenery to the display

The stand was decorated with strings of pearls too

There were a mixture of buttercream and fondant topped cupcakes

The edge of the cake was decorated with ribbon and lace, and embossed with edible pearls

A very vintage inspired wedding cake and cupcake tower!
Without sounding self-indulgent, this whole process was so exciting, and rewarding, and has totally re-affirmed my desire to do this and only this for a living. From the original planning, right through hand-making the flowers, and finally assembling the tower and seeing the vision come to life, I loved every moment, and would do it every day if I could. Thank you so much to my amazing friend for giving me the trust and the opportunity to do this, and I'm so pleased that you loved it! xxx

Is it possible for the cake decorator to get post-wedding blues too? My dining table seems very bleak now it is no longer covered in sugar roses! 

Thursday, 6 June 2013

Product Review: The Craft Company

I recently had the opportunity to review some products from The Craft Company, and unlike a lot of brands that contact bloggers for product reviews, The Craft Company tackled things a little differently, by giving me free reign which products to review from their website, up to a certain value. This in itself was an ingenious move by the team, and I spent a happy couple of hours browsing through their site, and I mean hours! They honestly sell anything you could want to do with cakes, baking and cake decorating. From ready-made cakes and cake toppers, to key ingredients, modelling tools, moulds, cake tins, boards and boxes and stands, they have the perfect products for any level of cake decorator, and to suit any scale of project. After lusting after some gorgeous wedding cake stands, and hovering over a selection of modelling tools that are missing from my collection, I managed to bring myself back to the task in hand, and set about choosing some products to review.

The products I chose I felt were a good selection of the kinds of things on offer from The Craft Company, from ready-made decorations, to the tools to make your own.

Culpitt Ready Made Sugar Daisies - Pack of 12 - £2.30


I chose this product to test, as I make a lot of my own sugar flowers, however it can be quite a fiddly job, not everyone has the time or desire to learn this skill, and sometimes even I am looking for a quick decoration for a batch of cupcakes without getting my decorating kit out and starting to colour and shape petals. I was also keen to judge how well The Craft Company would be able to transport the flowers, as they can be so delicate and fragile. 

All 12 daisies arrived in my kitchen in one piece, and I have to admit to being pleasantly surprised by this! The sugar daisies are a little thicker than I would normally make, which probably explains why they were more robust in transit. The beauty of this product is in their simplicity, all 12 daisies out of their packets and on top of their cupcakes in under a minutes, and you have 12 pretty cupcakes all ready to serve with no fuss or mess at all!


Leopard Print Sugar Sheet - 148mm x 148mm - £2.95


This was the product that I was most looking forward to receiving, as I had never heard of sugar sheets before I browsed the website. Basically, these are a thicker version of rice paper, totally edible, and almost vinyl-like in texture. You can use any metal or plastic cutters on the paper to cut out shapes, to make easy decorations for cupcakes or cakes. I used a small butterfly cutter to make some quick cupcake toppers, but you could equally cut out lettering for a cake for example to get a great instant effect.

These sheets come in a range of colours and patterns, my only word of caution is to plan how to use them well to avoid excess waste from cutting shapes, the sheets aren't very big and could get used quite quickly and therefore become expensive. However, for a quick, hassle-free way to create an impact, this is a great product!

Chocolate Moulds - prices start from £2.35

Chocolate Moulds
The website has a great range of silicone moulds available, which you could use for shaping chocolates either to enjoy on their own, or as great toppers for cupcakes. The silicone moulds are really flexible and adaptable, as well as oven and freezer safe, so you don't need to stop at chocolate either - try coloured or flavoured ice cubes, jellies, mini cakes, or get really clever like these Turkish Delight diamonds I made a while ago!

Disclaimer: The Craft Company sent me a selection of products of my own choice up to a predetermined value. I was not paid to write a review, and all opinions expressed are honest and my own. 

Thursday, 25 April 2013

How To Make The Perfect Buttercream Frosting

Buttercream is a perfect accessory to any cake or bake, due to it's versatility when it comes to colouring and flavouring it. There are several variations of buttercream, from a simple butter and sugar mix, to the more complex and delicate meringue based buttercreams, which use various methods of mixing beaten egg whites with sugar or sugar syrup, then beating in the butter. These are known as Italian, Swiss and French meringue buttercreams, and each has a slightly different preparation method to create a slightly different taste and texture. 

This post however is about the most commonly found buttercream recipe in English dishes. It is made up of butter and icing sugar, generally in a 1:2 parts ratio, and can be used to decorate cupcakes, fill and cover cakes, or form the integral layer between a cake and its fondant covering. The recipe is simple enough, but I believe there is a knack to the preparation of buttercream in order to turn it from sickly sweet butter, into a smooth, light, creamy cake topping. A smooth, well prepared buttercream will be easy to pipe, without leaving raggedy edges and air bubbles. 

Vanilla Cupcakes with a pure Vanilla Buttercream

The ingredients here make enough buttercream to top six large cupcakes, or fill and top an eight inch cake. The basic ratio is one part butter to two parts icing sugar, so you can multiply up these quantities as much as you need to for your bake. 

Ingredients

100 grams good quality unsalted butter
200 grams icing sugar
a little milk

Variations

Buttercream can be coloured and/ or flavoured to suit the overall look and taste of your cakes and cupcakes. 

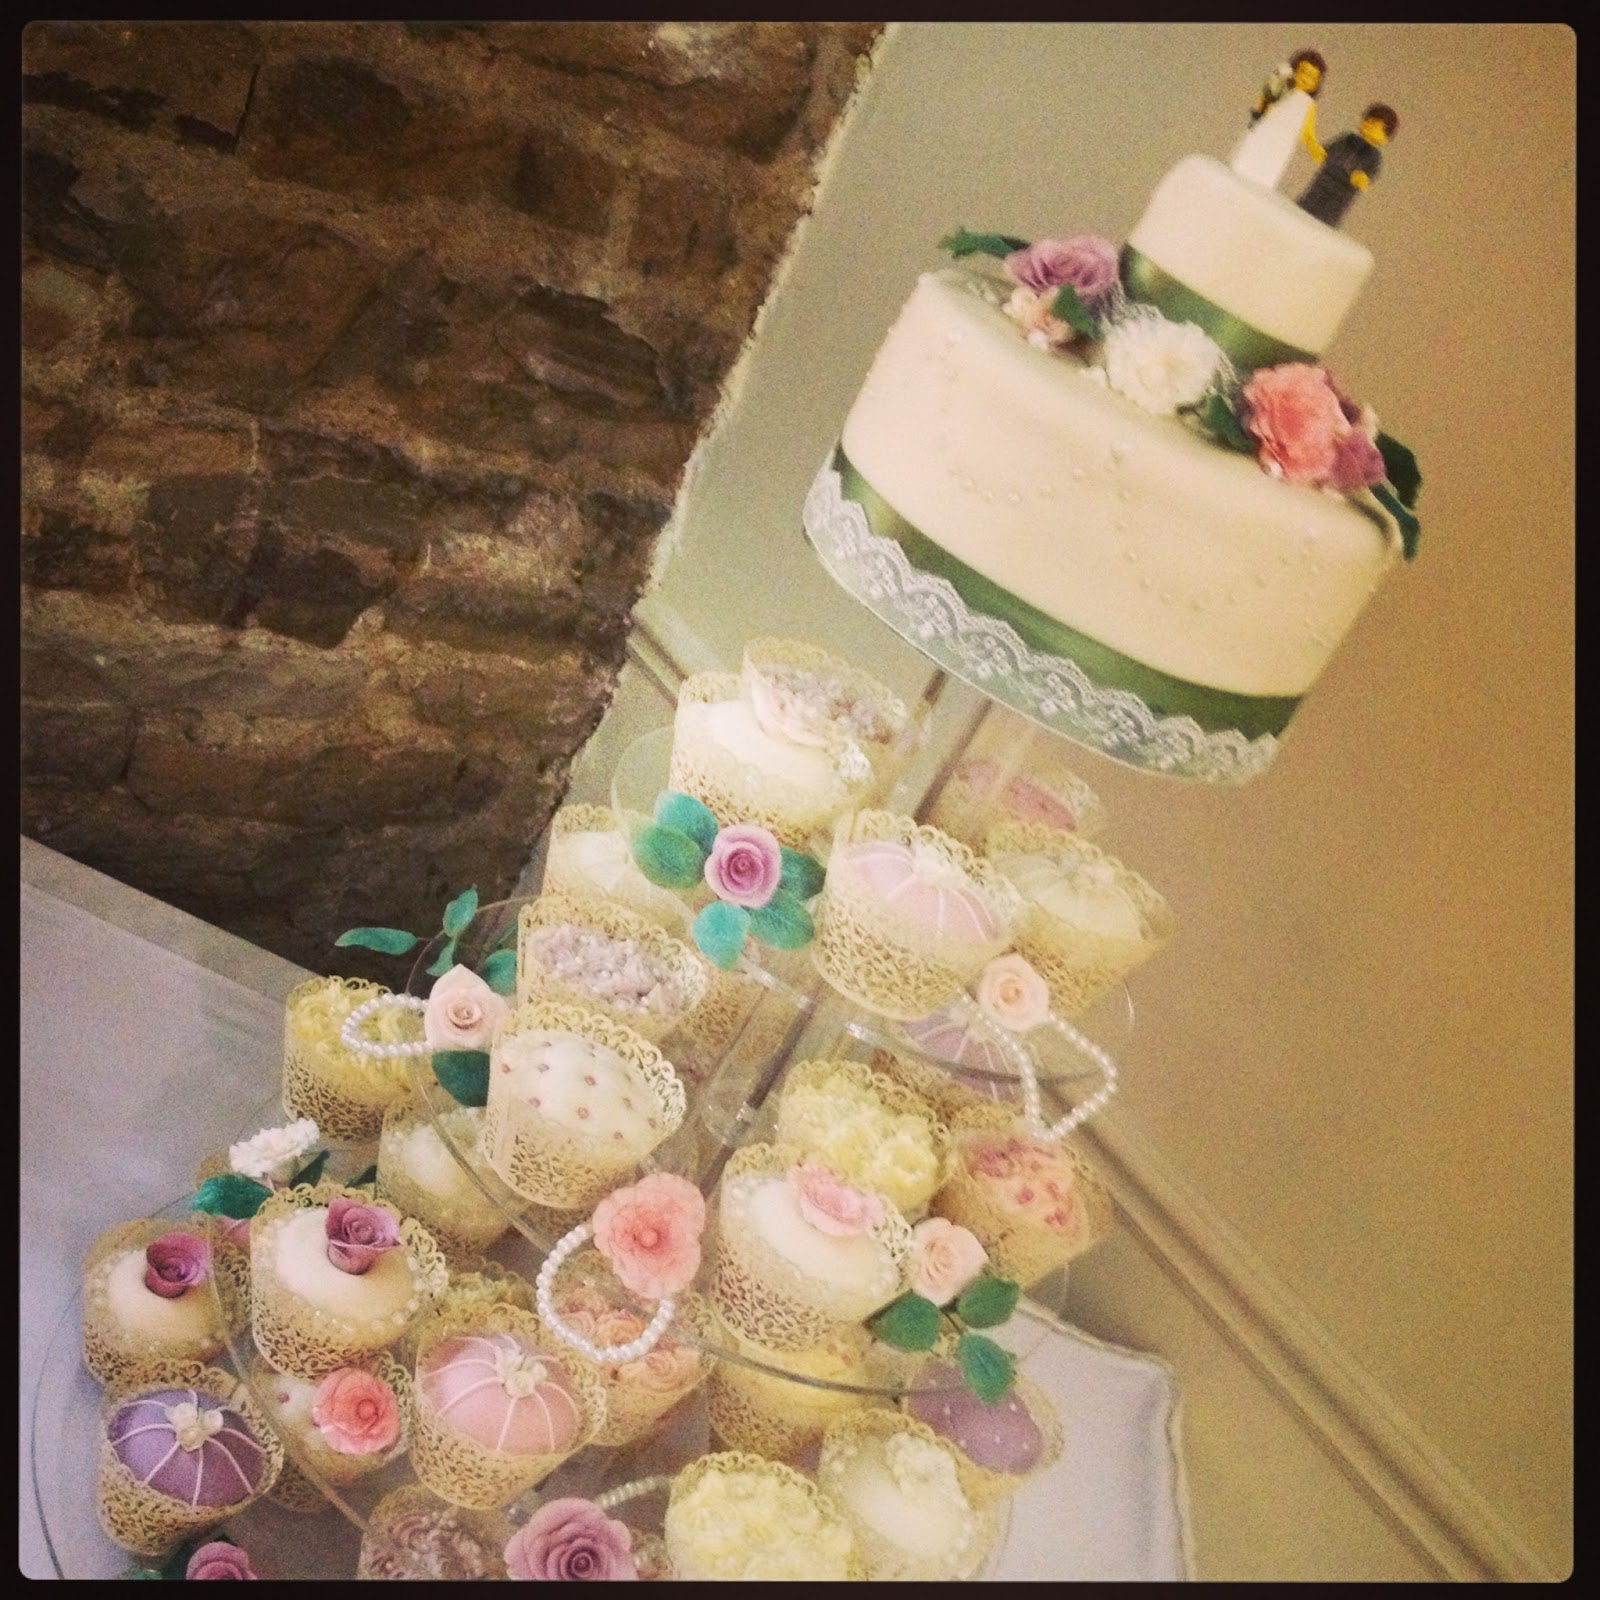
A selection of cakes and cupcakes I have decorated with buttercream

Flavouring your buttercream should be done around halfway through the process. You can add a dash of an extract, such as vanilla, rose water, peppermint, or lavender. For a more citrus flavour, grate the zest of an orange, lemon or lime into the mixture, or for a chocolate buttercream, swap out some of the icing sugar for a high quality cocoa powder such as Green and Blacks. You can flavour buttercream even with liquids, such as champagne or coffee. The important thing to remember if you are adding a liquid is to increase the quantity of icing sugar by double the volume of the liquid, so as not to alter the final consistency, and to incorporate them gently so as not to curdle or split the buttercream. 

Equally you can colour buttercream in any shade you should wish. It will naturally be a slightly off-white colour, however if you prepare it well, it will be as good as white to the eye. When using food colouring, always try to use a gel based colour, as they will not alter the consistency of your buttercream. If you do use a liquid food colour, remember to add an extra tablespoon of icing sugar to balance out the additional liquid. 

Method

Sift the icing sugar well into a bowl and set aside. 

In a large mixing bowl, add the butter roughly chopped into several chunks. Use a good quality unsalted butter here, as you will get a far superior flavour to using a spread containing vegetable oils. I always cook with salted butter, however to keep the lightness use unsalted here, plus you don't get the salt taste interfering with any additional flavour you add. I always use Lurpak for my buttercream, as I trust the taste, and it's lighter colour allows you to get an almost white buttercream. 


Now, take a hand whisk, and beat the butter for a minute...


...and another minute - can you see it getting lighter in colour? ...


...and one more - it should now have the appearance of whipped double cream, and be almost white...


Now we start to add the icing sugar. Retrieve the bowl of sifted icing sugar you set aside earlier. Now add the icing sugar two tablespoons at a time. Any more than this, and you will be engulfed in a white cloud of sugar as soon as you turn your whisk on!


Keep going now, adding a couple of tablespoons of icing sugar, beating until combined, and then adding a little more. About halfway through the icing sugar, add your flavouring if you are using one, this makes sure it gets fully combined through the buttercream.


Continue with the icing sugar until it has all been used. As you add more and more sugar, the mixture will start to thicken and get stiffer. By the time you have added all the icing sugar, the mixture may have formed a texture similar in appearance to scrambled eggs...


... carefully add a teaspoon of milk, and beat well. This is usually enough to bring the mixture back to the perfect piping consistency. If needed, add a second teaspoon of milk, but be careful as too much and the mixture may start to curdle. Your buttercream should now look like this...


If you are adding a colour to the buttercream, do it at this stage. Any earlier, and you risk diluting the colour as you add more icing sugar. Adding the colour to the finished product allows you to get exactly the right shade for your cake or cupcakes. 

Now you are ready to ice your cake. If you are planning to pipe the buttercream, prepare your piping bag and tip. Open the top of the bag wide, and fold over a good third of the bag. Use a mug or jug as a holder for your bag so you still have the use of both hands. 


Spoon the buttercream into the bag one spoonful at a time, each time, push the buttercream down into the bag, and use the side to scrape the spoon clean. Try to keep pushing more buttercream down into the bag to avoid creating any pockets of air in the bag that will affect the flow when piping. 


And now you are ready to pipe! Enjoy!


Tuesday, 16 April 2013

Black Forest Cupcakes

I'm off to Brussels for a few days for work this week, which means three bake-free days (boo) and a lot of networking (boo again). In the interest of making sure that Gary doesn't suffer too much from cake-withdrawal in my absence, I offered to bake him something to keep his sugar levels up, to which he replied that he wanted a Black Forest Gateaux. After explaining that this might not be the best bake, considering the fresh cream would prevent it from keeping well, we compromised on a "black forest flavoured" alternative. Basically, as long as it had cherries and chocolate I was onto a winner! 

Black Forest Gateaux, Cupcake, Cherry, Cherries, Grenadine
Black Forest Cupcake

I started with my absolute go-to chocolate cake recipe as a base for these cupcakes, and started to raid the cupboards for additions to make up the Black Forest elements. The flavourings here might be a little unconventional for any fresh cream and cherry purists out there, but I can promise that this recipe makes 12 sweet, fruity and yet chocolaty, perfect little cupcakes.

I have used maraschino, or glace cherries in this recipe over fresh ones, firstly because that happens to be what I had to hand, but secondly as I wanted the sweetness of the cherry syrup to cut through my dense rich chocolate cake. I have further enhanced the fruit flavour by adding Grenadine, a non-alcoholic fruit flavoured syrup mostly used in cocktails. Whilst not necessarily made from cherries, (my bottle has raspberries and strawberries on the label, although traditionally Grenadine is made from pomegranate or blackcurrants) the sweet syrup complements the flavours of the maraschino cherries and works well in these cupcakes. You could omit the Grenadine from this recipe if you didn't have any, and use the syrup from the jar of maraschino cherries instead. 


Ingredients:

For the cupcakes;

50 grams dark muscovado sugar
25 grams good quality cocoa powder (I use Green and Black's)
125 ml boiling water
1 tablespoon Grenadine
65 grams unsalted butter
75 grams caster sugar
1 egg
1/2 teaspoon vanilla extract
115 grams plain flour
1/2 teaspoon baking powder
1/2 teaspoon bicarb of soda
12 maraschino cherries

For the vanilla buttercream frosting;

250 grams unsalted good quality butter
500 grams icing sugar
1/2 teaspoon vanilla extract
2 tablespoons milk

To decorate;

cocoa powder
12 maraschino cherries
Grenadine

Method:

Sift the cocoa powder into a mixing bowl, and add the dark muscovado sugar. Pour over the boiling water, and whisk to form a syrup. Add the tablespoon of Grenadine, mix again, and set aside. 

In a large bowl, beat the butter until creamy, then add the caster sugar and beat again until light and fluffy. Add the egg and the vanilla extract, and mix well. Gradually pour in the cocoa mixture, whisking continuously, and stir until all the ingredients are well combined. Use a spatula, and make sure there is no butter left on the bottom of the bowl. 

In a separate bowl, sift the flour, and add the baking powder and bicarb of soda. Mix well. Add the flour mixture to the batter, and fold in. You will have quite a loose runny mixture once it is all combined. 

Divide the mixture between 12 cupcake cases. Take the 12 maraschino cherries, and chop each one roughly into quarters, sprinkling the pieces across the top of each of the cupcakes. 


Bake the cakes at 180 degrees for 12 - 15 minutes, until they are springy to the touch. Remove from the oven, and cool completely on a cooling rack. 


To make the buttercream frosting, beat the butter in a large bowl until creamy, then gradually add the icing sugar, a little at a time. Add the vanilla extract and the milk around halfway through, then continue until all the icing sugar has been incorporated. The mixture should have a whipped cream-like consistency. 

Finally, to decorate the cupcakes when cool, transfer the buttercream to a piping bag, and pipe swirls onto of each of the cupcakes.


Dust the top of each with a little cocoa powder, place a whole maraschino cherry on the top, and drizzle a little of the Grenadine over. (I did this by pouring a bit at a time into a 1/4 teaspoon measure and then drizzling from there in order to not pour too much at once). 


The finished cupcakes are rich and chocolaty on the bottom, with a hint of cherry, and then topped with a light buttercream, and a sweet drizzle of fruit from the Grenadine running through... mmmm...


I am entering these cupcakes into this month's Tea Time Treats, hosted by Lavender and Lovage, and What Kate Baked, where the theme this month is Fairy Cakes, Cupcakes and Muffins