Hi! Welcome to my blog. I am a major foodie, with a haphazard cooking philosophy, currently making that transition from cooking and baking for friends and family to 'wonder if I could make this my career'. Follow me for recipes, the outcomes of a few experiments, and general lovely foodiness. Opinions, reviews and recommendations are all my own.
Showing posts with label Chinese. Show all posts

Friday, 12 July 2013

Quick and Easy Chinese-Style BBQ Sauce

I feel as though I haven't blogged in an absolute age, although it's really only been 10 days or so. I have been merrily cooking and baking away, and have a stack of recipes and pictures to share with you all, but for some reason I have been struggling to put fingers to keyboard. Perhaps it's this gorgeous weather distracting me and drawing me out into the garden, or perhaps, as is more likely, life is just getting in the way. 

If you are suffering from a similar heat/life induced lethargy, this recipe is perfect, as it takes neither time nor effort to make. I think it's perfect for those impromptu BBQ's, or just getting in from a busy day at work, the sauce is simply whacking all the ingredients in a bowl and whisking for a minute, and then you can cook straight away, or marinade meat in it for a couple of hours before slapping it on the barbie...


Ingredients

4 tablespoons Teriyaki Sauce (I used the Kikkoman blend)
2 tablespoons Maple Syrup
1/2 teaspoon Chinese Five Spice
1 teaspoon Ground Ginger
1 teaspoon Crushed Garlic
1 tablespoon Tomato Purée

Method

Mix all the ingredients together in a large bowl until well combined. Marinade your chosen meat in the mixture and refrigerate until needed.

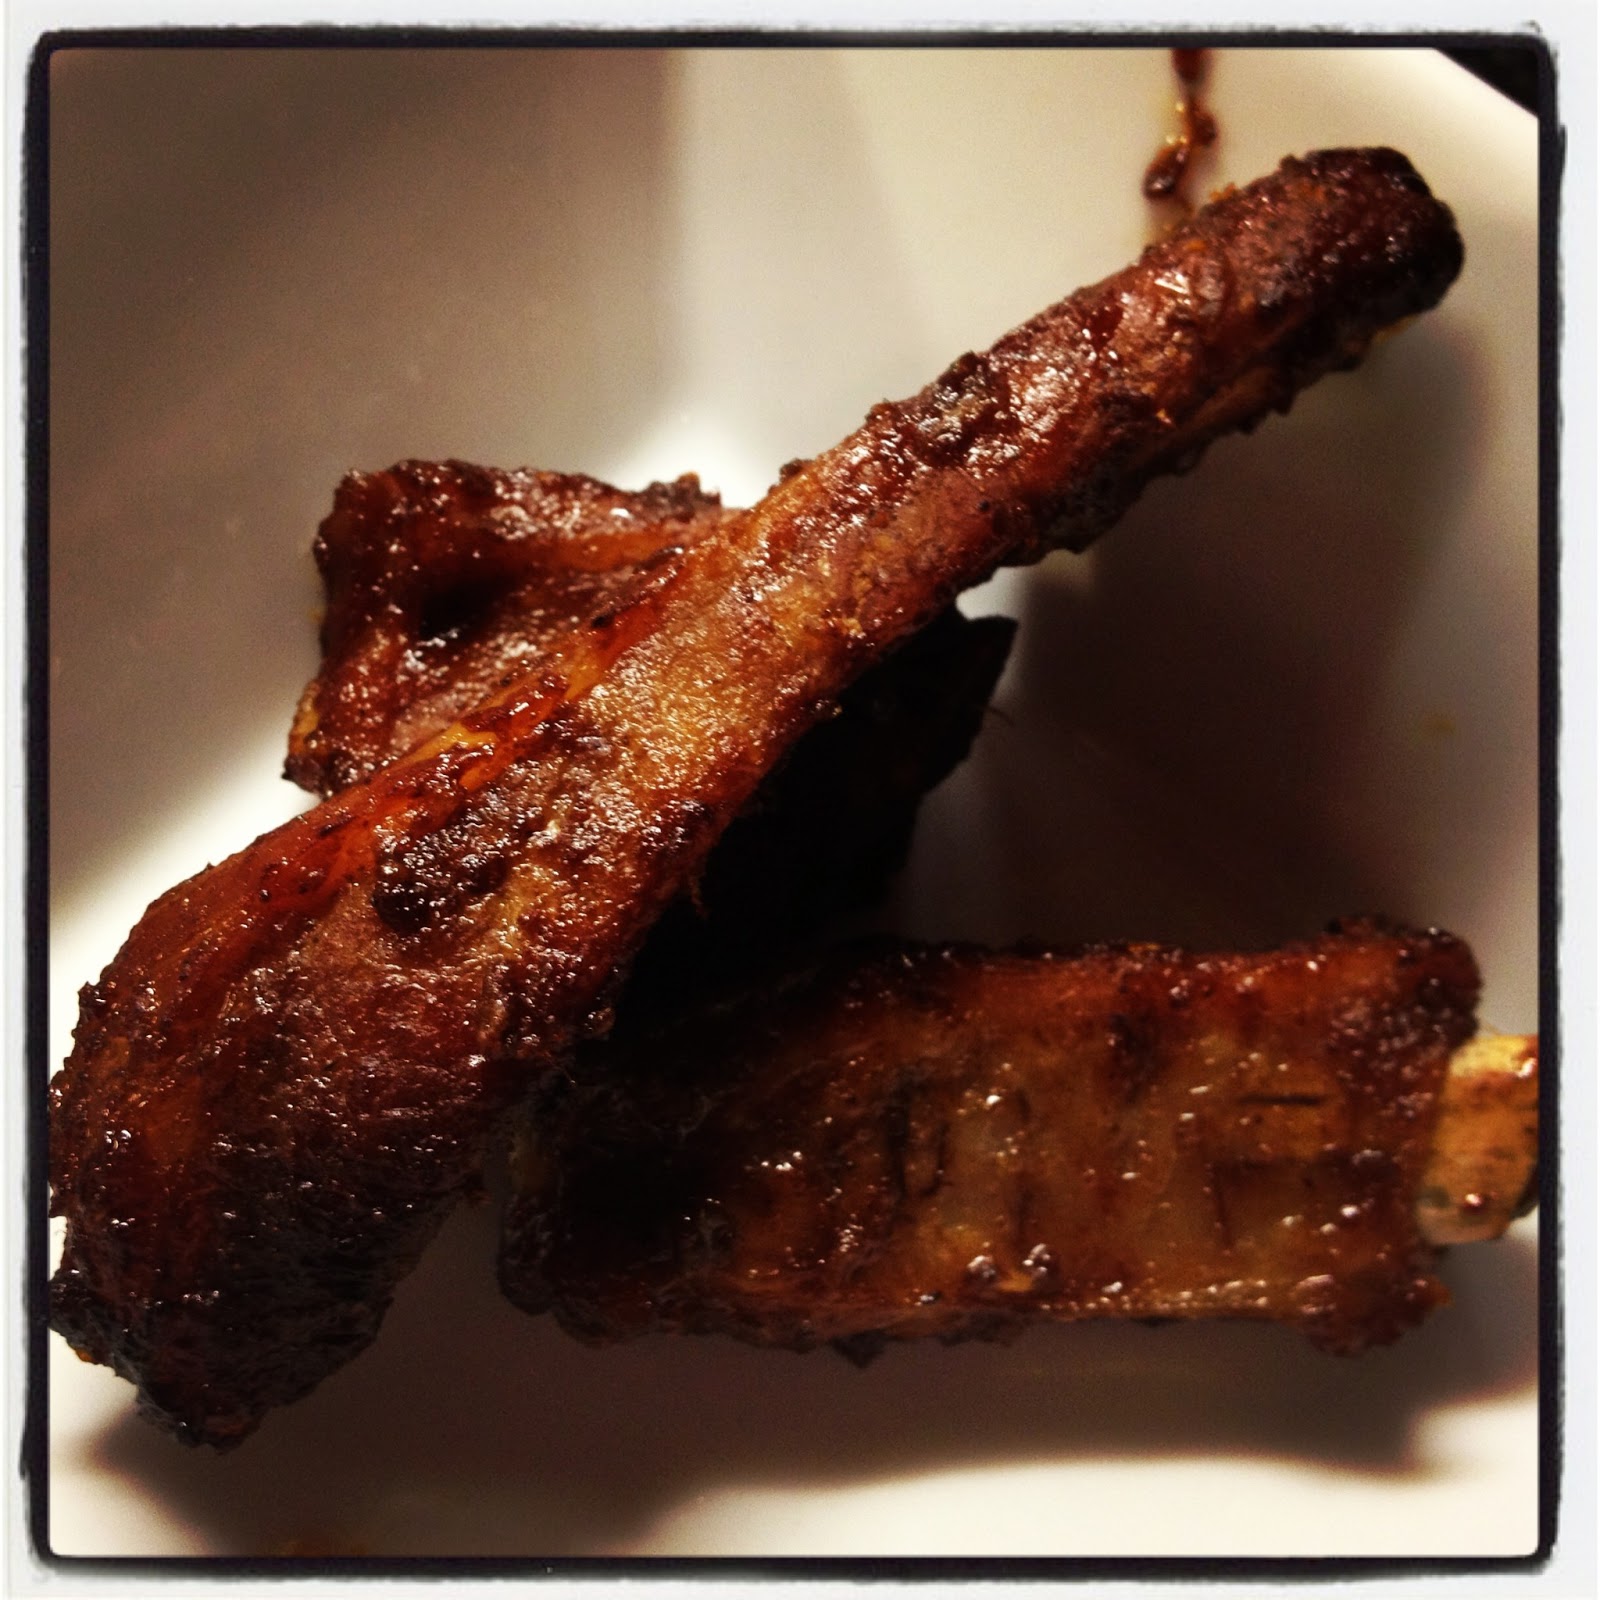
I used this mixture and marinated a couple of pork steaks for two hours when I got home from work last night, then transferred the lot to a griddle pan, cooked the pork steaks on both sides for five minutes, then added 100ml water and left to reduce down to make a sticky sauce to serve with the pork and some whole wheat rice.


The marinade would work equally well with chicken, duck or even as a sauce for a vegetable stir-fry!

Because this recipe contains Maple Syrup, I am linking it up to the Feel Good Food challenge this month. Feel Good Food is all about creating recipes that contain ingredients with especially high nutritional contents or health benefits.


Tuesday, 9 April 2013

Sweet and Sour King Prawns

Recently my blog seems to have been concentrating on cakes, bread and general baking, which is pretty reflective of my current obsessions and determination to have a go at making literally everything. However, I don't want to lose sight of the reason that I started writing about my recipes, which was to show that great home cooked food doesn't have to be difficult, and doesn't require fancy ingredients in order to taste amazing. 

A few weeks ago, I had a group of girlfriends over for a homemade Chinese feast, and I have been slowly posting up the recipes I used ever since. I have developed these recipes so that they have an easy to find list of ingredients, and are as simple as possible to make. Every one of these dishes was well received, and tasted so much fresher than if we had ordered it in (plus it was much cheaper!) 

A selection of Chinese dishes served... 
I have already shared with you all Chicken Satay Skewers, Chinese BBQ Ribs, Chicken with Cashew Nuts, Pineapple Sorbet and Coconut Ice Cream, and homemade Fortune Cookies. This is my quick and easy recipe for Sweet and Sour King Prawns, although you can easily swap the king prawns for chicken, beef or any other meat you wish to have with the sauce. 


Ingredients;

- 150g King Prawns (or other preferred meat)
- 1 small red pepper, diced
- 1 small green pepper, diced
- 100g fresh pineapple, diced (or tinned is fresh is not available)
- 125g caster sugar
- 50ml balsamic vinegar
- 200ml water
- 1 tablespoon tomato ketchup
- 1 tablespoon Worcestershire sauce
- pinch of salt
- 1 tablespoon cornflour

To make the sauce, mix together the sugar, vinegar, water, tomato ketchup, Worcestershire sauce and the salt in a saucepan. Heat the sauce until the sugar has dissolved, then bring to the boil. Mix the cornflour with a little water to form a smooth paste, then add to the sauce, stirring until it starts to thicken. Take off the heat and set aside.

Heat a little oil in a wok or a large frying pan, and add the prawns, fry for one minute, then add the peppers and pineapple. (If you have substituted a different meat, it will need to be cooked for longer before adding the veg) Cook for a further two - three minutes, then add the prepared sauce. Stir through, then serve! And there you are, fresh, easy and very tasty Sweet and Sour in minutes! 

I am entering this recipe into this week's Made With Love Monday hosted by Javelin Warrior, as it made completely from scratch, with fresh ingredients, and because everyone should try making their Chinese Takeaway at home! 


Wednesday, 3 April 2013

Chicken with Cashew Nuts

As promised, here is another recipe from the Girl's Night feast of a few weeks ago. I know that these posts are a little bit of a deviation from my usual cakes and bakes, however I really wanted to share how easy and delicious homemade Chinese food really can be, and give you a selection of recipes that do not need a cupboard full of exotic, hard to find ingredients.

Of the main courses served last Saturday, this Chicken and Cashew dish is one of my absolute favourites, and the one that was eaten up the quickest. This is a really quick and easy dish, and on it's own would make a really good mid-week meal served with fluffy rice. (You'll have to forgive some of the photography on these posts, people were already eating before I had chance to get the camera out!)


Here's how I made it...

Ingredients:

- 2 tablespoons Cornflour
- 500 ml Chicken Stock
- 3 tablespoons Dark Soy Sauce
- 1 teaspoon crushed Ginger, or 1/2 an inch grated
- 1/2 teaspoon Tabasco sauce (or similar hot chilli sauce)
- 2 large Chicken Breasts, diced
- 1/2 an Onion, diced
- 1 large Green Pepper, chopped
- 150 grams Cashew Nuts
- 100 grams Water Chestnuts (optional)

Step One: Make the Sauce

In a saucepan, heat the chicken stock. Add the cornflour, and mix well making sure that all the cornflour has been absorbed by the stock, and there are no lumps. Add the soy sauce, ginger, and tabasco sauce, and set aside. Tip: you can even make the sauce element ahead of time, leave it to cool, and put in a sealed container in the fridge, then it is ready to add to the chicken and vegetables whenever you need it! I found this useful for the feast night, as I made three main dishes at the same time, so having the sauces pre-made made the whole process much easier.

Step Two: Cook the Meat

In a wok, or a large frying pan, heat a little cooking oil, then fry the diced chicken breasts until slightly golden on the outside, and cooked all the way through. Remove the meat from the pan and set aside.

Step Three: Assemble the Dish

Add the onion and pepper to the wok, and lightly fry for 2-3 minutes until they start to colour. Add the cashew nuts and the water chestnuts (optional) and cook for a further minute. Finally, add the chicken and the sauce, and stir well. Cook for a minute longer, or until the sauce has warmed through if you have pre-made it, then serve.

Thursday, 28 March 2013

Chicken Satay Skewers and Chinese BBQ Ribs

Continuing the write up of the dishes I served for my Girls Night In Chinese feast last weekend, here are the recipes for the two appetisers I made: Chicken Satay Skewers with a Satay dip, and Chinese BBQ style Ribs. The key to both of these dishes is in the marinading, literally, the longer the better. I prepared the marinades and the meat for these dishes around 5pm on the Friday night, so they had a good 26 hours soaking up their lovely spices and flavours. The cooking process is just as easy as opening the oven door... seriously! 

I love these recipes as I have evolved them to have an authentic taste (well, Chinese Takeaway authentic) but only contain store cupboard or very easy to obtain ingredients. I adore cultural cuisine, but not living in a very cosmopolitan area, I don't have access to any of the amazing specialist stores that you can find in places like London, and have to make do with what I can get from the supermarket.

For the Chicken Satay Skewers;


Ingredients
- 3 tablespoons Crunchy Peanut Butter
- 2 tablespoons Dark Soy Sauce
- juice of 1 Lime
- 2 teaspoons crushed Garlic, or two cloves
- 1 teaspoon crushed Ginger, or half an inch grated
- 3 tablespoons Honey
- 1 1/2 tablespoons Curry Powder
- 3 large Chicken Breasts
- 4 tablespoons Coconut Cream

Put the peanut butter, soy sauce, lime, garlic, ginger, honey and curry powder in a large bowl and mix well. Cut the chicken breasts into 1 inch square cubes, place in the marinade, and stir through so all the pieces are coated well with the mixture. Cover the bowl, and refridgerate for at least 12 hours.

Remove the bowl from the fridge. Place the meat onto medium length skewers, around three pieces per skewer. Line up the skewers on a tray, and place in the oven at around 200 degrees for 10 - 15 minutes until cooked.

Meanwhile, transfer the leftover marinade to a small saucepan, and heat gently. Add the coconut cream, and stir well. This makes a delicius creamy dipping sauce for your skewers. Serve, and enjoy!

For the Chinese BBQ Ribs;


Ingredients
- 4 tablespoons Hoisin Sauce
- 2 tablespoons Honey
- 1 teaspoon crushed Garlic, or one clove
- 1 teaspoon crushed Ginger, or half an inch grated
- 1 tablespoon Soy Sauce
- juice of 1 Lime
- 1/2 teaspoon of Chinese Five Spice
- Rack of Ribs

Mix all of the ingredients together in a bowl. Take the rack of ribs, and using a sharp knife, seperate them into individual ribs. Do this by finding the fleshy part in between each of the bones, and make a clean cut. Place the ribs in a shallow oven-proof dish, and pour over the marinade. Move the ribs around so that they are coated in the marinade on all sides, cover the dish, and place in the fridge for at least 12 hours.

When ready for them, take the dish out of the fridge, unwrap, and place directly in the oven, at around 200 degrees, for 20 - 25 minutes, or until the meat is no longer pink. Serve piled high, with a roll of kitchen towel to hand for sticky fingers!

You can also see here the recipes that I used for Fortune Cookies, and Pineapple Sorbet and Coconut Ice Cream

Wednesday, 27 March 2013

Pineapple Sorbet and Coconut Ice Cream

This weekend I made a Chinese feast for the girls. Despite being separated by up to 200 miles for the most part, every couple of months we get together for food and wine, and a good girly natter. Over time, these girls nights have evolved to have a culinary theme, the last time we met we enjoyed an amazing Caribbean meal made by Tara, for which I provided my Mango and Coconut Cheesecake. 

The last time we met, we were ticking off the themes that we had covered so far, and realised that we had somehow overlooked arguably the two main 'foreign' cuisines enjoyed in this country, that being Chinese and Indian. I decided to rectify this this month, as it was my turn to host, and set about planning for a Chinese banquet. 

Over the next few days/ weeks I will post the recipes that I used to create my feast. After a heavy and varied selection of dishes, I didn't want to go all out on a heavy dessert, and to be honest, there aren't many Chinese desserts anyway. I had already decided on making my own fortune cookies, but wanted to create something of a pallet cleanser after all the sticky Chinese food. I decided to make this Pineapple Sorbet and Coconut Ice Cream combo, as they are flavours that feature in Chinese dishes, and would be a nice, light, not overly sweet end to the meal. 

Coconut Ice Cream and Pineapple Sorbet

These are two separate recipes, however I would thoroughly recommend serving them together as I have here, the sweet sharpness of the Pineapple sorbet, with the hint of lemon, cuts through the rich creamy Coconut ice cream with a hint of vanilla, and are just heavenly together. Here's how I made them (sooo much easier than you'd think, especially the sorbet!) ...

For the Pineapple Sorbet...

Ingredients;
- 300 grams diced fresh pineapple
- juice of 1 lemon
- 4 tablespoons sugar

Place the pineapple in a large blender, and blend until fully liquidised. Add the lemon juice and sugar, and blitz again. 

Pour the mixture into a metal container, and place in the freezer for around 90 minutes. The mixture will start to set around the outside first. 

After 90 minutes, scoop the part set sorbet out of the metal container back into the blender. Blitz one more time to get an even texture to the sorbet, then pour out into a tupperware container. 

Place the lid on, and return to the freezer to set. It is best to make this the day before needed to ensure that it is set fully, however at a push you could make it in the morning for the same evening. 

Pineapple Sorbet

For the Coconut Ice Cream...

Ingredients;
- 250 ml semi-skimmed milk
- 300 ml double cream
- 400 ml coconut cream
- 1 teaspoon vanilla extract
- 6 egg yolks
- 175 grams caster sugar
- 80 grams dessicated coconut

Put the milk, cream, vanilla extract and coconut cream in a large heavy bottomed saucepan, and bring to the boil. Once the mixture has reached boiling point, remove from the heat, and set aside. 

In a large bowl, whisk the egg yolks and sugar together until light and creamy. Slowly pour over the hot cream mixture, whisking continuously. 

Once all of the ingredients are combined, pour the mixture back into the saucepan, pouring through a sieve to strain out any lumps. 

Place the pan back over a low heat, and stir until the mixture starts to thicken slightly. Add the dessicated coconut and stir through. 

Pour the mixture into a metal container, cover, and set aside to cool to room temperature. Once cooled, cover with foil and place in the freezer for around 90 minutes. The mixture will start to set around the outside first.

After 90 minutes, scoop the part set sorbet out of the metal container back into the blender. Blitz one more time to get an even texture to the sorbet, then pour out into a tupperware container.

Place the lid on, and return to the freezer to set. It is best to make this the day before needed to ensure that it is set fully.

Coconut Ice Cream

Saturday, 23 March 2013

Fortune Cookies and a Girls Night In

Tonight I'm hosting a Girls Night In, with a group of close girlfriends. I've set myself the rather ambitious challenge of creating a full Chinese takeaway from scratch, the magnitude of which as always, only hit me after I had committed myself to the cause. 

After batting a few text messages around, to find out what my guests normally order in from their local takeaway, then making a few calculated choices, this is the menu that I have arrived at... recipes for all the dishes listed will be posted up here over the next few weeks as I get chance to write them up;

Appetisers:
- Chicken Satay Skewers
- Chinese BBQ Ribs

Main Courses:
- Sweet and Sour King Prawns
- Chicken with Cashews
- Sweet Chilli Crispy Beef

Sides:
- Egg Fried Rice
- Chow Mein

Dessert:
- Pineapple Sorbet
- Coconut Ice Cream

Last night, as an addition, I decide to attempt to make a batch of fortune cookies to really add a Chinese restaurant feel to the meal. Making fortune cookies is not unlike making Tuile biscuits, there is a simple batter, a knack to getting the biscuits thin enough before baking, and then the hot biscuit has to be shaped quickly before it starts to cool. This for me was the tricky part, and I had slightly tingly fingertips by the time I had finished my batch, however there really is now way to avoid this, just carefully pick up the hot cookie and work fast. Here are my finished cookies... I made two batches, and the first were a little too thick, but they definitely improved in batch two.

Homemade Fortune Cookies
To make approx 12 - 15 Fortune Cookies...

Ingredients;

2 large egg whites
1/2 teaspoon pure vanilla extract
1/2 teaspoon pure almond extract
3 tablespoons vegetable oil
8 tablespoons plain flour
1 1/2 teaspoons cornflour
1/4 teaspoon salt
8 tablespoons caster sugar
3 teaspoons water

The most important thing to start making your fortune cookies is of course the fortunes. Write or print your fortunes on thin strips of paper, and then fold and fold again to be roughly 1 inch long. I left Gary to write the fortunes, so that they would be as much a surprise to me as anyone... this could be interesting. 

Pre-heat the oven to 190 degrees c, and grease a large baking tray. 

To make the cookie batter, place the egg whites, vanilla and almond extracts and the vegetable oil in a large bowl, and beat with an electric whisk until frothy but still runny. Set aside.


In a smaller bowl sift the flour, add the sugar, cornflour, and salt, and mix well. 


Add the water to the flour mixture and stir through. This will start to clump together, don't worry, it's supposed to do that...


Gradually add the flour mixture to the egg whites, beating continuously, until a smooth batter is formed. The batter should be of a dropping consistency. 


Now, using a tablespoon measure, drop an even tablespoon of mixture well spaced out on the baking tray, I would recommend making about 5 cookies at a time, firstly because the mixture will spread, and secondly, because you need to move quickly to shape the cookies before they cool and become brittle.


Bake the cookies for 5 - 10 minutes, checking the progress constantly. As soon as they start to colour on the edges as shown, they are ready to mould. 


Using a spatula, remove all the cookies from the tray (if you only do them one at a time they will crisp up, and not come off the tray in one piece. 

Now, moving very quickly, but being careful not to burn yourself...

...flip the cookie upside down...

...place a fortune in the centre of the cookie...


,,,fold in half, pressing the edges together...


...bend over a bowl like so...


...place the shaped cookie in a muffin tin, or half sphere mould to keep its shape whilst it cools.


Repeat the process until you have used all your batter, or all your fortunes. 

The recipe for these cookies is very easy, the process a little more tricky, but only due to the speed needed, and the handling of the hot cookie. They are however well worth making, they taste great (of course I had to sample) and I have no doubt that they will add the final authentic flourish to our party tonight... and there goes the doorbell! 

Night x