Hi! Welcome to my blog. I am a major foodie, with a haphazard cooking philosophy, currently making that transition from cooking and baking for friends and family to 'wonder if I could make this my career'. Follow me for recipes, the outcomes of a few experiments, and general lovely foodiness. Opinions, reviews and recommendations are all my own.
Showing posts with label Icing. Show all posts

Saturday, 22 June 2013

The Tale of a Wannabe Wedding Cake Decorator

I have made no secret of the fact that I harbour a dream to quit the medical sales rat race one day and make a living from baking and cake decorating. I do in fact have something of a game plan for this, but have a little superstition (founded from blowing out the birthday cake candles I fear) that if I speak my goals out loud they will fail to come true. Maybe one day I shall surprise you all with the big reveal when it happens, and be all nonchalant .."oh yes, I planned this all along"... 

Anyway, I digress. When I first started this whole cake decorating/ recipe developing/ blogging malarkey back in September, a very dear friend of mine approached me and asked me to make her wedding cake, for the big day in June 2013. At that time, my cake decorating skills had pretty much started and ended with this...


... pretty huh! None-the-less, I have a terrible character flaw in never saying 'No' to anyone, and more importantly, my gorgeous friend had a seemingly bottomless supply of faith and belief in me, something which I will never forget, and will cherish for the rest of my life.

The wedding was last weekend, and after months of planning, taste testing, sharing photos and ideas, and colour matching buttercream, not to mention a 16 hour mammoth baking session, the finished cake took its place amongst the stunning vintage-style floral displays and table decorations. 

The brief was this: A selection of vintage style cupcakes, displayed in a tower, with a small one tier cake on top for the cutting the cake ceremony. The wedding colours were a selection of pastel lilacs, pinks and ivory, and the wedding flowers included memory lane roses, sweet avalanche roses, and frilly lisianthus. 

Colour-matching buttercream using paint colour charts!

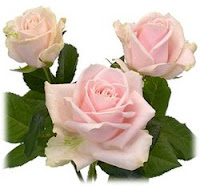
Memory Lane Rose Image
Sweet Avalanche Rose Image


 The Creative Process...

Sugarcraft Flowers in Production
And here are a selection of photos of the finished display...

The finished display installed at the venue

The display had 6 different cupcake designs, with each design in 3 colours

Edible pearls added to the 'Vintage' theme

Additional sugarcraft flowers and leaves were added to the stand as decorations

We used these adorable shimmery lace cupcake wrappers for a more elegant feel

How cute are the personalised Lego Bride and Groom!?

The cake was 8 inches, with a mini 3 inch cake for the Bride and Groom to stand proud

Handmade sugar eucalyptus springs added some greenery to the display

The stand was decorated with strings of pearls too

There were a mixture of buttercream and fondant topped cupcakes

The edge of the cake was decorated with ribbon and lace, and embossed with edible pearls

A very vintage inspired wedding cake and cupcake tower!
Without sounding self-indulgent, this whole process was so exciting, and rewarding, and has totally re-affirmed my desire to do this and only this for a living. From the original planning, right through hand-making the flowers, and finally assembling the tower and seeing the vision come to life, I loved every moment, and would do it every day if I could. Thank you so much to my amazing friend for giving me the trust and the opportunity to do this, and I'm so pleased that you loved it! xxx

Is it possible for the cake decorator to get post-wedding blues too? My dining table seems very bleak now it is no longer covered in sugar roses! 

Sunday, 20 January 2013

Microphone Cupcakes: A How To Guide

Microphone Cupcakes

Yesterday I uploaded a post about my cousin's birthday party, where I made her a One Direction cake, and a batch of these microphone design cupcakes. I mentioned that I had a few troubles along the way, and I wanted to share with you all a step by step how I made these, and a few things I would do differently next time. 

To make these sparkly little treats, you will need the following;

- A good quality sponge cake batter
- Ice cream cup cones (the ones with the flat bottoms)
- Edible silver spray - I used Dt Oetker's Shimmer Spray in silver, from Tesco
- Plenty of kitchen roll
- Buttercream frosting
- Coloured sugar crystals - I used silver and pink here, but would have preferred black (my local shop was out of stock)
- Liquorice and/or strawberry laces
- A skewer
- A small amount of royal icing in a piping bag

So, to start, we bake the cupcakes in the ice cream cones. I love this method for two reasons, one because you don't need to use a muffin or bun tin, because they stand up by themselves, and two, because the sponge bakes really even inside, without forming a crust on the edges, so it is really soft and light to eat. 
Based on a sponge recipe that calls for equal parts butter, sugar, egg and flour, I found that one egg (approx 54g) and equal of the rest of the ingredients filled 4 cones. For the party, I used 6 eggs, and 330g of the additional ingredients to fill 24 cones. 


Divide the mixture equally between the cones, place on a baking tray lined with a sheet of baking parchment, and bake in the oven at 180 degrees for about 20 minutes, or until the tops are firm to touch. 

Remove from the oven, and set to cool on a cooling rack. At this point use a small pallet knife to remove any overspill or edges from the sponge, so that all the cones are even ready for the microphone top to be iced.
Once the cones are cool, the next step is to make them appear metallic. I used here a Shimmer Spray from Dr Oetker. I found this product easy to use, however you need to make sure that you have covered every available surface with kitchen roll, as the glitter gets everywhere. I used two cans of the spray to cover 24 cones, but to be honest, they would have looked better if they had a third coat as well - you can still see the cone colour through the silver. The cans are quite expensive (£3.99 each) so I would have hoped that they would have stretched further. I also found that once they are coated the silver comes off on your fingers so keep handling to a minimum.

Once the cones are dry to touch, then we ice the top of them. Pipe or spoon buttercream frosting onto the top of the sponge. We will be making a dome shape, but the buttercream can just be applied like the picture. 

Empty the sugar crystals into a bowl and dip the buttercream portion of the cone in. I have to apologise here, I had too many hands full and couldn't photograph the process. 

Anyway, rotate the cone so that the buttercream is completely covered in the sugar crystals. Remove, and use the palm of your hand to to gently cup the top, moulding the frosting and crystals into a dome shape as per the photo. 

I had some issues here getting hold of black sugar crystals. My local cake shop explained that they could order in for me, however I didn't have the luxury of time, so had to settle for silver. Again, I bought two pots, yet they didn't stretch anywhere near as far as I had hoped. I made 12 silver, and then had to make 12 in pink as I had some in my cupboard. 


I also added some black edible glitter to the tops of the domes to darken the colour slightly. 

Next step is to create the band around the base of the dome. I used black liquorice on the silver topped cones, and red strawberry laces on the pink topped cones. For the liquorice bands, as I was using quite a thick liquorice so cut shorter lengths, and fixed two bands around each of the cones. You need a small amount of royal icing to 'glue' the liquorice into place. Personally I didn't have time to make up a batch of proper royal icing, so used one on my emergency Dr Oetker Designer Writing Icing bags... ;-)

For the red strawberry laces, because they are a lot thinner, I was able to stick the start of the lace in place and then wind the lace around the cone several times to create a thicker band. 
The final step is to create a 'wire' from the base of the microphone leading to the amp. For this step, we need a skewer, the royal icing, and some short pieces of the liquorice and strawberry laces. 

Using the skewer, carefully make a small hole at the base of the cone. Try to hold the cupcake by the liquorice band here to stop too much of the silver spray rubbing off onto your hands. For the strawberry laces, a single hole from the skewer is perfect, with the thicker liquorice I had to insert the skewer twice to make a wider hole. 


Pipe a small amount of icing into the hole as a glue, and then insert the liquorice into the centre of the cone. This forms the amp wire from the bottom of the microphone. I chose to secure the liquorice up in a slight twist as per the picture with a little blob of icing, but you could equally leave it loose. 

And that's it! A batch of cute little microphone cupcakes, perfect for any music themed party! 


Saturday, 19 January 2013

The One Direction Themed Party

Oh my goodness, I'm exhausted! I spent this afternoon at my cousin's 11th birthday party, surrounded by seventeen 10 and 11 year olds in a crowded function room at The Three Merry Lads in Cutthorpe, Barlow. Not having kids of my own yet, I haven't been to a kid's birthday party in a long long time - to be honest, the last time I did, I was a kid myself. So after today's crash course in kid's birthday parties, I realise now that these events are loud, brash, hyperactive, borderline hysterical, and I love them!

My super little cousin is totally obsessed with One Direction (aren't all young girls at the moment?) and I don't think anyone hesitated in deciding how to theme her party. The team at The Three Merry Lads have to be commended for the effort they put into decorating the function room; helium balloons, One Direction posters plastering every available square inch of wall space, beautifully laid tables and elaborate virgin cocktails for the guests. It was a really great effort from the team, and they were incredibly accommodating in the face of so many kids running around their rooms (and so many parents hiding out in the bar!). 

For my part, my cousin and I had long ago established that she wanted a One Direction cake for her birthday. I had part designed it in my mind already, and when I sat down to work out the detail it came together quite well. The cake is a rich chocolate Devil's Food Cake, filled with a milk chocolate ganache. After covering in navy blue fondant, I iced the names of the band-mates around the side, and punctuated them with pink and red sugarpaste hearts. For the 1D logo on the top of the cake, I googled and printed a copy of the logo, and then cut a stencil out of baking parchment. After gently pinning the stencil to the top of the cake, I used Dr Oetker's Shimmer Spray in silver to graffiti the logo onto the surface of the cake. 

One Direction Cake

Since there was going to be a party, I decided to supplement the cake with a batch of cupcakes, but I wanted to make them fit the theme. I decided to try out these cute microphone cupcakes, baked in ice cream cup cones. I had a few issues executing these, mostly due to the lack of supplies from my local cake shop at the last minute (I could not find black sugar crystals anywhere), and the fact that the silver crystals I had, and the silver shimmer spray did not stretch anywhere near as far as I expected, however I was really pleased with how they came out, and they were an absolute hit at the party. I am going to post up some step by step photos tomorrow and show you how I made them. 

Microphone Cupcakes

All in all, when the cake and cupcakes were laid out on the table they looked pretty good, and the kids approved, which I am holding as a personal achievement - pre-teens being a notoriously tough crowd! As I mentioned at the top of this post - I'm exhausted, so I'm off to bed with a well-deserved hot chocolate and a hot water bottle. Night All! x

One Direction Cake and Microphone Cupcakes

Blowing out the candles! 

Friday, 28 December 2012

The Latest Pantry Door Cake Projects

So my little idea is nearly 4 months old now, and really starting to take shape. I had a look back through some of my first cake designs this week, and can't believe how far they have come on already! My beautiful friends and family have given me so many new and exciting tools and books for Christmas gifts this year, I cannot wait to get back into the kitchen and start baking, and I have some great ideas for 2013.

These are my last few designs of 2012...

1. 30th Birthday Literary Book Stack Cake

Book Cake
This cake was designed a few months ago for the 30th birthday of a friend's brother. The books have been personalised with his favourite titles and authors, and the three books concealed three separate flavoured cakes, one chocolate with dark chocolate ganache, one Victoria sponge, and one lemon.

2. 1st Birthday Butterfly Cake

My first official request 4 months ago! This was for a friend's little girl's first birthday, and I had one remit - Girly! The cake is a lemon sponge, with coloured lemon frosting. The decoration comes from edible gold paint, edible diamonds, and a sprinkling of edible pink glitter. I found the shaped mould on a fantastic site called Baked by Me - www.bakedbyme.net They really are fantastic, I would recommend anyone to check out their wares! 


3. Christmas Cake Project from Cake Decorating Class.

Christmas Cake
As you know I have been attending a sugarcraft class, this is the completed project from the end of the course. I have signed up for next year, and we will be learning orchids and lilies... I can't wait!

4. Panda Cake


This was a little bit of a home experiment, using a mould that came free with a magazine. I used vanilla and chocolate sponge mixtures, and piped the chocolate into the darker areas of the panda, before filling in with vanilla, and then used black and white sugarpaste to cover. The bamboo was made from wafers. 

5. Christmas Day Yule Log

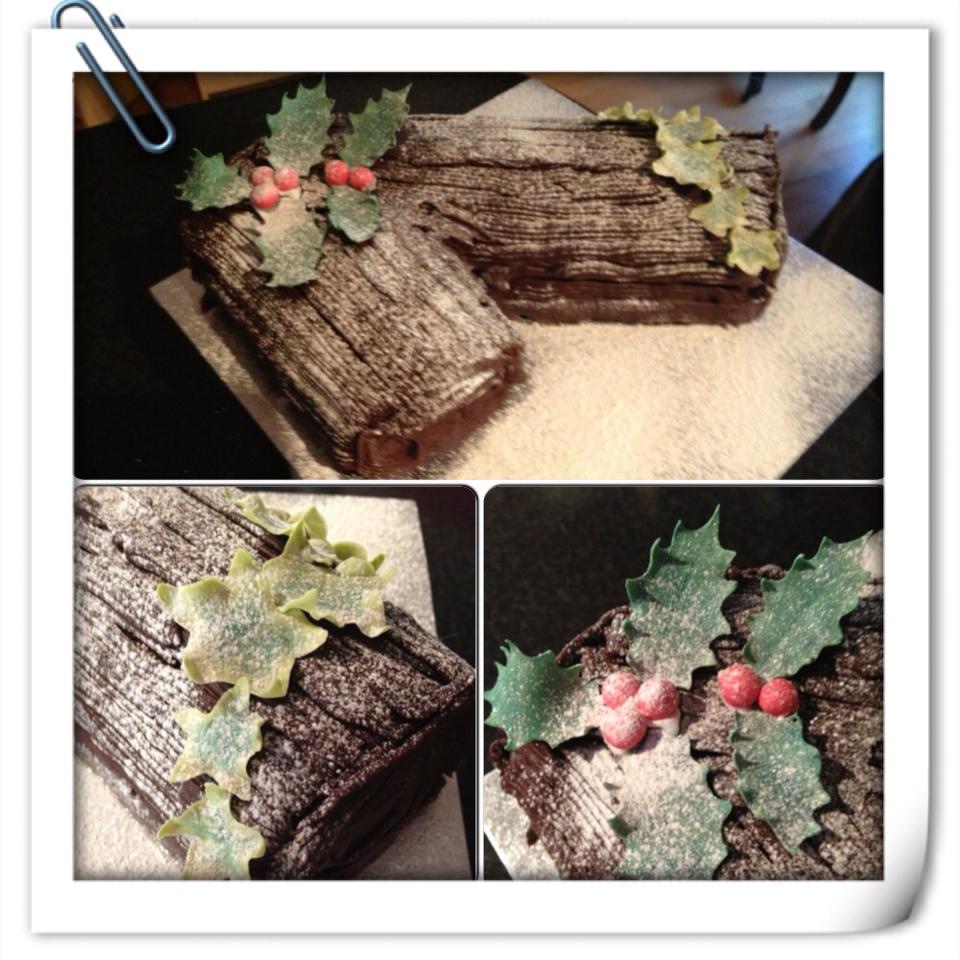
And finally. this was the Yule Log I made to take to our big family Christmas dinner, decorated with holly and ivy...


Sunday, 11 November 2012

Cake School Progress Update

Back in September I signed up to a 10 week course in sugarcraft and cake decorating, run by the Worker's Educational Association (WEA) in Sheffield. I found the company by searching for cake decorating courses online, and they have been brilliant, they run all kinds of courses, you can check them out at www.wea.org.uk

I'm halfway through the course now, and the more I learn, the more I fall in love with cake decorating - which is a big deal for me considering just how short my attention span is! We have completed our first project, started a Christmas themed one, and I am already saving up to enrol on the next course.

For project one, we had to make a small arrangement of roses and carnations. As we were all beginners, we had to learn everything from the start, how use flower paste, how to colour it, shape it, and keep it from drying out. The arrangement we were making was held on wires, and over the week we have built up the components, as they have to dry between each element added.

Step One: Creating Stems and Buds
Step Two: Leaves
Step Three: First Layer of Petals
Step Four: Second Layer of Petals

The Completed Arrangement!
I never expected working with sugar paste could be so rewarding, and the possibilities are seemingly limitless. Working with flower paste is such a delicate task, however the results are amazing, and look so realistic! The flowers are totally edible, however we are taught to be careful about the wires in arrangements such as the one above, and advise 'clients' not to eat them.

I had a great opportunity to try a design with sugarcraft flowers last week when a friend asked me to make a birthday cake for her Mum. After looking at a few options, we decided to create a Cherry Blossom design on a Victoria Sponge cake. I have to say that the internet does provide a wealth of ideas for cake designs, and if you have a basic idea of something you want to achieve, you can get some really good inspiration online. I would add a note of caution however not to carbon copy designs you find online, as many professional cake decorators are very protective over the intellectual property rights of their designs.

Anyway, the idea I came up with was a simple, yet elegant ivory iced cake, with royal iced branches, and shaped cherry blossoms scattered across the surface.

Cherry Blossom Victoria Sponge Cake
I was particularly proud of the fondant icing on this cake, as I have struggled a little getting the icing smooth and even so far. I think I have now mastered the theory behind it, a few more practise attempts needed though I think before I can be totally confident. I suppose that means I have to make some more cakes... it's a hard life! ;-)

Vx

Saturday, 10 November 2012

A Fond(ant) Trip Down Memory Lane

There are often things that you remember with a fondness, that, when you experience them again never quite live up to the memory. I remember French Fancies as a special treat, something that you only got at birthday parties, as they were too special for everyday. The only acceptable version was Mr Kipling's and oh! what a treat they were. Soft sponge cake, the sugar sweet iced coating, and the creamy buttercream topping. And so, I hope you understand my disappointment when I chanced upon these little beauties a few weeks ago, and with a now heightened sense of nostalgia, found the sponge to be mass produced and flavourless, the vegetable oil buttercream lacking, and the fondant icing overpoweringly sweet. 


I decided that this weekend's Saturday Experiment should be to try and recreate my childhood favourites, and set about the task in earnest this morning. I started out the way I often do these days - google, and found a range of recipes, which varied in their execution. I started by making a simple sponge cake for the centre, using my preferred method. I use a tip from an old friend, and measure out my eggs first, and then match the weight of butter, sugar and flour to them. Once all the ingredients are combined, I personally like to add a splash of milk to the batter to loosen it, as I find this makes a moister sponge when cooked. 

Once the cake was cooked and cooled, I sliced it into one inch squares, and topped each square with a blob  of buttercream. (Real, made with butter buttercream for that matter!) 

Now came the tricky part, coating each fancy with fondant icing. The trick I discovered, by trial and error, is getting the consistency of the icing just so, that it is fluid enough to move the sponge in easily to get the coating, but stiff enough so as it sets on the sponge rather than run straight off when on the cooling rack. Trust me, the whole process is a sticky, gooey, kitchen annihilating mess, saved only by a Mary Berry tip I read about securing the sponge pieces on a fork when coating in the fondant. 

The end result, although not as neat and uniform as Mr Kipling's I admit, I was really pleased with. The sponge is moist and buttery, the icing not as thick, and therefore not as over-powering. All in all, not bad for a first attempt, and enough to rekindle my love affair with Fondant Fancies. I just need a cup of tea now to wash them down! :)

Lilac Fondant Fancies